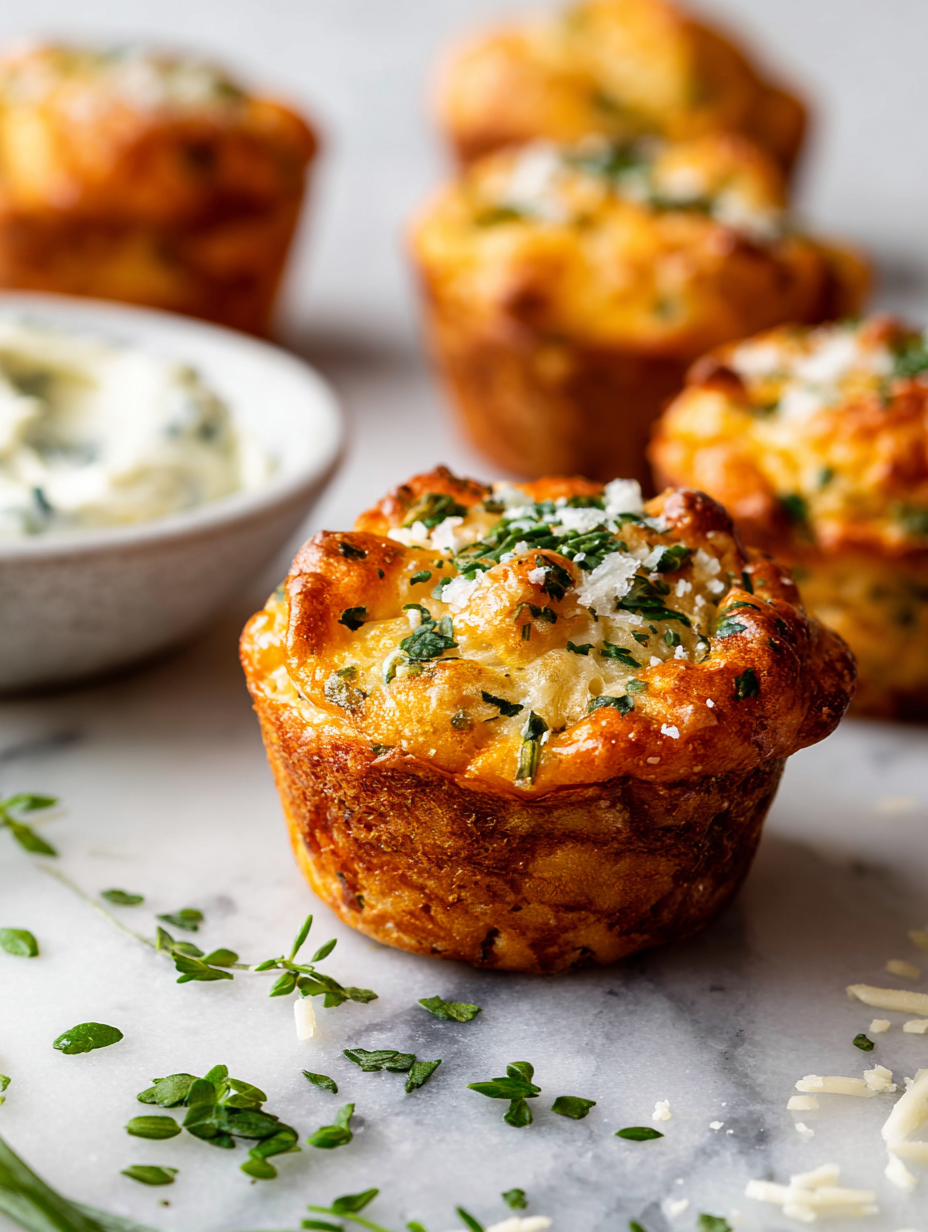
Cheese muffins might seem like childhood comfort food on the surface, but I’ve found a way to give them a little twist that keeps them interesting into adulthood. Using sharp cheddar and a dash of smoked paprika, these muffins turn from simple snack to something you actually want to savor with a cup of coffee or a bowl of soup. They’re the kind of thing that tastes like a warm memory, but with enough edge to surprise you.
Making these is one of those honest kitchen moments—no fuss, just mixing ingredients that come together quickly and yield a batch that’s crispy on the outside and gooey inside. I love how the smell of melted cheese mingles with the toasty aroma of baking, filling the house with that cozy, inviting scent. It’s a recipe that’s as practical as it is nostalgic, perfect for when you want comfort but also a little kick of flavor.
Focusing on the comforting nostalgia of childhood snacks, but elevating them with unexpected ingredients like sharp cheddar and a hint of smoked paprika, to create a savory muffin that feels both familiar and surprising.
Nostalgic bites with a twist
- These cheese muffins remind me of lazy weekend mornings when my mom would bake them fresh, filling the house with that irresistible cheesy aroma.
- I love how a simple muffin can turn chaotic in the best way, the crispy edges giving way to a gooey, cheesy center that melts in your mouth.
- Baking these always takes me back to childhood, but adding smoked paprika makes me feel like I’m sneaking a little grown-up spice into a familiar comfort.
- There’s a quiet pride in pulling a batch from the oven—golden tops, bubbling cheese, and that first warm bite that feels like a small victory.
- Sometimes I crave these just for the way they smell—rich, cheesy, with a hint of toasted flour—that cozy, unpretentious smell of home.
The story behind this recipe
- This recipe started from an accidental leftover experiment. I had some sharp cheddar and a handful of muffin batter and thought, why not? The result was so satisfying—crispy edges, melty cheese pockets—that I kept tweaking it until it felt just right. Now, I make these whenever I need a little bit of comfort with a punch of flavor, especially on busy mornings or lazy weekends.
- Baking these became a bit of a ritual—smelling the toasty cheese and baking flour fill the kitchen, instantly grounding me. They’re simple, honest, and a reminder that good things often come from a bit of improvisation and mess.
- heading
- story_type
Cheese Muffins Trivia & Origins
- Cheese muffins have roots in traditional British baking, where savory quick breads were a common snack for workers and families alike.
- They gained popularity in the early 20th century as an economical, filling snack that used simple pantry staples—cheese, flour, eggs.
- The idea of adding cheese to muffins was a clever way to elevate an everyday item into a more indulgent treat, often served with soups or salads.
- In some regions, cheese muffins are linked to rural bakeries that perfected the art of crispy, cheesy crusts in small batches.
- Today, they’re enjoying a revival as a comfort food that’s both nostalgic and adaptable, perfect for breakfast, snack, or picnic.
Key ingredients and tips
- All-purpose flour: I like how it gives the muffins structure and a light crumb, but you can swap in spelt flour for a nuttier flavor and a bit more density.
- Cheddar cheese: Sharp cheddar is my go-to for that punch of salty, umami goodness, but Gruyère melts beautifully too and adds a nutty note.
- Baking powder: This is the leavening that lifts the muffins, giving them that fluffy rise. Make sure it’s fresh, or they’ll stay dense and flat.
- Milk: I use whole milk for richness, but if you want a lighter muffin, swap in almond or oat milk—just expect a slightly different flavor and moisture level.
- Eggs: They bind everything together and add moisture. For a richer bite, try a splash of heavy cream instead, or use flaxseed for a vegan version.
- Butter: Adds a subtle richness and helps with browning. You can substitute with olive oil for a more savory, less buttery taste that’s still moist.
- Optional add-ins: Think chopped herbs, bits of ham, or a sprinkle of smoked paprika—whatever turns these into your signature snack.
Spotlight on key ingredients
Cheddar cheese:
- I love how it melts into crispy edges, gooey centers. It’s the soul of these muffins, delivering that sharp, salty punch with a slight nutty aroma.
- Cheddar melts and browns beautifully, creating a flavorful crust. Watch for bubbling and golden edges—those are your cues to pull them out.
Notes for ingredient swaps
- Dairy-Free: Swap the cheese with shredded vegan cheese or nutritional yeast for a cheesy flavor without dairy, but expect a slightly different melt and richness.
- Gluten-Free: Replace all-purpose flour with a good-quality gluten-free baking blend. Muffins may be a bit denser, but still tender.
- Lower-Sodium: Use a mild or reduced-sodium cheese to control salt levels; the muffins will be less salty but still flavorful.
- Vegan: Substitute eggs with flaxseed meal (1 tablespoon flaxseed + 3 tablespoons water per egg) and use plant-based butter or oil for moisture.
- Creamy: Add a dollop of sour cream or Greek yogurt to the batter for extra moisture and tang, which enhances the cheese flavor.
- Smoked: Incorporate smoked paprika or chipotle powder into the batter for a smoky aroma, which complements sharp cheddar beautifully.
- Herby: Mix fresh chopped herbs like chives, parsley, or thyme into the batter for added freshness and aroma, especially good with milder cheeses.
Equipment & Tools
- Muffin tin: To shape and bake individual muffins evenly.
- Grater: To shred cheese easily and uniformly.
- Mixing bowls: To combine ingredients separately and then mix together.
- Whisk or fork: To beat eggs and mix wet ingredients smoothly.
- Measuring cups and spoons: To ensure precise ingredient quantities for consistency.
- Oven mitts: To handle hot muffin tins safely.
Step-by-step guide to cheese muffins
- Preheat your oven to 200°C (390°F). Grease or line a muffin tin with paper liners. Have all ingredients at room temperature for easy mixing.
- In a large bowl, whisk together 1 1/2 cups (180g) all-purpose flour, 1 tablespoon baking powder, and a pinch of salt. This ensures even rising and a fluffy crumb.
- Grate 1 cup (100g) sharp cheddar cheese. Set aside a few small pieces for topping if desired. Mix the rest into the dry ingredients for cheesy distribution.
- In a separate bowl, beat 2 large eggs with 1/2 cup (120ml) milk and 1/4 cup (60g) melted butter or oil. This adds richness and moisture.
- Pour the wet mixture into the dry ingredients. Gently fold until just combined — don’t overmix. The batter should be lumpy but evenly incorporated.
- Fold in the grated cheese, saving some for topping if you like a cheesy crust. Add optional herbs or spices now if you want extra flavor.
- Spoon the batter into the prepared muffin tin, filling each cup about 3/4 full. Top with reserved cheese or a sprinkle of paprika for color.
- Bake in the preheated oven for 18-22 minutes. Check the muffins at 18 minutes. They should be golden on top and a toothpick inserted in the center comes out clean.
- Once baked, remove from oven and let the muffins rest in the tin for 5 minutes. Then transfer to a wire rack to cool slightly—this helps set the structure and avoids sogginess.
- Serve warm or at room temperature. These muffins are best enjoyed within the first day but can be stored in an airtight container for up to 2 days. Reheat gently in the oven or microwave, checking for crispy edges and gooey cheese inside.
Let the muffins cool in the tin for 5 minutes, then transfer to a wire rack. Serve warm or at room temperature, with a pat of butter if desired. They’re best enjoyed fresh but stay tasty for a day or two stored in an airtight container.
How to Know It’s Done
- Golden tops with a slight crust and melted cheese visible.
- A toothpick inserted in the center comes out clean or with moist crumbs.
- Muffins feel firm but spring back slightly when gently pressed.
Cheese Muffins with a Twist
Ingredients
Equipment
Method
- Preheat your oven to 200°C (390°F). Grease a muffin tin or line with paper liners to prevent sticking.
- In a large mixing bowl, sift together the all-purpose flour, baking powder, salt, and pepper. Whisk to combine evenly, creating a light, airy dry mixture.
- Grate the sharp cheddar cheese using a box grater, then add most of it to the dry ingredients, tossing gently to distribute evenly.
- In a separate bowl, whisk together the eggs, milk, melted butter, and smoked paprika until the mixture is smooth and slightly frothy.
- Pour the wet mixture into the bowl with the dry ingredients. Gently fold everything together with a spatula or spoon until just combined—be careful not to overmix, as this keeps the muffins tender.
- Divide the batter evenly among the muffin cups, filling each about three-quarters full. Sprinkle the remaining cheese on top of each muffin for extra cheesy crust.
- Bake in the preheated oven for 18 to 22 minutes, until the muffins are golden on top and a toothpick inserted into the center comes out clean. The cheese on top should be bubbling and crispy.
- Remove the muffins from the oven and let them cool in the tin for about 5 minutes. Transfer them to a wire rack to cool slightly further—this helps set the crumb and keeps the edges crispy.
- Serve the muffins warm or at room temperature, enjoying their crispy edges and gooey cheesy centers. They’re perfect with a pat of butter or alongside your favorite soup or salad.
Notes
Pro tips for perfect cheese muffins
- & crusty: Brush the muffin tops with a little butter before baking for a golden, crispy finish.
- Cheese distribution: Toss grated cheese in a bit of flour before mixing to prevent sinking and ensure gooey pockets.
- Temperature check: Use an oven thermometer to make sure your oven hits 200°C (390°F) for even rising.
- Don’t overmix: Mix just until ingredients are combined; overworking the batter makes muffins dense and tough.
- Add spice wisely: A pinch of smoked paprika or cayenne in the batter enhances the cheesy flavor with a smoky punch.
- Rest before baking: Let the batter sit for 5 minutes after mixing; it helps develop a better crumb structure.
- Cooling trick: Cool muffins on a wire rack for 5 minutes to prevent sogginess and keep the crispy edges intact.
Common mistakes and how to fix them
- FORGOT to check oven temperature → calibrate oven for even baking.
- DUMPED too much flour → spoon flour into cup, level off for accuracy.
- OVER-TORCHED muffins → lower oven temperature and cover with foil if browning too fast.
- MISSED mixing dry ingredients thoroughly → whisk well before combining with wet.
Quick fixes and pantry swaps
- When muffins sink in the middle → Increase oven temperature slightly.
- If muffins are too dry → Splash a little milk onto warm muffins before serving.
- Dumped too much cheese → Patch with a sprinkle on top and bake a few extra minutes.
- Over-torched edges → Shield with foil mid-bake to prevent burning and keep cheese melty.
- When batter is lumpy → Open the oven, gently tap the tin, then continue baking for even rise.
Prep, store, and reheat tips
- Prepare the batter a day in advance, cover tightly, and refrigerate. The flavors meld slightly, and the batter firms up, making scooping easier.
- Store baked muffins in an airtight container at room temperature for up to 24 hours; after that, transfer to the fridge. Expect slight staleness and less crispness over time.
- Reheat muffins in the oven at 180°C (350°F) for 5-7 minutes until warm and cheese is slightly gooey. The aroma of melted cheese should re-emerge with a crispy edge if reheated properly.
- For longer storage, freeze muffins individually wrapped in plastic wrap and placed in a zip-top bag for up to 3 months. Thaw at room temperature or warm directly in the oven, watching for a crispy crust and melty center.
Top questions about cheese muffins
1. How do I know when cheese muffins are done?
Look for muffins that feel firm when gently pressed and have a golden, slightly crispy top. A toothpick inserted should come out clean.
2. How should I store leftover cheese muffins?
Store them in an airtight container at room temperature for a day, then in the fridge for up to 2 days. Reheat in the oven or microwave until warm and cheese is gooey.
3. Can I use different cheeses in the recipe?
Yes, you can swap cheddar for Gruyère or Parmesan for different flavor profiles. Use grated cheese for even melting and distribution.
4. Why are my muffins dense or flat?
Use fresh baking powder for a good rise. If muffins are dense, they might have been overmixed or baked at too low a temperature.
5. How can I make the muffins more flavorful?
Add a pinch of smoked paprika or cayenne to boost flavor. Mixing herbs like chives or thyme also adds a fresh twist.
6. Why do my muffins turn out tough?
Mix just until ingredients are combined to keep the muffins light. Overmixing develops gluten, making them tough.
7. Can I make the batter ahead of time?
Prepping the batter the night before enhances flavor. Reheat muffins in a warm oven for 5-7 minutes to restore crispness and melty cheese.
8. My muffins sink — what went wrong?
If muffins sink in the middle, increase oven temperature slightly or check your baking powder’s freshness. Use a toothpick to test doneness.
9. What cheese works best for these muffins?
Use a good-quality, sharp cheddar for the best melt and flavor. Freshly grated cheese melts more evenly than pre-shredded varieties.
10. How do I prevent burning or uneven baking?
Ensure your oven hits the right temperature and don’t open the door early. Use an oven thermometer for accuracy and check color and smell during baking.
These cheese muffins feel like a little slice of comfort that you can actually make quickly. The smell of melting cheese and toasted flour filling the house is something I always look forward to. They’re perfect for when you want something satisfying and a little bit indulgent without fuss.
Most days, I end up reheating one or two just to get that warm, cheesy moment again. It’s wild how a simple muffin can carry so much nostalgia and flavor. Sometimes, that’s exactly what you need to get through a busy afternoon or a lazy weekend.

Hi, I’m Noah Bennett, the creator behind Breathing In Flavors. For me, cooking begins with a breath. Before the first bite, before the plating, before the garnish, there is that quiet moment when steam rises and you inhale. That is where flavor truly begins. Breathing In Flavors is my space to slow down, appreciate ingredients, and cook with awareness. I am so glad you’re here.
 The creator behind Breathing In Flavors.
For me, cooking begins with a breath. Before the first bite, before the plating, before the garnish, there is that quiet moment when steam rises and you inhale. That is where flavor truly begins.
Breathing In Flavors is my space to slow down, appreciate ingredients, and cook with awareness. I am so glad you’re here.
The creator behind Breathing In Flavors.
For me, cooking begins with a breath. Before the first bite, before the plating, before the garnish, there is that quiet moment when steam rises and you inhale. That is where flavor truly begins.
Breathing In Flavors is my space to slow down, appreciate ingredients, and cook with awareness. I am so glad you’re here.


