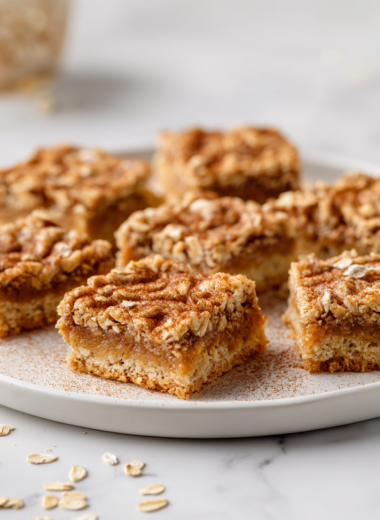
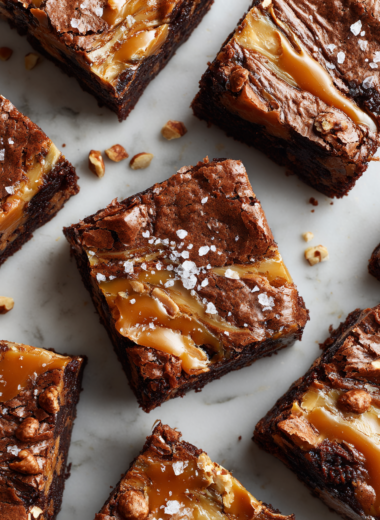
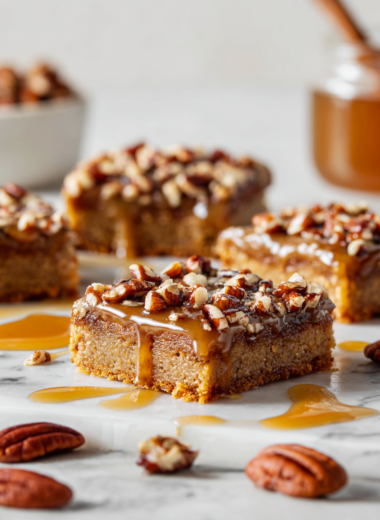
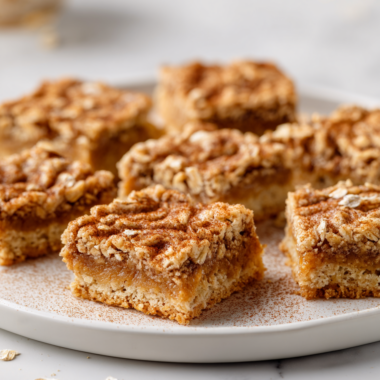
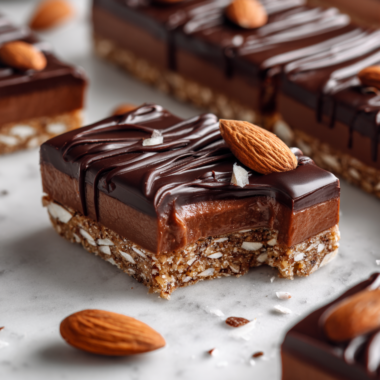
Blog

  • Gingerbread Latte Recipe

    Making a gingerbread latte isn’t just about warming up with a sweet drink. It’s about the ritual of stirring, smelling, and tasting those spicy, molasses-rich notes that evoke holiday memories. I love how the kitchen fills with the scent of fresh ginger and cinnamon as I simmer the syrup. It’s a small act of comfort, a moment of warmth in a mug.

    This recipe is all about capturing that cozy, nostalgic vibe. It’s simple enough to whip up on a weekday, but rich enough to feel indulgent. Plus, once you get the hang of it, you can tweak the spices to match your mood or the season’s bounty.

    Focusing on the sensory, cozy experience of crafting a homemade gingerbread latte during the chilly season, emphasizing tactile and aromatic details.

    Why I Keep Coming Back to This Recipe

    • I love how the smell of ginger fills my kitchen like a holiday hug.
    • There’s a chaos to making the syrup — measuring, simmering, tasting — but it’s worth every step.
    • I feel proud when I pour that first sip, knowing I crafted every bit of it.
    • This latte reminds me of cozy mornings and winter nights by the fire.

    A Personal Touch in Every Mug

    • This recipe was born out of a chilly weekend when I craved comfort but wanted something a bit special. I started simmering spices on a whim, and the aroma just took over the kitchen. It became a ritual I look forward to each fall and winter.
    • I like to tweak the spice levels each time, making it more fiery or mellow depending on my mood. It’s a simple pleasure that always feels like a little celebration.
    • The best part? It’s quick enough to make in the mornings but feels indulgent enough for weekend treats.

    The Cozy History of Gingerbread and Spices

    • Gingerbread flavors date back to medieval Europe, with ginger often used for medicinal purposes.
    • The first gingerbread cookies appeared in Germany in the 16th century, often shaped into intricate figures.
    • Molasses was a common sweetener before refined sugar became widespread, giving gingerbread its rich flavor.
    • The combination of warm spices in gingerbread lattees is rooted in ancient trade routes, blending multiple culinary traditions.

    Ingredient Insights and Tips

    • Fresh ginger: I love its pungent, zesty punch. If you only have ground, use half the amount and simmer longer.
    • Molasses: It’s the backbone of this syrup, giving that deep, chewy sweetness. Light molasses makes it milder, blackstrap is more robust.
    • Cinnamon: I prefer Ceylon cinnamon for its sweet, delicate aroma. Substitute cassia if you like a stronger, spicier note.
    • Cloves: Just a pinch adds warmth. Whole cloves during simmering give a mellow, rounded spice, but ground cloves are quicker.
    • Milk: Full-fat makes it rich and velvety. Skim works well if you prefer a lighter latte, though it won’t be as creamy.

    Spotlight on Ginger and Molasses

    Fresh ginger:

    • Ginger: Its sharp, zesty aroma fills the kitchen as it simmers, making the syrup fragrant and lively.
    • Bulb of ginger: When fresh, it’s firm and juicy, with a bright, spicy scent that wakes up the senses.
    • Ginger’s juice can ooze out when grated, adding extra zing to the syrup.

    Molasses:

    • Its thick, dark syrup has a smoky sweetness that anchors the spice blend.
    • It’s sticky and rich, with a deep, almost bitter undertone that balances the sweetness.
    • The aroma of molasses is warm and inviting, like a cozy bakery.

    Smart Swaps and Adjustments

    • Dairy-Free: Use coconut or almond milk for a nutty, fragrant alternative. It pairs well with the spices.
    • Sweetener: Maple syrup can replace molasses for a lighter, fruitier note, but it’s less robust.
    • Spices: Allspice or cardamom can be added for a different spice profile, adding complexity.
    • Sugar substitutes: Honey or agave nectar can be used, but adjust quantities because they’re sweeter.
    • Extracts: Add a splash of vanilla or almond extract for extra depth, especially if skipping spices.

    Equipment & Tools

    • Small saucepan: To simmer the syrup.
    • Fine mesh sieve: To strain out spices.
    • Jar or bottle: To store the syrup.
    • Milk frother or jar with lid: To froth the milk.
    • Mug: To serve the latte.

    How to Make a Cozy Gingerbread Latte

    1. Combine water, molasses, ginger, cinnamon, cloves, and nutmeg in a small saucepan.
    2. Bring to a gentle simmer over medium heat, about 5 minutes, stirring often.
    3. Reduce heat to low; let it simmer for another 10 minutes until fragrant and slightly thickened.
    4. Strain the syrup through a fine mesh sieve into a jar. Let it cool; store in the fridge.
    5. To prepare the latte, heat milk to 60°C (140°F).
    6. Add 1-2 tablespoons of syrup to a mug, then pour in the hot milk.
    7. Stir well, then top with a sprinkle of cinnamon or a dollop of whipped cream if desired.

    Let the syrup cool completely before sealing and storing. Serve the latte immediately, garnished with a sprinkle of cinnamon or a swirl of whipped cream.

    How to Know It’s Done

    • Syrup is fragrant and slightly thickened after simmering.
    • Milk is steaming but not boiling (around 60°C/140°F).
    • Latte has a balanced taste of spice, sweetness, and creaminess.

    Homemade Gingerbread Latte

    This cozy gingerbread latte combines a rich, molasses-spiced syrup with warm milk for a comforting winter treat. The process involves simmering aromatic spices and fresh ginger to create a fragrant syrup, then blending it with steamed milk for a velvety, festive beverage. Its final appearance is a creamy mug topped with a sprinkle of cinnamon or whipped cream, evoking holiday warmth.
    Prep Time 10 minutes
    Cook Time 20 minutes
    Total Time 30 minutes
    Servings: 2
    Course: Main Course
    Cuisine: Holiday
    Calories: 150

    Ingredients
      

    • 1/2 cup water for syrup
    • 1/2 cup molasses deep, rich sweetness
    • 1 inch fresh ginger peeled and sliced
    • 1 cinnamon stick cinnamon or 1 tsp ground cinnamon
    • 3 cloves whole cloves or 1/4 tsp ground cloves
    • 1/4 teaspoon nutmeg freshly grated if possible
    • 1 cup milk full-fat recommended
    • 1-2 tablespoons gingerbread syrup adjust sweetness to taste
    • cinnamon for garnish cinnamon

    Equipment

    • Small saucepan
    • Fine mesh sieve
    • Jar or bottle
    • Milk frother or jar with lid
    • Mug

    Method
     

    1. Combine water, molasses, sliced fresh ginger, cinnamon stick, cloves, and nutmeg in a small saucepan.
    2. Bring the mixture to a gentle simmer over medium heat, letting the aroma fill your kitchen as the spices infuse into the syrup, about 5 minutes, stirring occasionally.
    3. Reduce the heat to low and let it simmer for another 10-15 minutes until the syrup thickens slightly and becomes fragrant.
    4. Remove from heat and strain the syrup through a fine mesh sieve into a jar, discarding the solids. Let it cool, then store in the fridge.
    5. When ready to serve, heat the milk until steaming, around 60°C (140°F), either on the stove or in the microwave.
    6. Pour 1-2 tablespoons of the gingerbread syrup into a mug, then add the hot milk, stirring gently to combine and warm evenly.
    7. Froth the milk using a frother or shake it vigorously in a jar until frothy and silky, then gently spoon or pour it over the syrup mixture.
    8. Sprinkle a pinch of cinnamon on top for an aromatic finishing touch, and add whipped cream if you like extra indulgence.
    9. Serve immediately with a cozy mug in hand, enjoying the warm, spicy aroma and velvety texture.

    Notes

    Adjust spice levels and sweetness to your preference. The syrup can be stored in the fridge for up to 2 weeks. For a dairy-free version, substitute with coconut or almond milk.

    Pro Tips for the Perfect Gingerbread Latte

    • FLAVOR: Use fresh ginger for a spicy kick that’s more vibrant.
    • TEXTURE: Froth milk until it’s silky and shiny—about 20 seconds in a good frother.
    • HEAT: Keep syrup at a gentle simmer to avoid burning the molasses.
    • BALANCE: Taste the syrup before adding to the latte—adjust sweetness if needed.
    • TECHNIQUE: Strain spices out of syrup for a smooth, velvety drink.

    Common Mistakes and How to Fix Them

    • FORGOT to simmer spices long enough? → Simmer for at least 10 minutes for full flavor.
    • DUMPED the syrup? → Store in a sealed jar in the fridge for up to 14 days.
    • OVER-TORCHED the milk? → Use a thermometer to keep milk at 60°C (140°F).
    • SPOILED the foam? → Froth milk just before serving for a fresh, airy top.

    Fast Fixes for Common Issues

    • When the latte is too sweet, dilute with a splash of hot water or more milk.
    • Splash a little vanilla extract if the spice flavor feels dull.
    • Patch over a burnt syrup by quickly simmering a fresh batch.
    • Shield the milk from over-heating by removing from heat once steaming.
    • Rescue a too-thick syrup with a tiny splash of hot water.

    Preparing in Advance and Storing

    • Make the syrup up to 2 weeks ahead; keep refrigerated in a sealed jar.
    • Reheat the syrup gently, just warming until it’s pourable, for best flavor.
    • The spices deepen over time, making the flavor more complex after a day or two.
    • Reheat the milk over low heat, steaming until hot but not boiling, for perfect froth.

    10 Practical FAQs About Making a Gingerbread Latte at Home

    1. Can I use ground ginger instead of fresh?

    Use fresh ginger and good-quality molasses for the best flavor. Fresh ginger adds a spicy punch, while molasses gives that deep, rich sweetness.

    2. What’s the right temperature for the milk?

    Warm the milk gently, around 60°C (140°F). Too hot and it can scald, too cold and it won’t meld well with the spices.

    3. How can I make it more spicy?

    Add a pinch more ginger or cinnamon if you like it spicier. Taste and adjust as you go.

    4. What if it’s too sweet?

    If the latte is too sweet, dilute it with a bit more hot milk or espresso. Balance is key.

    5. Can I use skim milk?

    Use heavy cream or full-fat milk for a richer, more indulgent latte. Skim milk makes it lighter.

    6. How long does the syrup last?

    Store leftover syrup in a jar in the fridge for up to 2 weeks. Reheat gently before using.

    7. How do I get a good foam?

    For a frothy top, shake the milk in a jar or use a milk frother. It adds a cozy texture.

    8. Can I add vanilla?

    Add a splash of vanilla extract for extra depth. It complements the spices beautifully.

    9. Should I taste it before serving?

    Adjust the sweetness and spice levels based on your preference. Tasting as you go helps.

    10. Do I need to strain the syrup?

    Use a fine mesh sieve to strain spices out of the syrup for a smooth latte.

    There’s a certain quiet joy in drinking something you made yourself, especially when it’s layered with spices and stories. It’s not just a beverage; it’s a little ritual that makes the day feel a bit more special. And honestly, once you’ve got your syrup ready, this latte becomes a quick comfort anytime.

    In a world that’s often rushing, these small moments—like savoring a homemade gingerbread latte—remind us to slow down and enjoy the richness of the season.

  • Red Lentil Curry Recipe

    I’ve been making this red lentil curry for years, always tweaking the spice levels, always surprised by how forgiving it is. It’s simple, yet somehow feels like a warm hug—something I crave after a long day when I want something nourishing but not complicated. The smell of cumin and turmeric filling the kitchen, the gentle simmering sound, those soft, plump lentils absorbing all the flavors—this dish is a small daily celebration.

    It’s not flashy, but it’s honest. I like that it’s adaptable, forgiving of overcooking or a pinch too much spice. It’s a reminder that good food doesn’t need to be complicated to be comforting. Sometimes, all you need is a pot on the stove, a handful of lentils, and the patience to let everything meld.

    Focusing on the sensory experience of making and eating this curry, emphasizing textures and aromas that evoke a cozy, tactile connection to the dish.

    Why this recipe matters to me

    • I love how the smell of spices instantly shifts my mood.
    • Making this curry feels like a small ritual—measuring, stirring, tasting.
    • It’s a relief to have a go-to meal that’s both simple and deeply satisfying.
    • Sharing this dish always sparks conversations about other comforting foods.

    Personal story behind the dish

    • This recipe was born out of those frantic weeknights when I need something quick but nourishing. I remember the first time I added a splash of coconut milk—suddenly, it felt like a treat, a little indulgence. Over the years, it’s become my quiet, reliable comfort, a dish I turn to when I want to feel grounded.
    • Every batch is a bit different—sometimes I add a pinch of cinnamon, other times I toss in spinach for color and nutrition. It’s a flexible recipe, built on the idea that good food is simple, forgiving, and always warm.
    • The real secret? Letting the lentils simmer slowly until they’re soft and the flavors meld into a cozy, fragrant sauce. That’s when I feel most satisfied.

    Historical and cultural notes on red lentil curry

    • Red lentils are a staple in Middle Eastern and Indian cuisines, known for their quick cooking time.
    • This dish is a modern, simplified take that uses pantry staples and minimal fuss.
    • Lentils have been cultivated for thousands of years, revered for their nutritional density.
    • The vibrant color and bold spices make it a visually appealing and comforting dish.
    • In some cultures, lentil dishes symbolize abundance and hospitality.

    Ingredient insights and tweaks

    • Red lentils: First-person, I love how quickly these cook, their soft texture is perfect for a hearty sauce. Swap with yellow lentils if you prefer a milder taste.
    • Onions: They add sweetness and body, cooking them until translucent is key. Use shallots for a subtler flavor.
    • Garlic: I always use fresh garlic—it’s punchy and aromatic. Dried garlic powder can work, but it’s not the same.
    • Turmeric: Its earthy, slightly bitter note gives the curry a vibrant color. Fresh turmeric is prettier, but ground is fine.
    • Cumin: Toasting cumin releases a smoky aroma that defines the dish. Try smoked cumin for an extra depth.

    Spotlight on key ingredients

    Red Lentils:

    • They break down easily, creating a creamy texture. Rinse thoroughly to remove dust.
    • They cook fast—about 20 minutes—so keep an eye on tenderness.

    Cumin:

    • Its warm, nutty aroma fills the kitchen as you toast it. Use whole seeds for maximum flavor.
    • Ground cumin is more convenient but less fragrant than toasted seeds.

    Ingredient substitutions to customize your curry

    • Dairy-Free: Coconut milk can replace cream for creaminess with a tropical note.
    • Low-Sodium: Use less salt or opt for salt-free spice blends to control sodium intake.
    • Gluten-Free: This dish is naturally gluten-free, just check spice labels for additives.
    • Vegetarian: Use vegetable broth; avoid meat-based stocks for pure plant flavor.
    • Extra Heat: Add chopped chili or cayenne pepper for more spice, adjusting to taste.

    Equipment & Tools

    • Large heavy-bottomed pot: Even heat distribution for simmering
    • Wooden spoon: Stirring and preventing sticking
    • Measuring spoons and cups: Accurate spice and ingredient measurement
    • Knife and cutting board: Chopping onion, garlic, ginger

    Step-by-step guide to making red lentil curry

    1. Heat a large, heavy-bottomed pot over medium heat. Add 2 tbsp oil, swirl to coat.
    2. Add 1 chopped onion, cook until translucent, about 5 minutes. Stir often.
    3. Stir in 2 minced garlic cloves and 1-inch grated ginger; cook until fragrant, about 1 minute.
    4. Add 1 tbsp cumin, 1 tsp turmeric, ½ tsp chili powder; toast spices for 30 seconds. Smell the toasty aroma.
    5. Pour in 1 cup red lentils, rinse briefly under cold water. Stir to coat.
    6. Add 3 cups vegetable broth, bring to a boil. Reduce heat to low, cover.
    7. Simmer for 20-25 minutes, stirring occasionally, until lentils are soft but not mushy.
    8. Check seasoning, adjust salt and spice if needed. If too thick, add a splash of hot water.
    9. Remove from heat, let sit for 10 minutes to meld flavors.
    10. Serve hot with rice or flatbread, garnished with fresh herbs.

    Let the curry rest off the heat for 10 minutes, then stir again before serving.

    How to Know It’s Done

    • Lentils are tender and breaking apart slightly.
    • The sauce is thick and glossy, not watery.
    • A rich, fragrant aroma fills the kitchen, spices well toasted.

    Red Lentil Curry

    This comforting red lentil curry features soft, tender lentils simmered in a fragrant, spiced tomato-based sauce. The dish is cooked slowly to allow the flavors of cumin, turmeric, and garlic to meld, resulting in a creamy, hearty texture with a warm, inviting aroma. It’s an easy, forgiving recipe perfect for a nourishing meal that feels like a warm hug.
    Prep Time 10 minutes
    Cook Time 30 minutes
    Total Time 40 minutes
    Servings: 4
    Course: Main Course
    Cuisine: Indian, Middle Eastern
    Calories: 250

    Ingredients
      

    • 1 cup red lentils rinsed
    • 2 tbsp oil vegetable or olive oil
    • 1 onion chopped
    • 2 cloves garlic minced
    • 1 inch ginger grated
    • 1 tbsp cumin whole seeds or ground
    • 1 tsp turmeric ground
    • 0.5 tsp chili powder optional, for heat
    • 3 cups vegetable broth
    • 1 can diced tomatoes optional for richer flavor
    • Salt to taste

    Equipment

    • Large heavy-bottomed pot
    • Wooden spoon
    • Measuring spoons and cups
    • Knife and cutting board

    Method
     

    1. Heat the oil in a large heavy-bottomed pot over medium heat. Once shimmering, add the chopped onion and cook, stirring occasionally, until translucent and fragrant, about 5 minutes.
    2. Add the minced garlic and grated ginger to the pot, stirring until fragrant, about 1 minute. The mixture should smell aromatic and slightly sizzling.
    3. Stir in the cumin seeds (or ground cumin), turmeric, and chili powder if using. Toast the spices for about 30 seconds until they release a warm, nutty aroma and turn slightly darker.
    4. Add the rinsed red lentils to the pot, stirring well to coat them with the spice mixture. Cook for 1-2 minutes, allowing the lentils to absorb the flavors.
    5. Pour in the vegetable broth and diced tomatoes (if using). Bring the mixture to a boil, then reduce the heat to low, cover the pot, and let it simmer gently for 20-25 minutes. Stir occasionally to prevent sticking.
    6. Check the lentils for tenderness—they should be soft and breaking apart, creating a creamy consistency. If the curry is too thick, stir in a splash of hot water or broth to loosen it.
    7. Season the curry with salt to taste, stirring well. Let it sit off the heat for 10 minutes, allowing the flavors to meld further.
    8. Give the curry a final stir, then serve hot with rice, flatbread, or your favorite accompaniment. Garnish with fresh herbs if desired for an extra touch of brightness.

    Cooking tips and tricks for perfect red lentil curry

    • SPICES: Toast spices in oil to release their full aroma and flavor.
    • LOW AND SLOW: Keep heat moderate to avoid burning spices or sticking.
    • LENTIL TEST: They should be soft but still hold shape—taste as you go.
    • BALANCE FLAVORS: Taste and adjust salt and acidity before serving.
    • USE FRESH SPICES: For the brightest flavor, grind spices just before cooking.
    • SIMMER COVERED: Keeps moisture in, prevents splattering, and softens lentils evenly.
    • STIR OFTEN: Prevents sticking at the bottom and helps spices distribute evenly.

    Common mistakes and how to fix them

    • FORGOT to toast spices? Quickly dry-toast in a hot pan, then add to the curry.
    • DUMPED too much salt? Rinse lentils before cooking or add a splash of lemon juice to brighten.
    • OVER-TORCHED spices? Start over with fresh spices, or dilute with more broth.
    • Curry too watery? Simmer uncovered for a few more minutes until it thickens.

    Quick fixes for common issues

    • When too thick, splash in hot water or broth, stir until smooth.
    • When bland, stir in a squeeze of lemon or a handful of fresh herbs.
    • When spices burn, remove from heat immediately and start over with fresh spices.
    • When lentils are undercooked, simmer a few more minutes, adding water if needed.
    • When curry is too watery, simmer uncovered until thickened, stirring often.

    Make-ahead and storage tips

    • Lentil curry can be made 1-2 days ahead. Store in airtight container in fridge.
    • Freezer-friendly: up to 3 months in a sealed container, thaw overnight.
    • The flavors deepen after sitting, making it even better.
    • Reheat gently on stovetop, stirring often. Add a splash of water if it thickens too much.

    10 Practical Q&As About Red Lentil Curry

    1. What kind of pot is best for cooking this curry?

    Use a sturdy pot with a thick bottom to prevent sticking and burning.

    2. How do I know when the lentils are ready?

    Cook the lentils until they are soft but still hold their shape, about 20-25 minutes.

    3. How do I balance the flavors if it’s too bland or too spicy?

    Adjust the salt and spice levels to suit your taste; start small and add more gradually.

    4. Why should I let the curry sit before serving?

    Let the curry rest for at least 10 minutes after cooking to allow flavors to meld.

    5. What’s the best accompaniment for this curry?

    Serve with a side of rice or flatbread to soak up the flavorful sauce.

    6. How long can I keep the curry in the fridge?

    Store leftovers in an airtight container in the fridge for up to 3 days.

    7. How do I reheat without losing texture or flavor?

    Reheat gently on the stove over low heat, stirring occasionally.

    8. How can I brighten up the curry after cooking?

    Add a squeeze of lemon or a handful of fresh herbs before serving for extra brightness.

    9. Can I use pre-ground spices instead of fresh ones?

    Use fresh spices for the best flavor, but ground spices work in a pinch.

    10. What if my curry is too thick or dry?

    If the curry is too thick, thin it out with a bit of hot water or broth.

    This curry is perfect for making ahead—its flavors deepen overnight, and it’s even better the next day. I often freeze portions for quick lunches, letting the flavors thaw into something even richer. When reheated, it’s important to simmer gently, watching for a thick, glossy sauce that clings to each spoonful.

    In the end, this dish is about simplicity and warmth. It’s a reminder that hearty, soulful food can come from humble ingredients, turning everyday moments into small, quiet celebrations of flavor.

  • Peanut Butter Chocolate Chip Cookies Recipe

    Baking these peanut butter chocolate chip cookies is like a little trip down memory lane, but with a twist. I like to think of it as capturing a moment of childhood chaos and comfort, all in one tray of warm, gooey cookies. There’s a messy, sweet smell that fills the kitchen, making everyone gather around, waiting.

    This recipe isn’t about perfection. It’s about the imperfect, the slightly cracked edges, the melty chocolate, and that rich peanut butter aroma that makes the house smell like a cozy Sunday. It’s a simple joy, a small act of kindness that turns into a batch of memories waiting to happen.

    A nostalgic approach focusing on how these cookies evoke childhood memories of baking with family, emphasizing sensory memories like the smell of melting chocolate and the feel of soft dough.

    Why These Cookies Matter to Me

    • I love how these cookies turn out slightly crispy on the edges but chewy in the middle.
    • Baking these always reminds me of lazy weekends with my family.
    • There’s a satisfying feeling in pressing chocolate chips into the dough before baking.
    • I once added a pinch of sea salt on top—game changer, really enhances the flavors.
    • These cookies are my go-to when I need a quick, comforting treat.

    Make-Ahead and Storage Tips

    • This recipe was born out of a messy afternoon in my kitchen, trying to make something quick and satisfying. I wanted the rich flavor of peanut butter with the indulgence of chocolate, but I didn’t want to fuss too much. The smell of melting chocolate and roasted peanuts always makes me feel at home.
    • A little trial and error led me to the right balance of ingredients, making sure they’re not too sweet, not too flat, just right for a cozy bite.
    • make_ahead_storage

    Background and fun facts about peanut butter and chocolate in baking.

    • This recipe is inspired by classic American peanut butter cookies but with a chocolate twist.
    • Chocolate chips were first introduced in the 1930s and became a baking staple.
    • Peanut butter was popularized in the U.S. in the early 20th century, originally as a health food.
    • The combination of peanut butter and chocolate is often called a ‘dream team’ in baking circles.
    • Many bakeries have their own secret recipe for peanut butter cookies, but this one keeps it simple and honest.

    Ingredient Insights

    • Peanut Butter: Creamy peanut butter gives a smooth texture. Natural peanut butter works, but expect a slightly oilier cookie.
    • Chocolate Chips: Use semi-sweet for balance. Milk chocolate adds sweetness, dark adds richness.
    • Butter: Softened butter creames better, making cookies tender. Cold butter might make dough crumbly.
    • Flour: All-purpose flour is standard, but cake flour can make cookies more delicate.
    • Sugar: Granulated sugar helps with spreading and crispness. Brown sugar adds chewiness and depth.

    Spotlight on Peanut Butter and Chocolate Chips

    Chocolate Chips:

    • Peanut butter: The nutty aroma and creamy texture are key. It melts into the dough, creating a rich, savory note.
    • It behaves differently during baking—more oily, so don’t overmeasure.
    • Look for natural oils on top—stir before measuring.

    Chocolate Chips:

    • They hold their shape when baked, providing pockets of gooey sweetness.
    • The smell of melting chocolate is irresistible. It’s a sensory cue that baking is almost done.
    • Opt for high-quality chips for the best melt and flavor.

    Substitutions for Different Diets and Preferences

    • Dairy-Free: Swap butter for coconut oil or dairy-free margarine; expect a slightly different texture.
    • Sugar-Free: Use a natural sweetener like erythritol, but cookies might spread less.
    • Gluten-Free: Replace all-purpose flour with a gluten-free blend; cookies may be crumblier.
    • Vegan: Use flax eggs instead of regular eggs; flavor remains rich but slightly denser.
    • Extra Nutty: Add chopped nuts like pecans or walnuts for crunch and flavor.

    Equipment & Tools

    • Mixing bowls: Combine ingredients smoothly.
    • Electric mixer or whisk: Cream butter and sugar.
    • Baking sheet: Bake cookies evenly.
    • Parchment paper: Prevent sticking and easy cleanup.
    • Cookie scoop: Portion dough uniformly.

    Step-by-step guide to perfect peanut butter chocolate chip cookies.

    1. Preheat your oven to 180°C (350°F). Line a baking sheet with parchment paper.
    2. In a bowl, cream together 1/2 cup (115g) softened butter, 1/2 cup (125g) peanut butter, and 1/2 cup (100g) sugar until smooth.
    3. Beat in 1 large egg and 1 teaspoon vanilla extract.
    4. In another bowl, whisk together 1 1/4 cups (150g) all-purpose flour, 1/2 teaspoon baking soda, and a pinch of salt.
    5. Gradually add dry ingredients to wet, mixing just until combined. Fold in 3/4 cup (130g) chocolate chips.
    6. Scoop dough with a tablespoon or cookie scoop, place on prepared baking sheet, about 2 inches apart.
    7. Bake for 10-12 minutes until edges are golden and center looks slightly soft.
    8. Remove from oven and let cookies rest on the sheet for 5 minutes, then transfer to a wire rack to cool.
    9. Repeat with remaining dough. Enjoy warm or at room temperature.

    Let cookies cool on a wire rack for 5 minutes before serving or storing.

    How to Know It’s Done

    • Edges are golden and slightly crisp.
    • Center looks soft but not wet, with a slight jiggle.
    • Chocolate chips are melted and gooey when hot.

    Peanut Butter Chocolate Chip Cookies

    These cookies are soft, chewy treats with crispy edges, featuring rich peanut butter and melty chocolate chips. The baking process creates a warm, inviting aroma and a golden-brown appearance, with gooey chocolate pockets and a tender crumb. They’re perfect for nostalgic moments and quick homemade indulgence.
    Prep Time 15 minutes
    Cook Time 12 minutes
    Total Time 27 minutes
    Servings: 12
    Course: Main Course
    Cuisine: American
    Calories: 150

    Ingredients
      

    • 1/2 cup butter softened
    • 1/2 cup peanut butter creamy
    • 1/2 cup granulated sugar
    • 1 large egg
    • 1 teaspoon vanilla extract
    • 1 1/4 cups all-purpose flour
    • 1/2 teaspoon baking soda
    • Pinch salt
    • 3/4 cup chocolate chips semi-sweet preferred

    Equipment

    • Mixing bowls
    • Electric mixer or whisk
    • Baking sheet
    • Parchment paper
    • Cookie scoop

    Method
     

    1. Preheat your oven to 180°C (350°F) and line a baking sheet with parchment paper.
    2. In a large mixing bowl, cream together softened butter, peanut butter, and sugar using an electric mixer or whisk until the mixture is smooth and fluffy, about 2-3 minutes. The mixture should be pale and slightly airy.
    3. Beat in the egg and vanilla extract, mixing until fully incorporated and the mixture is glossy and uniform.
    4. In a separate bowl, whisk together the flour, baking soda, and salt to evenly distribute the leavening agents.
    5. Gradually add the dry ingredients to the wet mixture, mixing on low speed or folding gently until just combined. The dough will be soft and slightly sticky.
    6. Fold in the chocolate chips evenly, pressing some into the dough for an extra gooey bite.
    7. Use a cookie scoop or tablespoon to portion out the dough onto the prepared baking sheet, spacing them about 2 inches apart to allow for spreading.
    8. Bake for 10-12 minutes, or until the edges are golden brown and the centers look slightly soft but set. The house will fill with a warm, chocolate-peanut aroma.
    9. Remove the baking sheet from the oven and let the cookies rest for 5 minutes; they will firm up slightly as they cool.
    10. Transfer the cookies to a wire rack to cool completely, or enjoy them warm for the gooey chocolate experience.
    11. Repeat with remaining dough, then serve and savor these soft, chewy, and crispy-edged cookies filled with rich peanut butter and melty chocolate.

    Notes

    For extra flavor, sprinkle a pinch of sea salt on top before baking. Dough can be refrigerated for up to 24 hours for even better flavor and texture.

    Tips & Tricks for Perfect Cookies

    • Room temp ingredients → Make sure butter and eggs are softened for smooth mixing.
    • Use a light hand when mixing → Keep cookies tender by not overworking the dough.
    • Chocolate chips → Press some chips into the tops before baking for extra gooey bites.
    • Even spacing on sheet → Prevent cookies from merging by spacing at least 2 inches apart.
    • Slightly underbake → For chewy centers, take out when edges are golden but centers look soft.

    Common Mistakes and How to Fix Them

    • FORGOT TO chill the dough? Pop it in the fridge for 30 minutes to prevent spreading.
    • DUMPED too much flour? Gently fold in more peanut butter or a splash of milk to fix dry dough.
    • OVERT-TORCHED the first batch? Lower the oven temp by 10°C (20°F) and watch carefully.
    • MISSED the salt sprinkle? Just add a pinch on top after baking for a flavor boost.

    Quick Fixes for Common Baking Woes

    • When dough is too sticky, chill it for 15 minutes before scooping.
    • Splash a little milk if dough crumbles—makes it easier to shape.
    • Patch cracks with a tiny bit of extra peanut butter.
    • Shield cookies from over-browning by tenting with foil.
    • If cookies are flat, add a bit more flour to the dough.

    How to Prepare and Store ahead of Time

    • Dough can be prepared a day ahead, wrapped tightly in plastic, and refrigerated.
    • Cookies can be frozen for up to 3 months. Thaw at room temperature for best texture.
    • Refrigerate baked cookies for up to 3 days; warm slightly before serving for a softer bite.
    • The flavor deepens overnight, so leftovers might taste even better the next day.

    10 Practical Q&As: Peanut Butter Chocolate Chip Cookies

    1. Can I use chunky peanut butter?

    Use creamy peanut butter for a smooth, rich flavor that blends easily into the dough.

    2. Should I chill the dough?

    Chill the dough for at least 30 minutes to prevent spreading and enhance flavor.

    3. How long to bake?

    Bake at 180°C (350°F) for about 10-12 minutes until edges are golden.

    4. Can I add more chocolate chips?

    Add extra chocolate chips on top before baking for a gooey finish.

    5. How do I mix without overworking?

    Use a light hand when mixing to keep the cookies tender and avoid overworking the dough.

    6. How do I know when they’re done?

    Cookies are done when edges are golden and centers look slightly soft but set.

    7. How to store?

    Store in an airtight container for up to 3 days, or freeze for longer storage.

    8. How to reheat?

    Cookies can be reheated in a 150°C (300°F) oven for a few minutes until warm.

    9. Can I change the type of chocolate?

    Feel free to swap dark chocolate for milk chocolate if you prefer sweeter cookies.

    10. Can I use natural peanut butter?

    Using natural peanut butter will make the cookies a bit oilier but no less tasty.

    Once out of the oven, let these cookies rest for about 5 minutes; they’re fragile straight from the heat. The first bite should be chewy, with a burst of salty peanut and sweet chocolate. That moment when the warm cookie melts the chocolate, and the peanut butter’s richness hits just right—it’s the kind of comfort that sticks with you.

    Whether you’re baking for a quiet afternoon or a quick snack, these cookies are a reminder that sometimes, the simplest ingredients make the most memorable treats. They’re imperfectly perfect, a little messy, and totally worth the effort.

  • Turmeric Lentil Vegetable Soup Recipe

    Sometimes, I find myself craving something warm and nourishing, but not too heavy. This turmeric lentil vegetable soup is my go-to for those quiet, hectic weekdays when I need a moment of calm in the kitchen.

    It’s not fancy, just honest ingredients simmered together until they bloom with flavor. The smell alone—spicy, earthy, and a little sweet from the carrots—feels like a small gift. Making it feels almost meditative, as if each step clears the chaos for a little while.

    A cook’s notes on the quiet, mindful process of making comfort food during a busy week.

    Why This Soup Matters to Me

    • Cooking this always makes me feel rooted in tradition.
    • I love how the turmeric turns the broth a vibrant yellow—it’s like a sunny hug.
    • Sometimes, I throw in leftover roasted veggies instead of fresh—works surprisingly well.
    • When I need comfort, this soup is my quiet little ritual.
    • Watching the lentils soften is oddly satisfying, like a small miracle in the pot.

    A Simple Inspiration for Nourishing Comfort

    • This recipe was born out of a busy weekend when I needed something quick, wholesome, and easy.
    • I threw together what I had—carrots, celery, lentils, and turmeric—and was surprised by how satisfying it turned out.
    • It’s become a staple because it’s flexible, forgiving, and makes the whole kitchen smell like a cozy spice shop.

    A Little Background on This Humble Bowl

    • Turmeric has been used in Indian cooking for over 4,000 years.
    • Lentils are one of the oldest cultivated legumes, dating back to ancient Persia.
    • The bright yellow color of turmeric comes from curcumin, a potent antioxidant.
    • This soup’s simplicity echoes traditional peasant meals, hearty and nourishing.
    • Adding greens at the end preserves their color and nutrients.

    Ingredient Insights and Tweaks

    • Turmeric: I love its warm, earthy aroma; it turns everything a cheerful yellow. If you don’t have it, a pinch of curry powder adds complexity.
    • Lentils: They’re hearty, quick-cooking protein, filling and comforting. Red lentils break down faster, making a creamier texture.
    • Carrots: Sweet, juicy, and vibrant. I prefer fresh, but frozen chopped carrots work in a pinch—just adjust cooking time.
    • Celery: Adds a subtle crunch and depth. Use fennel for an anise note or omit for a milder taste.
    • Spinach or kale: Brighten the soup at the end. Baby spinach wilts quickly, kale needs a few extra minutes.

    Spotlight on Turmeric and Lentils

    Turmeric:

    • The bright, warm spice that transforms the broth into a sunny, earthy hug. Handle carefully—it stains everything.
    • Lentils: The humble, hearty legume that cooks quickly and provides a satisfying protein punch. Rinse well for a cleaner taste.

    Fresh turmeric:

    • Turmeric’s vivid color comes from curcumin, a potent antioxidant. Toast it first for a richer aroma.
    • Fresh turmeric is more pungent and stains hands—wear gloves if you can.

    Smart Ingredient Swaps for Your Pantry

    • Dairy-Free: Use coconut milk instead of cream for a creamy, tropical twist.
    • Gluten-Free: Ensure broth is gluten-free, especially if using store-bought.
    • Spicy: Add a pinch of cayenne or chopped fresh chili for heat.
    • Sweetness: Swap carrots with sweet potatoes for a richer, earthier sweetness.
    • Herbaceous: Toss in fresh cilantro or parsley for bright, fresh flavor.
    • Acidity: Splash in lemon juice or apple cider vinegar to lift flavors.

    Equipment & Tools

    • Large heavy-bottomed pot: Even heat distribution for simmering
    • Wooden spoon or spatula: Stir and prevent sticking
    • Measuring spoons and cups: Accurate seasoning
    • Knife and chopping board: Prep vegetables

    Making the Soup: Easy Steps for a Cozy Pot

    1. Heat 2 tbsp olive oil in a large pot over medium heat. Add 1 chopped onion, cook until translucent, about 5 minutes.
    2. Stir in 2 tsp turmeric, 1 tsp cumin, and a pinch of chili flakes. Let fragrant, about 1 minute.
    3. Add 2 chopped carrots, 2 chopped celery stalks, cook until slightly softened, around 7 minutes.
    4. Pour in 1 liter vegetable broth. Bring to a boil.
    5. Add 1 cup rinsed lentils. Reduce heat to low, cover, and simmer for 25-30 minutes.
    6. Check lentils: they should be tender but not mushy. Adjust salt.
    7. Taste for seasoning, add more spices if needed.
    8. Stir in chopped spinach or kale, cook until wilted, about 2 minutes.

    Let the soup sit for 5 minutes after simmering. Serve hot, maybe with a squeeze of lemon or a drizzle of olive oil.

    How to Know It’s Done

    • Lentils are tender but not falling apart.
    • Smell should be spicy and earthy, not burnt.
    • Color is bright yellow-orange from turmeric.

    Turmeric Lentil Vegetable Soup

    This comforting turmeric lentil vegetable soup is a simple, nourishing dish made by simmering lentils and vegetables in a spiced broth until tender. It features a vibrant yellow hue from turmeric, with a hearty yet light texture, perfect for quiet, cozy days. The soup is finished with greens that wilt into the fragrant, earthy liquid, resulting in a warm, inviting bowl.
    Prep Time 10 minutes
    Cook Time 30 minutes
    Total Time 40 minutes
    Servings: 4
    Course: Main Course
    Cuisine: Comfort Food
    Calories: 250

    Ingredients
      

    • 2 tbsp olive oil
    • 1 large onion, chopped
    • 2 tsp turmeric powder or fresh, toasted for more flavor
    • 1 tsp cumin
    • 1 pinch chili flakes optional, for heat
    • 2 carrots chopped carrots fresh and vibrant
    • 2 stalks celery chopped
    • 1 liter vegetable broth gluten-free if needed
    • 1 cup red lentils rinse well before adding
    • 1 handful spinach or kale chopped, to wilt at the end
    • to taste salt and pepper

    Equipment

    • Large heavy-bottomed pot
    • Wooden spoon or spatula
    • Measuring spoons and cups
    • Knife and chopping board

    Method
     

    1. Heat the olive oil in a large heavy-bottomed pot over medium heat. Add the chopped onion and cook, stirring occasionally, until translucent and fragrant, about 5 minutes.
    2. Stir in the turmeric, cumin, and chili flakes, letting them toast gently until aromatic, about 1 minute. This releases their essential oils and deepens their flavor.
    3. Add the chopped carrots and celery to the pot. Cook, stirring occasionally, until the vegetables start to soften and turn slightly golden, about 7 minutes.
    4. Pour in the vegetable broth and bring the mixture to a gentle boil, filling the kitchen with warm, earthy aromas.
    5. Add the rinsed lentils to the boiling broth. Reduce the heat to low, cover the pot, and let simmer gently for 25-30 minutes, or until the lentils are tender and have absorbed the flavors.
    6. Check the lentils for tenderness. They should be soft but not mushy. Season the soup with salt and pepper to taste, adjusting as needed.
    7. Stir in the chopped greens and cook for another 2 minutes until wilted and bright green, adding freshness to the hearty soup.
    8. Remove the soup from heat and let it sit for a few minutes to meld flavors. Serve hot, perhaps with a squeeze of lemon or a drizzle of olive oil for extra brightness.

    Notes

    Feel free to toss in leftover roasted veggies or greens you have on hand. For a creamier texture, mash some lentils with a spoon before serving.

    Tips for a Perfect Pot of Soup

    • FLAVOR: Toast spices briefly before adding liquids—they release more aroma.
    • SALT IN STAGES: Season in layers to build depth.
    • ACID BOOST: Finish with a squeeze of lemon or splash of vinegar to brighten.
    • TEXTURE CONTROL: If lentils are too mushy, reduce simmer time.
    • GOLDEN COLOR: Stir turmeric in oil first to enhance its vibrancy.
    • BALANCE SPICES: Taste as you go, adding small pinches.
    • PREP VEGETABLES: Chop everything uniformly for even cooking.

    Common Pitfalls and How to Fix Them

    • FORGOT TO RINSE LENTILS? Rinse now to avoid gritty texture.
    • DUMPED TOO MUCH SALT? Add a splash of water or a potato to absorb excess salt.
    • OVER-TORCHED SPICES? Immediately remove from heat and add a splash of cold water.
    • LID LEFT OFF? Cover the pot to keep flavors rich and ingredients tender.

    Rescue and Adjust

    • When too thick, add a splash of hot water or broth to loosen.
    • If bland, stir in a dash of soy sauce or miso for umami.
    • Splash a little vinegar or lemon juice if flavors are flat.
    • Patch over over-salted soup with a potato cooking in broth.
    • Shield from overcooking greens by adding last minute.

    Prep and Store for Busy Days

    • Chop vegetables ahead of time; store in airtight containers in the fridge for 1-2 days.
    • Cooked soup lasts up to 4 days in the fridge, better after flavors meld.
    • Reheat gently on the stove, stirring often, until steaming hot—about 5 minutes.
    • Freeze in portions for up to 3 months; thaw before reheating.

    10 Practical Q&As About Turmeric Lentil Vegetable Soup

    1. Can I use canned lentils instead of dried?

    Use dried lentils, like red or green, which cook quickly and absorb flavors well. Rinse them thoroughly before cooking.

    2. Can I skip rinsing canned lentils?

    Yes, canned lentils work, but rinse them well to remove excess sodium and preserve texture.

    3. Can I substitute frozen vegetables for fresh in this soup?

    Fresh carrots and celery add crunch and brightness, but frozen can work if they’re chopped small.

    4. Can I add other vegetables like spinach or kale?

    Yes, just add frozen vegetables directly, but expect slightly softer texture and less fresh flavor.

    5. When do I add greens for the best flavor?

    Absolutely, add leafy greens at the end and let them wilt for a minute or two.

    6. Can I substitute fresh turmeric for powder?

    Use turmeric powder for a warm, earthy flavor and bright color. Fresh turmeric can be used if available, but handle carefully.

    7. How do I store leftover soup?

    Yes, but fresh turmeric has a more intense flavor and stains everything yellow.

    8. Can I reheat it in the microwave?

    Let it cool, then refrigerate in an airtight container for up to 4 days, or freeze for longer.

    9. Is this soup suitable for vegan diets?

    Yes, reheat gently, stirring often, until steaming hot. Check for even heat distribution.

    10. Can I make this soup spicy?

    Yes, it’s naturally plant-based, just check your broth if using store-bought.

    This soup isn’t just about filling a bowl, it’s about slowing down enough to enjoy the simple act of cooking. It’s a reminder that even in busy days, a bit of patience and good ingredients make all the difference.

    Plus, it’s forgiving. You can tweak the veggies, spice, or even the lentils, and it’ll still turn out cozy. Sometimes, that’s enough to make me feel grounded amid the rush.

  • Chocolate Peanut Butter Truffles Recipe

    In a cramped kitchen, I discovered that making these truffles is about more than just the ingredients. It’s about savoring the small victories—melting chocolate without burning, rolling perfect little spheres, and tasting that first bite with sticky fingers and a grin.

    There’s a quiet magic in transforming simple pantry staples into something that feels like a treat, even when the space is tight and the day’s chaos is loud outside. It’s a reminder that comfort and joy can come from the smallest, sweetest moments.

    The Unlikely Joy of Making Comfort in a Tiny Kitchen

    Why these truffles are my tiny daily escape

    • Making these always makes me feel like a kid again, sneaking seconds.
    • I love how a simple ingredient like peanut butter can be transformed into something elegant.
    • There’s a quiet satisfaction in coating each truffle, knowing you crafted it yourself.
    • They’re perfect for when I need a quick, homemade pick-me-up.

    A personal story of comfort and experimentation in the kitchen

    • I first made these after a long, chaotic day when I needed something sweet but quick. The combination of peanut butter and chocolate is nostalgic for me, reminding me of childhood snacks. Now, it’s become my go-to for a simple, indulgent treat.
    • I experimented with textures and coatings, loving the contrast of crunchy salt or smooth cocoa. It’s a recipe that’s forgiving and adaptable, perfect for improvising in a small kitchen.
    • Each batch feels like a small victory, especially when I manage to get the chocolate coating just right without making a mess.

    A little history and fun facts about this sweet combo

    • This recipe is inspired by classic French chocolatier techniques, adapted for home kitchens.
    • Peanut butter was originally a 19th-century invention meant as a protein-rich food for the masses.
    • In the 1950s, peanut butter and chocolate became a popular pairing thanks to iconic candies.
    • Chocolate and peanut butter together balance bitterness and richness with creamy sweetness.

    Ingredient insights and tweaks

    • Dark chocolate: I love the deep, bittersweet flavor. Use good quality for a silkier melt.
    • Peanut butter: Creamy, natural peanut butter gives the best texture. Smooth and rich, it makes rolling easier.
    • Honey: Adds a touch of sweetness and helps bind the mixture. Maple syrup can work as a substitute.
    • Salt: Enhances the chocolate-peanut flavor combo. Flaky sea salt adds a nice crunch and shine.
    • Cocoa powder: For dusting, it prevents sticking and adds a gentle, bitter note to balance sweetness.

    Spotlight on key ingredients

    Dark chocolate:

    • Melts into a shiny, smooth coating; watch for over-heating which makes it seize.
    • It’s fragrant and smoky when melted; avoid water contact to keep it silky.

    Peanut butter:

    • Creamy texture is key to binding; natural oils can make the mixture softer.
    • Vivid peanut aroma, slightly roasted; stir well to incorporate oil evenly.
    • Cheaper brands might be grainy or gritty—opt for smooth for best results.

    Ingredient swaps for dietary needs and flavor twists

    • Dairy-Free: Swap milk chocolate for dark, or use coconut cream to make it dairy-free, with a milky richness.
    • Vegan: Use vegan chocolate and almond or soy butter for a plant-based version.
    • Nut Allergies: Try sunflower seed butter, note it’s slightly thinner and less sweet.
    • Sweetener: Replace honey with agave syrup or maple for a different flavor profile.
    • Salt: Use flavored salts or sprinkle on top for added flavor.

    Equipment & Tools

    • Double boiler: Gently melts chocolate without direct heat.
    • Small scoop or teaspoon: Portioning uniform-sized truffles.
    • Parchment paper: Prevent sticking and easy cleanup.
    • Spatula or spoon: Mixing and coating.

    Step-by-step guide to perfect truffles

    1. Set up a double boiler: fill a pot with 2 inches of water, bring to a gentle simmer, and place a heatproof bowl on top.
    2. Chop 200g dark chocolate into small pieces, then melt slowly over the simmering water, stirring until smooth (about 3-5 min).
    3. In a mixing bowl, combine 1/2 cup creamy peanut butter, 1/4 cup honey, and a pinch of salt. Mix until smooth.
    4. Pour the melted chocolate into the peanut butter mixture, stirring until fully combined and glossy.
    5. Chill the mixture for 30 minutes in the fridge, or until firm enough to handle.
    6. Using a teaspoon or small scoop, portion out the mixture and roll into balls with your hands dusted lightly with cocoa powder.
    7. Melt 100g more chocolate for coating. Dip each truffle into the melted chocolate, letting excess drip off.
    8. Place coated truffles on a parchment-lined tray. Sprinkle with sea salt or crushed peanuts if desired.
    9. Chill the truffles for another 15-20 minutes until the chocolate coating is set.
    10. Serve at room temperature for the best flavor and texture.

    Let the coated truffles sit at room temp for 10 minutes before serving or store in fridge.

    How to Know It’s Done

    • Chocolate is fully melted and smooth.
    • Mixture is firm enough to roll without sticking.
    • Chocolate coating is shiny and set when cooled.

    Chocolate Peanut Butter Truffles

    These chocolate peanut butter truffles are rich, creamy bites made by melting dark chocolate and mixing it with smooth peanut butter and honey. Once chilled and shaped into spheres, they are dipped in more melted chocolate and finished with a sprinkle of sea salt or crushed peanuts, resulting in a decadent, melt-in-your-mouth treat with a glossy finish.
    Prep Time 15 minutes
    Cook Time 10 minutes
    Total Time 25 minutes
    Servings: 12
    Course: Main Course
    Cuisine: American
    Calories: 150

    Ingredients
      

    • 200 g dark chocolate preferably 70% cocoa
    • 1/2 cup creamy peanut butter natural or store-bought
    • 1/4 cup honey or maple syrup
    • a pinch salt to enhance flavor
    • 100 g more dark chocolate for coating
    • Optional sea salt or crushed peanuts for topping

    Equipment

    • Double boiler
    • Small scoop or teaspoon
    • Parchment paper
    • Spatula or spoon

    Method
     

    1. Chop the dark chocolate into small, even pieces and place them in a heatproof bowl.
    2. Set up a double boiler with simmering water and place the bowl on top, ensuring the bottom doesn’t touch the water. Gently melt the chocolate, stirring occasionally until smooth and glossy.
    3. In a separate mixing bowl, combine the peanut butter, honey, and a pinch of salt. Stir until the mixture is smooth and creamy.
    4. Pour the melted chocolate into the peanut butter mixture and stir thoroughly until fully combined and shiny.
    5. Cover the bowl and refrigerate for about 30 minutes, or until the mixture firms up enough to handle.
    6. Using a small scoop or teaspoon, portion out the chilled mixture and quickly roll it between your palms to form small, even spheres. Lightly dust your hands with cocoa powder to prevent sticking.
    7. Chop the remaining dark chocolate and melt it gently over the double boiler, just like before, until smooth.
    8. Dip each peanut butter ball into the melted chocolate, using a fork to lift and coat thoroughly. Let excess chocolate drip off before placing the truffle on a parchment-lined tray.
    9. Sprinkle with sea salt or crushed peanuts on top while the coating is still wet for added flavor and texture.
    10. Refrigerate the finished truffles for another 15-20 minutes until the chocolate coating is set and shiny.
    11. Serve the truffles at room temperature for the best flavor and enjoy these rich, creamy bites!

    Tips and tricks for perfect truffles

    • Use room temperature ingredients for smoother mixing.
    • Chill the mixture in stages to make rolling easier and cleaner.
    • Dip truffles in chocolate quickly to avoid thick coating.
    • Add a pinch of salt on top for flavor contrast.
    • Work in a cool room to prevent chocolate from melting prematurely.

    Common pitfalls and how to fix them

    • FORGOT TO CHILL? → Chill mixture longer or briefly in freezer to firm up.
    • DUMPED TOO MUCH CHOCOLATE? → Use a spoon to control coating thickness.
    • OVER-TORCHED CHOCOLATE? → Start again with fresh, slowly melted chocolate.
    • MISSHAPED TRUFFLES? → Chill mixture before rolling, or warm hands slightly for easier shaping.

    Quick fixes to common truffle troubles

    • When chocolate is too thick, warm it slightly or add a drop of coconut oil.
    • If the mixture is too sticky, chill it longer or dust your hands with cocoa.
    • Splash a little hot water on the chocolate for a smoother dip.
    • Patch cracked coating with a quick re-melt of chocolate.
    • Shield delicate truffles from drafts to prevent blooming or streaks.

    Make ahead and storage tips for freshness and flavor

    • The mixture can be prepared a day ahead; keep covered in the fridge.
    • Truffles can be stored in an airtight container for up to a week in the fridge.
    • Freezing is fine for up to a month—wrap tightly to prevent freezer burn.
    • Refrigerate for best texture; let stand at room temp for 10 minutes before serving to soften.

    10 Practical Q&As About Chocolate Peanut Butter Truffles

    1. Can I use milk chocolate instead?

    Use good quality dark chocolate, around 70% cocoa, for a rich, smooth melt. Cheaper chocolates can be waxy and dull in flavor.

    2. What if my peanut butter is too oily?

    Peanut butter should be creamy, not chunky, to help the truffles hold together smoothly. Natural peanut butter works well but can be a bit runny.

    3. How cold should the mixture be?

    Chill the mixture for at least 30 minutes before shaping. If it’s too soft, the truffles won’t hold their shape.

    4. How do I keep the truffles from melting in my hands?

    Use a small cookie scoop or teaspoon to make uniform balls. Dust your hands with cocoa or powdered sugar to prevent sticking.

    5. What if my chocolate gets grainy?

    Melt the chocolate gently over a double boiler or in short bursts in the microwave at 30% power. Overheated chocolate can seize or burn.

    6. Can I freeze these?

    Store truffles in an airtight container in the fridge for up to a week. Let them come to room temperature before serving for better flavor.

    7. How do I make the coating shiny?

    Add a pinch of flaky sea salt on top before chilling for a flavor contrast. It enhances the chocolate and peanut butter.

    8. How do I know when the coating is set?

    For a softer center, refrigerate for 30 minutes; for a firmer bite, freeze for 15 minutes before serving.

    9. What should I do if the chocolate is too thick to coat?

    If the chocolate cracks when you bite, it’s perfectly set. If it feels sticky, give it more chilling time.

    10. How do I prevent the chocolate from pooling?

    Use a fork or skewer to dip and lift the truffles for a clean, even coat. Let excess chocolate drip off.

    These truffles aren’t just a sweet bite; they’re a tiny celebration of what you can do with a handful of ingredients and a bit of patience. Every batch feels like a small victory, especially when shared or kept for yourself.

    In the end, making these is about more than the recipe. It’s about finding calm in the chaos, a moment of sweetness amid the busy days. Sometimes, that’s enough.

  • Stuffed Mushrooms Recipe

    Growing up, I always associated stuffed mushrooms with family gatherings. My grandma’s version was simple—creamy, garlicky, with just a hint of sharp cheese. But as I’ve gotten older, I’ve realized those humble bites hold a world of possibility, a canvas for experimenting with flavors and textures.

    Now, I see stuffed mushrooms not just as an appetizer, but as a way to bring a little bit of that childhood comfort to the table, with a modern, sophisticated edge. It’s satisfying to take something familiar and elevate it, making it feel both nostalgic and fresh.

    A nostalgic dive into childhood flavors with a sophisticated twist—recreating grandma’s stuffed mushrooms with a gourmet touch.

    Why This Dish Matters to Me

    • I love how versatile these are—dairy-free, vegan, hearty, or light.
    • Nothing beats that first bite—crisp top, juicy mushroom, rich filling.
    • I feel proud when I see guests go for seconds, even the skeptics.
    • Making these reminds me of my grandma’s kitchen, warm and full of life.
    • There’s a chaos in prep—chopping, stuffing, baking—that somehow feels comforting.

    The Inspiration Behind These Stuffed Mushrooms

    • This recipe was born out of my quest to find a way to make an everyday ingredient feel special. I wanted the earthy mushroom flavor to shine through, balanced by a cheesy, herbaceous filling. It’s about capturing that nostalgic feeling but adding a modern twist.
    • I often think about how simple ingredients can become something memorable when paired thoughtfully. These stuffed mushrooms are a celebration of that—humble, familiar, but elevated with a little culinary love.
    • They’re perfect for when I want to impress without fuss, or just indulge in a quiet moment of cooking.

    The Rich History and Quirky Trivia of Stuffed Mushrooms

    • Stuffed mushrooms date back to medieval Europe, where they were considered a delicacy for the wealthy.
    • The filling often included ingredients like breadcrumbs, herbs, and cheese, reflecting local flavors.
    • In Italy, they’re called ‘Funghi Ripieni’ and are a staple in antipasto spreads.
    • Modern variations include vegan fillings, seafood, and spicy sausage, reflecting culinary trends.
    • Mushrooms are known for their umami flavor, making them a perfect savory vessel for stuffing.

    Ingredient Insights for Better Stuffed Mushrooms

    • Mushroom caps: Large Portobellos or creminis are best. They’re meaty and hold a good amount of filling.
    • Garlic: Fresh garlic gives a punch, but roasted garlic adds sweetness—use as you prefer.
    • Cheese: Parmesan is classic, but try Gruyère or vegan cheese for different flavor profiles.
    • Breadcrumbs: Use fresh for more flavor, or toasted panko for crunch—both absorb moisture well.
    • Herbs: Parsley and thyme brighten the filling, but basil or chives work too.
    • Olive oil: Brings richness and helps with browning. Skip if making oil-free.
    • Lemon: Adds brightness when squeezed over before serving, especially good with herbs.

    Spotlight on Mushrooms and Cheese

    Cheese: Melts into a gooey, golden layer on top—Parmesan adds saltiness, mozzarella melts smoothly.:

    • Mushrooms: Their earthy aroma intensifies during baking, becoming deeply savory and slightly smoky.
    • Caps shrink a bit, so choose big, fresh ones for stuffing.

    Cheese: It’s the flavor anchor—rich, umami, and binds the filling together.:

    • Mushrooms release moisture as they bake, so avoid overcrowding the pan to prevent sogginess.
    • Their texture becomes tender yet firm, providing a perfect bite.

    Smart Substitutions for Different Diets and Preferences

    • Dairy-Free: Swap cheese for vegan cheese or nutritional yeast—less gooey, but still flavorful.
    • Gluten-Free: Use gluten-free breadcrumbs or crushed roasted nuts for crunch.
    • Low-Sodium: Opt for less salt in the filling and use herbs for flavor.
    • Vegan: Replace cheese with cashew cream or vegan cheese, and add sautéed vegetables.
    • Nut-Free: Use toasted breadcrumbs instead of nuts or nut-based toppings.

    Equipment & Tools

    • Baking sheet: To hold the stuffed mushrooms during baking
    • Skillet: To sauté stems and aromatics
    • Mixing bowl: To combine filling ingredients
    • Spoon or piping bag: To stuff the mushrooms
    • Pastry brush (optional): To lightly coat mushrooms with oil if desired

    How to Make Stuffed Mushrooms: A Step-by-Step Guide

    1. Preheat your oven to 180°C (350°F).
    2. Clean the mushroom caps gently with a damp cloth. Remove stems and chop finely.
    3. Sauté mushroom stems, garlic, and onion in a little olive oil until soft, about 5 minutes.
    4. Mix the sautéed stems with breadcrumbs, cheese, herbs, salt, and pepper.
    5. Stuff the mushroom caps generously with the filling, pressing slightly to pack.
    6. Place stuffed mushrooms on a baking sheet lined with parchment paper.
    7. Bake for 20 minutes until tops are golden and filling is bubbling.
    8. Remove from oven and let rest for 5 minutes before serving.

    Let the mushrooms rest for 5 minutes on the tray, then serve warm with a sprinkle of fresh herbs.

    How to Know It’s Done

    • Filling is fragrant and slightly browned.
    • Mushrooms are tender and not shriveled.
    • Filling is hot and bubbling when out of the oven.

    Gourmet Stuffed Mushrooms

    These stuffed mushrooms feature large, meaty caps filled with a savory mixture of chopped mushroom stems, garlic, herbs, and cheese, baked until golden and bubbling. The final dish boasts a tender mushroom exterior with a rich, cheesy filling topped with a crispy layer, making them an elegant appetizer or side. The process involves prepping, stuffing, and baking to achieve a perfect balance of textures and flavors.
    Prep Time 15 minutes
    Cook Time 20 minutes
    Total Time 35 minutes
    Servings: 4
    Course: Main Course
    Cuisine: International
    Calories: 150

    Ingredients
      

    • 8 large large mushroom caps (Portobello or cremini) cleaned and stems removed
    • 3 cloves garlic minced
    • 1/2 cup chopped mushroom stems finely chopped
    • 1 small onion finely chopped
    • 1/4 cup parmesan cheese grated
    • 1/4 cup breadcrumbs fresh or toasted panko
    • 2 tbsp olive oil divided
    • 2 tbsp fresh parsley chopped
    • 1/2 tsp thyme dried or fresh
    • to taste salt and pepper for seasoning
    • 1/2 cup shredded mozzarella cheese optional, for extra gooeyness

    Equipment

    • Baking sheet
    • Skillet
    • Mixing bowl
    • Spoon
    • Paring knife

    Method
     

    1. Preheat your oven to 180°C (350°F). Place the mushroom caps on a baking sheet, clean side up, and gently remove the stems, setting them aside.
    2. Chop the mushroom stems and finely dice the onion. Mince the garlic cloves.
    3. Heat one tablespoon of olive oil in a skillet over medium heat. Sauté the chopped stems, onion, and garlic until fragrant and tender, about 5 minutes.
    4. Transfer the sautéed mixture to a mixing bowl. Add the grated Parmesan, breadcrumbs, chopped parsley, thyme, salt, and pepper. Mix well to combine.
    5. Stuff each mushroom cap generously with the prepared filling, pressing slightly to pack it in. If using, sprinkle shredded mozzarella cheese on top for a gooey finish.
    6. Drizzle the remaining tablespoon of olive oil over the stuffed mushrooms to help them brown evenly.
    7. Bake in the preheated oven for 20 minutes, until the tops are golden and bubbling, and the mushrooms are tender.
    8. Remove from the oven and let rest for 5 minutes. Garnish with extra parsley if desired, then serve warm, enjoying the crispy top and flavorful filling.

    Notes

    For extra crunch, top with toasted breadcrumbs before baking. Feel free to customize the filling with cooked sausage, spinach, or other herbs for variety.

    Tips & Tricks for Perfect Stuffed Mushrooms

    • HERBS: Chop herbs finely so they distribute evenly and release their aroma in every bite.
    • SEAR GARNISH: Toast breadcrumbs in butter until golden for a crunchy topping.
    • USE NON-STICK: Keeps ingredients from sticking and makes stuffing easier.
    • CONTROL MOISTURE: Squeeze excess moisture from chopped stems to prevent soggy filling.
    • BREATHE THE ROOM: Garlic and herbs will fill your kitchen with inviting aromas.
    • TRICK: If mushrooms release too much water during baking, drain excess liquid halfway through.
    • TIP: For a crispier top, broil for the last 2 minutes, but watch closely.

    Common Mistakes and How to Fix Them

    • FORGOT to preheat the oven? Do it now, and bake at 180°C (350°F) for 20 minutes.
    • DUMPED too much cheese? Add a splash of milk or extra breadcrumbs to balance.
    • OVER-TORCHED the tops? Cover with foil mid-baking and lower the heat slightly.
    • MISSED removing stems? Do so before stuffing to avoid sogginess and uneven cooking.

    Quick Fixes for Common Stuffed Mushrooms Woes

    • WHEN filling is too dry, stir in a little olive oil or broth.
    • IF mushrooms are soggy, bake on a higher rack or increase oven temp by 10°C.
    • WHEN cheese isn’t melting properly, turn on the broiler for 1-2 minutes.
    • PATCH a soggy top with a sprinkle of breadcrumbs and a quick broil.
    • SHIELD delicate toppings with foil if they start to burn too soon.

    Make-Ahead and Storage Tips for Stuffed Mushrooms

    • Prepare the stuffing and fill the mushroom caps up to 2 hours ahead. Keep refrigerated.
    • Cover with plastic wrap and store in the fridge, the flavors will meld nicely.
    • Reheat in a 160°C (320°F) oven for about 10 minutes until warm and crispy on top.
    • Fresh herbs will lose their vibrancy over time, so add just before serving.
    • For longer storage, freeze unbaked stuffed mushrooms for up to 1 month. Thaw before baking.

    10 Practical Q&As About Stuffed Mushrooms

    1. What mushrooms work best for stuffing?

    Use large, meaty mushroom caps like portobellos or big creminis. They hold more filling and look appealing.

    2. Should I use the stems in the filling?

    Chop the stems finely and mix them into your filling. They add flavor and texture, and prevent waste.

    3. Should I cook the filling before stuffing?

    Pre-cook the filling mixture for a few minutes to meld flavors and reduce moisture, which keeps the mushrooms from getting soggy.

    4. What oven temperature and time are ideal?

    Bake at 180°C (350°F) for about 20 minutes until the tops are golden and mushrooms are tender.

    5. How long should I rest the mushrooms after baking?

    Rest the stuffed mushrooms for 5 minutes after baking to let flavors settle and make them easier to handle.

    6. Can I make this dairy-free?

    Use a mix of cheeses like Parmesan and mozzarella for flavor and meltiness, but try vegan cheese for dairy-free.

    7. How can I enhance the flavor?

    Add herbs like thyme or parsley for freshness. Fresh herbs brighten the filling and add aromatic complexity.

    8. Should I add breadcrumbs on top?

    Use panko breadcrumbs on top for crunch, or skip if you want a softer texture.

    9. Can I make these ahead and reheat?

    Serve immediately for the best flavor and texture. Reheating can make them soggy, so reheat gently.

    10. Can I alter the filling ingredients?

    Feel free to customize fillings with cooked sausage, spinach, or even crab meat for variety.

    These stuffed mushrooms are perfect for a cozy night in or a small gathering. They’re simple to prepare, but each bite offers a complex burst of flavor—earthy, cheesy, aromatic. And honestly, they remind me that sometimes, the most unassuming ingredients can surprise you when treated with care.

    There’s a quiet joy in perfecting a classic like this, knowing it’ll bring a smile or a little nostalgic sigh. It’s about the small moments—those warm, savory bites—that make home cooking so special.

  • Vegan Pasta Bake Recipe

    There’s something about a warm, bubbling dish that makes a cold evening feel a little brighter. I love how the scent of roasted garlic and melting vegan cheese fills the kitchen, wrapping me in a sense of home. It’s a recipe that feels like a hug, but with a bit of chaos in the prep that somehow makes it more satisfying.

    Every time I make this pasta bake, I remember my first apartment—clumsy, rushed, but full of hope. It’s not the prettiest dish, but it’s honest. I’ve tweaked it over the years, adding more vegetables, less oil, and a touch of lemon zest for brightness.

    Focusing on the emotional comfort and nostalgic memories of a cozy, homemade vegan pasta bake during chilly evenings.

    Why this dish matters to me

    • I love how this dish comes together in one pan, no fuss.
    • It’s my go-to when I want something filling but quick.
    • The smell of garlic and baked cheese makes my kitchen feel warm.
    • I feel proud when I see kids gobbling it up, no complaints.
    • This recipe is flexible, so I often toss in whatever veggies I have.

    Personal story behind the recipe

    • I first made this when I was learning to cook vegan meals that still feel indulgent. It’s a dish that’s forgiving and adaptable, perfect for cozy nights. Over time, it became a staple because it hits that comfort spot without relying on dairy or meat.
    • I remember experimenting with different cheeses—some too salty, some too mild. Now, I love how nutritional yeast brings that cheesy depth, but I still keep a jar of vegan cheese for special occasions.
    • This dish is about making something hearty and familiar when you need a little extra warmth. It’s a small act of caring, especially on busy nights when you want something nourishing and effortless.

    Origin and fun facts about Vegan Pasta Bake

    • This dish is a flexible, comfort food staple in many vegan households.
    • The combination of tomato and dairy-free cheese mimics classic baked ziti.
    • Vegan cheese options have expanded, making this dish more creamy and flavorful.
    • It’s inspired by traditional Italian baked pasta but adapted for plant-based diets.
    • Using nutritional yeast adds a cheesy umami flavor that’s rich and satisfying.

    Ingredient insights and tweaks

    • Pasta: I prefer penne or rigatoni for their shape. Swap with gluten-free options for allergies.
    • Tomatoes: Use canned whole peeled for richer flavor, or fresh for brightness. Both work beautifully.
    • Vegan cheese: I love a good shredded mozzarella-style. Switch to slices for a melty top.
    • Vegetables: Zucchini and peppers add crunch and sweetness—use eggplant for more umami.
    • Nutritional yeast: It’s my secret weapon for cheesy depth. Omit for a more neutral flavor.

    Spotlight on key ingredients

    Vegan cheese: Melts into gooey patches, adding creaminess and depth.:

    • Tomatoes: Juicy and tangy, they soften into a rich sauce that clings to pasta.
    • Nutritional Yeast: Flakes are savory, with a nutty, cheesy aroma that enhances all the flavors.

    Pasta: Al dente is key; overcooked pasta turns mushy when baked.:

    • Vegan cheese: Watch for the stretch—some brands melt better than others.
    • It can be a little oily—try pressing it first to remove excess moisture.

    Substitutions for dietary needs and flavor tweaks

    • Dairy-Free: Use store-bought vegan cheese for a creamy, cheesy texture.
    • Gluten-Free: Swap regular pasta for your favorite gluten-free variety, mind the cooking time.
    • Low-Sodium: Opt for no-salt-added canned tomatoes and reduce salt in seasoning.
    • Extra Protein: Toss in cooked lentils or chickpeas for a hearty boost.
    • Richness: Add a splash of coconut milk or cashew cream for extra creaminess.

    Equipment & Tools

    • Large pot: Cook pasta evenly.
    • Sauté pan: Cook vegetables and build flavor.
    • Mixing bowls: Combine ingredients.
    • Baking dish: Bake the assembled dish.
    • Oven: Cook and crisp the bake.

    Step-by-step guide to making Vegan Pasta Bake

    1. Preheat your oven to 190°C (375°F). Lightly oil a 9×13 inch baking dish.
    2. Cook the pasta in boiling salted water until just al dente, about 1 minute less than package suggests. Drain.
    3. While pasta cooks, chop vegetables: zucchini, bell peppers, and eggplant into bite-sized pieces. Sauté in a large pan with a splash of olive oil over medium heat for about 8 minutes, until tender and slightly caramelized.
    4. In a bowl, mix cooked pasta, sautéed vegetables, drained canned tomatoes, nutritional yeast, garlic powder, and a pinch of smoked paprika. Stir well.
    5. Transfer the mixture to your prepared baking dish. In a small bowl, combine vegan cheese and a splash of plant milk, then dollop over the pasta.
    6. Bake uncovered for 20-25 minutes until bubbly and the top is golden. Check periodically; if it bubbles over, turn down the heat slightly.
    7. Remove from oven and let rest for 5-10 minutes. This helps it set, making serving neater.

    Let the bake rest for at least 5 minutes before slicing. Serve with a sprinkle of fresh herbs if desired.

    How to Know It’s Done

    • Top is bubbling and golden.
    • Crust is slightly crispy, not burnt.
    • Pasta is tender but not mushy.

    Vegan Pasta Bake

    This comforting vegan pasta bake combines al dente pasta with roasted vegetables, rich tomato sauce, and melty vegan cheese, baked until bubbling and golden. The dish features a cozy, hearty texture with a crispy top and tender inside, perfect for chilly evenings. It’s an easy one-pan meal that’s both satisfying and customizable with your favorite veggies.
    Prep Time 15 minutes
    Cook Time 30 minutes
    Total Time 45 minutes
    Servings: 4
    Course: Main Course
    Cuisine: Italian-inspired, Vegan
    Calories: 420

    Ingredients
      

    • 8 oz penne pasta or rigatoni
    • 1 can whole peeled tomatoes drained
    • 1 cup vegetable mix zucchini, bell peppers, eggplant, chopped
    • 2 tbsp olive oil
    • 3 cloves garlic minced
    • 1 cup nutritional yeast adds cheesy flavor
    • 1 cup vegan cheese shredded
    • 1 tsp smoked paprika optional
    • to taste salt and pepper
    • 2 tbsp plant-based milk for cheese topping

    Equipment

    • Large pot
    • Sauté pan
    • Mixing bowls
    • Baking dish
    • Oven

    Method
     

    1. Preheat your oven to 190°C (375°F) and lightly oil a 9×13 inch baking dish.
    2. Bring a large pot of salted water to a boil, then cook the pasta until just al dente, about 1 minute less than package instructions. Drain and set aside.
    3. While the pasta cooks, chop your vegetables into bite-sized pieces. Heat olive oil in a sauté pan over medium heat, then add the vegetables. Sauté for about 8 minutes until they soften and develop some caramelized edges, filling your kitchen with a fragrant aroma.
    4. In a mixing bowl, combine the drained tomatoes, nutritional yeast, minced garlic, smoked paprika, salt, and pepper. Use a spoon to mash the tomatoes slightly, creating a chunky sauce with rich flavor.
    5. Add the cooked pasta and sautéed vegetables to the bowl with the tomato sauce. Toss everything together until well coated and evenly mixed.
    6. Transfer the pasta mixture into your prepared baking dish, spreading it out evenly. In a small bowl, stir the vegan cheese with plant-based milk until creamy, then dollop this mixture over the top of the pasta.
    7. Bake uncovered in the oven for 20-25 minutes until bubbling and the top is golden brown. Keep an eye on it towards the end to prevent burning.
    8. Remove the bake from the oven and let it rest for about 5-10 minutes. This helps it set and makes serving easier, with a slightly crisp top and tender inside.
    9. Slice into portions and serve hot, garnished with fresh herbs if desired. Enjoy the comforting, cheesy aroma and hearty texture of this vegan pasta bake!

    Tips and tricks for perfect vegan pasta bake

    • FLAVOR: Roast vegetables first for a smoky depth.
    • EVEN BAKING: Use a glass dish for uniform heat distribution.
    • MOISTURE CONTROL: Squeeze excess water from spinach to avoid a watery bake.
    • CHEESE MELT: Mix cheese with a splash of plant milk for a creamy top.
    • PREPARE EARLY: Assemble the night before for a quick bake.

    Common mistakes and how to fix them

    • FORGOT to preheat the oven? Warm it up for at least 15 minutes before baking.
    • DUMPED the pasta in too early? Slightly undercook next time to prevent mush.
    • OVER-TORCHED the top? Cover with foil for the last 10 minutes to prevent burning.
    • SALT overshot? Rinse vegetables or reduce salt in the sauce.

    Fast fixes for common baking mishaps

    • When sauce is too thick, stir in a splash of plant milk to loosen.
    • If cheese isn’t melting well, cover and bake longer or increase oven temp slightly.
    • Splash a bit of lemon juice to brighten flavors if dish feels flat.
    • Patch over burnt edges with fresh cheese and herbs.
    • Shield edges with foil if they brown too quickly, but keep the center baking.

    Prepping and storing the vegan pasta bake

    • Cook the pasta and sauté the vegetables ahead of time. Store in separate containers for up to 2 days.
    • Assemble the dish a day in advance; keep refrigerated for up to 24 hours. Add cheese topping just before baking.
    • The flavors deepen overnight, making it even more comforting.
    • Reheat in the oven at 180°C (350°F) for 15-20 minutes, until bubbling and fragrant. Check for hot spots and bubbly edges.

    10 practical Q&As about Vegan Pasta Bake

    1. Can I add other vegetables?

    Use hearty vegetables like zucchini, eggplant, and bell peppers to add texture and flavor. They hold up well in baking.

    2. Can I use frozen spinach?

    Yes, frozen spinach works great; just squeeze out excess water before mixing. Fresh spinach should be wilted first.

    3. Can I replace nutritional yeast?

    Nutritional yeast adds a cheesy flavor without dairy. You can substitute with vegan cheese or omit if preferred.

    4. How should I cook the pasta?

    Cook the pasta al dente so it doesn’t become mushy during baking, about 1 minute less than package instructions.

    5. What baking dish works best?

    Use a ceramic or glass baking dish to avoid sticking and for even heat distribution.

    6. Should I soak dried herbs?

    Pre-soaking dried herbs intensifies their flavor. Add them early in the sauce for a deeper taste.

    7. Can I spice it up?

    Adjust seasoning to taste; a pinch of smoked paprika or chili flakes can add depth.

    8. How long should I let it rest?

    Let the bake rest for 5-10 minutes before serving to help it set and be easier to serve.

    9. How long does it keep?

    You can keep leftovers in the fridge for up to 3 days, covered tightly.

    10. How do I reheat?

    Reheat in the oven at 180°C (350°F) until hot, about 15-20 minutes, for even warmth.

    This dish isn’t just about feeding the belly. It’s about slowing down enough to enjoy the small, imperfect moments of cooking. Plus, it’s a way to gather around the table, sharing stories over something that’s simple, nourishing, and deeply satisfying.

    In the end, a good vegan pasta bake is about comfort and community. It’s a reminder that even in chaos, there’s beauty—especially when it comes out of the oven golden and fragrant, ready to be tasted and remembered.

  • Creamy Vegan Tomato Pasta Recipe

    Sometimes, I crave the kind of meal that feels like a warm hug but is quick enough to whip up on a hectic day. This creamy vegan tomato pasta is exactly that—simple, comforting, and surprisingly indulgent without any cream or cheese. It’s become my go-to when I need a little culinary solace amid chaos.

    What I love most is how the sauce’s tangy brightness cuts through the richness, making every bite feel like a little celebration. Plus, it’s versatile enough to tweak with whatever pantry finds I have on hand, making it a true kitchen refuge in uncertain times.

    The Unlikely Comfort of Creamy Vegan Tomato Pasta: A Kitchen Refuge During Tough Times

    Why This Recipe Matters To Me

    • I love how this dish smells of roasted garlic and simmering tomatoes—so welcoming.
    • Making this pasta reminds me of my childhood, sitting at my grandma’s table with a bowl of steamy noodles.
    • I feel proud every time I make this, knowing it’s nourishing and kind to the planet.

    The Inspiration Behind the Creamy Tomato Pasta

    • I stumbled upon this recipe during a busy week when I needed comfort food that wouldn’t take hours to prepare. The secret was blending cashews into the tomato sauce—creamy, tangy, and so satisfying.
    • It’s a dish I’ve customized many times, adding different herbs or greens depending on what’s in the fridge.
    • It’s become a little ritual—cooking it slowly while listening to my favorite music, savoring the process.

    Trivia & Origins of Vegan Tomato Pasta

    • This sauce is inspired by classic Italian ‘pomodoro’ but made vegan with cashews and coconut milk.
    • Tomato-based pasta dishes date back to ancient Italy, where simple, fresh ingredients ruled.
    • Cashews became popular in vegan cooking during the 1980s as a dairy substitute, especially in creamy sauces.
    • The combination of tomato and creamy nuts is a recent innovation, blending tradition with modern dietary needs.

    Ingredient Breakdown & Tips

    • Tomatoes: Ripe, juicy tomatoes give the sauce a bright, sweet flavor. Skip if too tart—add a touch of sugar.
    • Cashews: Soaked for 4 hours, they blend into a creamy base. Use coconut milk for a quick fix—less rich but still tasty.
    • Garlic: Fragrant and pungent when sautéed—don’t burn it, or it turns bitter.
    • Olive oil: Adds depth; opt for extra virgin for best flavor.
    • Fresh basil: Adds a fragrant, herbal note—stir in at the end for maximum aroma.

    Spotlight on Tomatoes & Cashews

    Tomatoes:

    • Juicy, ripe tomatoes burst with flavor as they simmer, filling the kitchen with a tangy aroma.
    • They break down into a thick, velvety sauce that coats the pasta beautifully.
    • Choose firm yet ripe tomatoes for the best balance of sweetness and acidity.

    Cashews:

    • Cashews turn into a rich, buttery sauce base once soaked and blended.
    • They have a mild, slightly sweet flavor that complements the tangy tomatoes.
    • Soaking softens them for easier blending and a smoother sauce.

    Ingredient Substitutions & Variations

    • Dairy-Free: Use canned coconut milk or blended silken tofu for creaminess—both add a different texture and flavor.
    • Gluten-Free: Substitute gluten-free pasta like rice or chickpea noodles—cooks similarly but can vary in texture.
    • Low-Sodium: Use unsalted canned tomatoes and skip additional salt—rely on herbs and acidity to build flavor.
    • Oil-Free: Sauté garlic in a splash of vegetable broth or skip sautéing altogether, add raw for freshness.
    • Herb Variations: Swap basil for oregano or thyme—each brings a different aromatic note.

    Equipment & Tools

    • Large pot: Boil pasta evenly and efficiently.
    • Large skillet or sauté pan: Cook the sauce and combine with pasta.
    • Blender or immersion blender (optional): Puree cashews or coconut milk if a smoother sauce is desired.
    • Wooden spoon or spatula: Stir and combine ingredients without scratching non-stick surfaces.

    Step-by-step for Creamy Vegan Tomato Pasta

    1. Bring a large pot of salted water to a boil, about 100°C (212°F). Cook pasta until al dente, 8-10 minutes. Drain and set aside.
    2. While pasta cooks, heat 2 tbsp olive oil in a large pan over medium heat (about 160°C/320°F). Add 2 cloves minced garlic and sauté until fragrant, about 30 seconds.
    3. Add 1 can (400g) crushed tomatoes or about 4 ripe fresh tomatoes chopped, simmer for 10 minutes until thickened, stirring occasionally.
    4. Stir in 1/2 cup soaked cashews or coconut milk for creaminess. Cook for another 5 minutes, until sauce is silky and well combined.
    5. Taste and adjust salt, pepper, and add a squeeze of lemon juice for brightness. Toss in fresh basil if desired.

    Serve immediately with a sprinkle of fresh basil. Let it sit for 2 minutes to allow flavors to meld.

    How to Know It’s Done

    • Sauce should be rich and slightly thickened, clinging to the back of a spoon.
    • Pasta should be cooked to al dente, with a slight firmness.
    • The sauce should smell fragrant, with a hint of garlic and tomato, not burnt or sour.

    Creamy Vegan Tomato Pasta

    This creamy vegan tomato pasta combines simmered ripe tomatoes and soaked cashews to create a velvety, tangy sauce that coats al dente pasta. It’s a comforting, dairy-free dish with a rich texture and vibrant flavor, perfect for quick weeknight dinners or cozy weekends. The final dish is a warm, hearty bowl with a smooth, glossy sauce and fresh basil accents.
    Prep Time 10 minutes
    Cook Time 20 minutes
    Total Time 30 minutes
    Servings: 4
    Course: Main Course
    Cuisine: Italian
    Calories: 430

    Ingredients
      

    • 8 ounces pasta (e.g., spaghetti or penne) uncooked
    • 2 tablespoons olive oil extra virgin preferred
    • 2 cloves garlic minced
    • 1 can (400g) crushed tomatoes or 4 ripe fresh tomatoes, chopped
    • 1/2 cup soaked cashews soaked for at least 4 hours
    • 1 tablespoon lemon juice optional, for brightness
    • to taste salt and black pepper
    • fresh basil basil leaves roughly chopped, for garnish

    Equipment

    • Large pot
    • Large skillet or sauté pan
    • Blender or immersion blender
    • Wooden spoon or spatula

    Method
     

    1. Bring a large pot of salted water to a boil, then add the pasta and cook until al dente, about 8-10 minutes. Drain and set aside.
    2. While the pasta cooks, heat the olive oil in a large skillet over medium heat until shimmering. Add the minced garlic and sauté for about 30 seconds until fragrant and slightly golden.
    3. Add the crushed tomatoes to the skillet and simmer gently for 10 minutes, stirring occasionally, until the sauce thickens and the flavors meld. It should smell fragrant and look vibrant red.
    4. Stir in the soaked cashews and cook for another 5 minutes, allowing the flavors to combine and the sauce to become creamy. If desired, add a splash of water or plant-based milk to loosen the sauce slightly.
    5. Use an immersion blender or transfer the sauce to a blender and blend until smooth and velvety. Return the sauce to the skillet if transferred, and season with salt, pepper, and a squeeze of lemon juice for brightness.
    6. Add the cooked pasta to the skillet and toss gently to coat the noodles evenly with the sauce. Let it cook together for 1-2 minutes for the flavors to meld.
    7. Serve hot, garnished with fresh basil leaves for a fragrant, colorful finish. Enjoy your comforting bowl of creamy vegan tomato pasta!

    Cooking Tips & Tricks

    • HEAT: Keep heat moderate to prevent burning garlic or splattering.
    • SAUTE: Sauté garlic until fragrant but not browned, to keep the flavor fresh.
    • SIMMER: Let the sauce simmer gently—rapid bubbling can break down the tomatoes too much.
    • BLEND: Use an immersion blender for a silky sauce without extra dishes.
    • SEASON: Taste and adjust seasoning before serving—tomatoes need a good salt balance.

    Common Mistakes & How to Fix Them

    • FORGOT to salt the water? Add salt once boiling, taste for seasoning before serving.
    • DUMPED too much water from the pasta? Toss in a little olive oil or butter to keep it from sticking.
    • OVER-TORCHED the garlic? Start fresh and sauté at a lower heat next time.
    • Sauce too thick? Stir in a splash of pasta water or plant-based milk to loosen it up.

    Quick Kitchen Fixes

    • When sauce is too acidic, stir in a pinch of sugar or baking soda.
    • Splash in more coconut milk if sauce becomes too thick or bitter.
    • Patch over a burnt garlic smell by adding fresh garlic and cooking briefly.
    • Shield the pan with a lid if sauce splatters too much.
    • Rescue watery sauce by simmering longer until it thickens, then adjust seasoning.

    Make-Ahead & Storage Tips

    • You can prep the sauce up to 2 days ahead; store in an airtight container in the fridge.
    • Cooked pasta keeps well in the fridge for 1-2 days; reheat with a splash of water or broth.
    • The flavors deepen overnight, making it even more comforting the next day.
    • Reheat gently on the stove or microwave, tasting and adjusting seasoning as needed.

    10 Practical Questions & Answers About Creamy Vegan Tomato Pasta

    1. Can I use fresh tomatoes instead of canned?

    Use ripe, flavorful tomatoes—either fresh or good quality canned. They give the sauce a bright, sweet-tangy base.

    2. Can I substitute fresh tomatoes for canned?

    Yes, but you’ll need to simmer longer to break down the fresh fruit into a sauce. Use about 4-5 ripe tomatoes per can.

    3. What can I use instead of heavy cream?

    For creaminess, blend soaked cashews or use coconut milk. Both add richness without dairy.

    4. What oil works best?

    Use a neutral oil like olive or avocado for sautéing. It won’t overpower the tomato flavor.

    5. How do I make the sauce pop?

    Add a splash of lemon juice or vinegar at the end to brighten the flavors and cut through the richness.

    6. How long should I cook the pasta?

    Cook the pasta al dente, about 8-10 minutes in salted boiling water. It keeps the dish from becoming mushy.

    7. What size pan should I use?

    Use a large pan to give the sauce room to simmer and the pasta space to coat evenly.

    8. When should I add herbs?

    Taste and adjust salt and pepper before serving. Add fresh basil for a fragrant finish.

    9. Can I reheat leftovers?

    Serve immediately for best texture and flavor. Reheat gently in a skillet with a splash of water or broth.

    10. How long does leftovers last?

    Yes, store in an airtight container in the fridge up to 3 days. Reheat with a little water for moisture.

    This dish isn’t just about filling bellies—it’s about reclaiming a moment of calm in a busy day. Once you get the hang of that silky, tangy sauce, it’s hard to go back to plain pasta again.

    In a way, it’s a reminder that simple ingredients, treated with care, can create something nourishing and familiar. Maybe it’s that unpretentious comfort that makes it worth keeping in rotation, especially when the world feels a little off-kilter.

  • Peanut Butter Muffins Recipe

    When I first started baking muffins, I was obsessed with making them ultra-moist and rich, but I kept ending up with dense, heavy bites.

    One day, I realized it’s all about the peanut butter — not just the flavor, but how it affects the batter’s structure.

    That’s when I started tweaking my method, using just the right amount of flour and a gentle hand, and these muffins became my go-to.

    The secret to moist, fluffy peanut butter muffins is all about the right balance of ingredients and gentle mixing. I’ve found that the way you incorporate the peanut butter and how you handle the batter really makes a difference in the final texture. It’s not just about flavor, but about achieving a tender crumb that melts in your mouth.

    Why These Muffins Matter to Me

    • I love how these muffins come together fast, perfect for when I need comfort in a hurry.
    • Baking these makes my kitchen smell like warm peanuts and baked goods, which always lifts my mood.
    • Sharing these muffins with friends reminds me of lazy weekend mornings and simple joys.
    • They’re a reminder that sometimes, simple ingredients make the best treats.
    • I feel proud every time I see someone take a first bite and smile.

    My Inspiration for These Muffins

    • I stumbled upon this recipe during a busy week when I had a jar of peanut butter and a few pantry staples.
    • It became my quick fix for mornings when I needed something satisfying but didn’t want to fuss.
    • The secret is in not overmixing, which keeps them light and fluffy.
    • Now, I keep a batch in the freezer for whenever a craving hits.

    A Little History and Trivia About Peanut Butter Muffins

    • Peanut butter muffins are a twist on classic American quick bread recipes.
    • This recipe is inspired by childhood memories of quick snacks after school.
    • Peanut butter in baked goods adds protein, making muffins more filling.
    • Traditionally, muffins like these were perfect for picnics and quick mornings.
    • The combination of sweet and nutty flavors is a nod to the classic peanut butter and jelly sandwich.

    Ingredient Insights for Better Muffins

    • Peanut Butter: Natural, oozing with flavor, adds moistness. Swap with almond or cashew butter for nutty variations.
    • Flour: All-purpose gives structure, but whole wheat adds a hearty touch. Slightly denser, more wholesome.
    • Sugar: Regular white sugar keeps it classic, but honey or maple syrup can add a richer sweetness.
    • Eggs: Bind ingredients and lift the batter. Flax eggs work if you want vegan options, but keep in mind they’re less fluffy.
    • Milk: Keeps batter moist. Almond or oat milk are good dairy-free options, with a slightly different flavor.

    Spotlight on Peanut Butter and Eggs

    Peanut Butter:

    • It’s the soul of these muffins. Look for a natural, smooth version for best texture.
    • It’s rich, nutty, and a little oily. It helps keep the muffins moist and tender.

    Eggs:

    • They give structure and lift. Room temp helps them blend smoothly.
    • They also add a slight richness and help the muffins rise evenly.

    Ingredient Substitutions for Every Kitchen

    • Dairy-Free: Swap cow’s milk for almond, soy, or oat milk for a nutty twist.
    • Gluten-Free: Use a 1:1 gluten-free baking flour blend to keep the texture light.
    • Sweetener: Replace sugar with honey or maple syrup for a more complex sweetness.
    • Vegan: Use flax eggs instead of real eggs for binding and moisture.
    • Extra Nutty: Mix in chopped peanuts or chocolate chips for added texture and flavor.

    Equipment & Tools

    • Muffin tin: Holds the batter for baking
    • Mixing bowls: Combine ingredients
    • Whisk or spoon: Mix wet and dry ingredients
    • Cooling rack: Cool muffins evenly

    Step-by-Step Guide to Perfect Peanut Butter Muffins

    1. Preheat your oven to 180°C (350°F). Grease or line a muffin tin with paper liners.
    2. In a large bowl, whisk together 1 cup of all-purpose flour, 1/2 teaspoon baking soda, and a pinch of salt.
    3. In another bowl, mix 3/4 cup of peanut butter with 1 cup of sugar until smooth and creamy.
    4. Add 2 eggs, one at a time, blending well after each. Stir in 1/2 cup of milk and 1 teaspoon vanilla.
    5. Gently fold the dry ingredients into the wet, just until combined. Do not overmix — a few lumps are okay.
    6. Scoop the batter into the muffin tin, filling each about 2/3 full.
    7. Bake for 18-20 minutes, until the muffins are golden on top and a toothpick inserted in the center comes out clean.
    8. Remove from oven and let cool in the tin for 5 minutes, then transfer to a wire rack.
    9. Let the muffins cool completely before serving to set the crumb.
    10. Enjoy these muffins warm or at room temperature, with a glass of cold milk or a spread of butter.

    Let muffins cool completely on a wire rack before storing or serving.

    How to Know It’s Done

    • Edges are golden and slightly crisp.
    • Toothpick comes out clean from the center.
    • Muffins bounce back when gently pressed.

    Peanut Butter Muffins

    These peanut butter muffins are light, fluffy, and moist with a tender crumb that melts in your mouth. The key ingredients—peanut butter, eggs, and flour—combine through gentle mixing to achieve a perfect balance of richness and fluffiness. Their golden tops and soft interior make them a comforting treat for any time of day.
    Prep Time 10 minutes
    Cook Time 20 minutes
    Total Time 30 minutes
    Servings: 12
    Course: Main Course
    Cuisine: American
    Calories: 210

    Ingredients
      

    • 1 cup all-purpose flour
    • 3/4 cup peanut butter smooth, natural
    • 1 cup sugar
    • 2 eggs room temperature
    • 1/2 cup milk dairy or plant-based
    • 1 teaspoon vanilla extract
    • 1/2 teaspoon baking soda
    • a pinch salt

    Equipment

    • Muffin tin
    • Mixing bowls
    • Whisk or spoon
    • Cooling rack

    Method
     

    1. Preheat your oven to 180°C (350°F) and line a muffin tin with paper liners or lightly grease it.
    2. In a large mixing bowl, whisk together the flour, baking soda, and a pinch of salt until evenly combined. This creates a light, airy base for your muffins.
    3. In a separate bowl, mix the peanut butter and sugar using a whisk or spoon until the mixture is smooth, creamy, and fragrant, about 2 minutes.
    4. Add the eggs one at a time to the peanut butter mixture, beating well after each addition until the mixture is glossy and slightly thickened.
    5. Stir in the milk and vanilla extract until the batter becomes smooth and slightly runny, with a glossy appearance and a pleasant aroma.
    6. Gently fold the dry ingredients into the wet mixture using a spatula or spoon, mixing just until no streaks of flour remain—be careful not to overmix, as this keeps the muffins tender.
    7. Spoon or scoop the batter evenly into the prepared muffin tin, filling each cup about two-thirds full to allow room for rising.
    8. Bake the muffins in the preheated oven for 18 to 20 minutes, or until the tops are golden brown and a toothpick inserted in the center comes out clean.
    9. Remove the muffins from the oven and let them cool in the tin for about 5 minutes, then transfer to a wire rack to cool completely. The aroma of warm peanuts and baked goods will fill your kitchen.
    10. Once cooled, enjoy these muffins warm or at room temperature. They taste great with a glass of milk or a spread of butter for extra indulgence.

    Cooking Tips & Tricks to Elevate Your Muffins

    • BOLDEN the top with a quick sprinkle of sugar before baking for a crunchy crust.
    • GENTLE folding keeps the batter airy and the muffins light.
    • USE room temperature eggs for smoother mixing and better rise.
    • TOUCH the top of a muffin; it should be firm but springy.
    • FOR extra flavor, add a handful of chopped peanuts or chocolate chips.

    Common Mistakes and How to Fix Them

    • FORGOT to preheat oven? Turn it on now, and bake a little longer if needed.
    • DUMPED in too much flour? Add a splash more milk to loosen the batter.
    • OVER-TORCHED the muffins? Cover with foil and reduce oven temp by 10°C (20°F).
    • GOT dense muffins? Mix the batter just until combined, don’t overdo it.

    Quick Fixes for Baking Hiccups

    • When batter is too thick, splash in a little more milk.
    • If muffins crack on top, shield with foil mid-bake.
    • Patch underbaked muffins by returning to oven for 3-5 minutes.
    • Shield over-browned muffins with foil to prevent burning.
    • When muffins stick, splash the pan with a little hot water, then gently loosen.

    Make-Ahead and Storage Tips

    • Prepare the batter the night before, cover, and refrigerate for up to 12 hours.
    • Bake muffins fresh or reheat in the microwave for 20-30 seconds, smell the warm peanut aroma.
    • Store cooled muffins in an airtight container at room temp for 2 days, or fridge for a week.
    • Freeze baked muffins for up to 1 month; reheat directly from freezer, smell for warmth and nuttiness.

    10 Practical FAQs About Peanut Butter Muffins

    1. Can I use crunchy peanut butter?

    Use creamy peanut butter for a smooth texture that blends easily into the batter.

    2. Can I substitute the peanut butter?

    Yes, but the muffins will have a chunkier texture and a bit more crunch.

    3. What if I only have almond butter?

    Natural peanut butter without added sugar works best, but you can use sweetened if you prefer sweeter muffins.

    4. How do I know when the muffins are done?

    Almond butter will change the flavor but still make moist, tasty muffins.

    5. How long do I bake these muffins?

    They should be golden on top and a toothpick inserted in the center comes out clean.

    6. Can I freeze the muffins?

    Bake for about 18-20 minutes at 180°C (350°F). Keep an eye for golden edges.

    7. How do I reheat frozen muffins?

    Yes, cool completely, then store in an airtight container in the freezer for up to a month.

    8. Are these muffins suitable for breakfast?

    Warm in the microwave for 20-30 seconds until just heated through.

    9. What makes these muffins special?

    Absolutely, they’re filling, with a good mix of protein and carbs, perfect for starting the day.

    Now, these peanut butter muffins are what I turn to when I want a quick, comforting treat that feels homemade and honest.

    They’re perfect for breakfast, a snack, or even a quick dessert. Plus, they smell like peanut butter cookies baking — that warm, nutty aroma never gets old.

  • Pineapple Mint Popsicles Recipe

    Pineapple mint popsicles aren’t just a treat—they’re a little ritual of summer. I love how the bright, tropical scent of pineapple mingles with the cool burst of fresh mint. It’s like capturing a moment of sunshine in every bite, especially on days when the heat makes everything else sluggish.

    Making these popsicles feels almost meditative—measuring, blending, pouring. It’s a reminder that some of the best summer memories come from simple, honest ingredients and a slow, deliberate process. Plus, they’re just so easy to customize and throw together, no fancy equipment needed.

    Focusing on the sensory experience of making and enjoying these popsicles, emphasizing the fresh, juicy, and herbal qualities that evoke summer memories and the simple joy of homemade treats.

    Why I Keep Coming Back to This Recipe

    • I love the way the mint makes my whole kitchen smell fresh.
    • There’s something satisfying about blending everything into a smooth, oozy mixture.
    • I feel a little nostalgic making these, like summer’s just around the corner.
    • Sharing these popsicles always makes me feel like I’ve done something good for myself.

    A personal story of summer refreshment

    • This recipe started from a simple craving for something cool and bright. I had a ripe pineapple and some fresh mint, and suddenly it all clicked.
    • A friend once told me about how her grandma used to freeze fruit juice in ice cube trays—so I adapted that idea into these popsicles.
    • It’s become a little summer ritual, a way to cool down and reconnect with fresh ingredients.

    Fun facts about pineapple, mint, and frozen treats

    • Pineapple was once called ‘the king of fruits’ for its rarity and luxurious appeal.
    • Mint has been used medicinally for thousands of years, dating back to Ancient Egypt.
    • Homemade popsicles date back to the 1900s, originally created as a cold dessert for hot summer days.

    Ingredient insights and tweaks

    • Fresh pineapple: I love its juicy, tropical sweetness. Use canned in a pinch, but flavor won’t be as bright.
    • Mint leaves: They add a refreshing herbal note. Use basil for a different, slightly sweeter twist.
    • Honey: I prefer it for its smooth, floral sweetness. Maple syrup works too, with a richer aroma.
    • Lime juice: Optional, but it brightens the flavor. Skip if you want a simpler taste.
    • Water or juice: Use to thin out if needed, especially if your mixture is too thick.

    Key ingredients that make these popsicles special

    Fresh pineapple:

    • Pineapple: The star. Its sweet, tart, and fragrant—look for ripe, golden fruit for the best flavor.
    • Pineapple’s natural enzymes give a slight ooze when blending, creating a smooth base.

    Fresh mint leaves:

    • Mint: Fresh leaves provide a cooling burst. Use more for a stronger herbal punch.
    • Mint leaves release aroma immediately—crush slightly before adding to release more flavor.
    • Avoid using dried mint; fresh is key for that bright, crisp taste.

    Smart ingredient swaps to customize your popsicles

    • Fruity: Swap pineapple for mango or papaya for a tropical twist.
    • Sweetener: Use agave syrup or coconut nectar for a vegan option with a different flavor.
    • Herb: Basil or cilantro can replace mint for a different herbal profile.
    • Liquid: Swap water for coconut milk for a creamier popsicle.
    • Citrus: Add lemon or lime zest for a more intense citrus aroma.

    Equipment & Tools

    • blender: Puree the pineapple smoothly.
    • popsicle molds: Shape and freeze the popsicles.
    • spoon: Pour the mixture into molds.
    • warm water: Loosen popsicles for easy removal.

    Step-by-step guide to perfect pineapple mint popsicles

    1. Gather your equipment: a blender, popsicle molds, and a spoon for pouring.
    2. Cut fresh pineapple into small chunks—about 2 cups. Blend until completely smooth, about 30 seconds.
    3. Finely chop a handful of fresh mint leaves. Mix into the pureed pineapple.
    4. Taste the mixture; add honey or sugar if more sweetness is desired. Blend briefly to combine.
    5. Pour the mixture into molds, leaving about ¼ inch at the top for expansion. Insert sticks.
    6. Freeze for at least 4 hours, or overnight. For best results, wrap molds in plastic wrap after a couple of hours.
    7. To serve, run warm water around the molds for a few seconds to loosen. Gently pull out the popsicles.

    Let the popsicles sit at room temperature for a minute before removing from molds. Serve immediately for the best texture.

    How to Know It’s Done

    • Popsicles are fully frozen when they are solid with no wiggle.
    • The mixture should be vibrant and fragrant, with a strong pineapple aroma.
    • Popsicles should slide out easily when run under warm water for 5 seconds.

    Pineapple Mint Popsicles

    These pineapple mint popsicles are a refreshing summer treat that combine the tropical sweetness of ripe pineapple with the cool, herbal aroma of fresh mint. Made by blending juicy pineapple with mint leaves and sweetener, then freezing the mixture in molds, they develop a vibrant, icy texture that’s perfect for hot days. Their bright appearance and invigorating flavor make them a delightful homemade dessert that captures the essence of summer.
    Prep Time 10 minutes
    Total Time 10 minutes
    Servings: 6
    Course: Main Course
    Cuisine: American
    Calories: 80

    Ingredients
      

    • 2 cups fresh pineapple chunks
    • a handful fresh mint leaves about 8-10 leaves
    • 2 tbsp honey or to taste
    • 1 tbsp lime juice optional, for brightness

    Equipment

    • Blender
    • popsicle molds
    • Spoon
    • Knife

    Method
     

    1. Start by peeling and chopping your fresh pineapple into small chunks, about two cups’ worth. Place the chunks into your blender.
    2. Finely chop about 8 to 10 fresh mint leaves and add them to the blender with the pineapple.
    3. Pour in the honey and lime juice, then blend everything together until the mixture is completely smooth and vibrant, about 30 seconds. You should see a fragrant, slightly frothy liquid.
    4. Give the mixture a quick taste and add more honey if you’d like it sweeter. Blend briefly to incorporate.
    5. Using a spoon, pour the mixture evenly into your popsicle molds, leaving about a quarter inch space at the top to allow for expansion during freezing.
    6. Insert the sticks into the molds, then place them in your freezer. Let them freeze for at least 4 hours or overnight for the best texture.
    7. Once frozen solid, run warm water around the outside of each mold for a few seconds to loosen the popsicles.
    8. Carefully pull out the popsicles and serve immediately to enjoy their bright, icy, and herbal flavor—perfect for a hot summer day.

    Notes

    For an extra tropical twist, swap honey for agave syrup or coconut nectar. To make creamier popsicles, substitute half the water with coconut milk. Always use ripe, fragrant pineapple for maximum sweetness and aroma.

    Cooking tips and tricks for perfect popsicles

    • Use ripe pineapple for maximum sweetness and aroma.
    • Chill your blender bowl to help keep the mixture cold and prevent melting.
    • Pour slowly into molds to avoid air bubbles.
    • Insert sticks before freezing fully to ensure stability.
    • Run warm water around molds for 5 seconds to loosen.

    Common mistakes and how to fix them

    • FORGOT to add enough mint? Sprinkle extra leaves on top of the mixture before freezing.
    • DUMPED too much sugar? Dilute with a splash of pineapple juice and blend again.
    • OVER-TORCHED the pops? Run the molds under warm water to loosen.
    • MIXTURE is too thick? Add a splash of water or juice to thin it out.

    Quick fixes for common popsicle problems

    • When mixture is too runny, add more pineapple or freeze briefly.
    • Splash in a little lime juice for extra zing.
    • Patch leaks by wrapping molds tightly in plastic wrap.
    • Shield mold cracks by placing on a flat surface during freezing.
    • When in doubt, re-blend with extra fruit or juice for smoother texture.

    Make-ahead tips and storage advice

    • You can prepare the mixture ahead and keep it in the fridge for up to 24 hours before freezing.
    • Freeze the popsicles for at least 4 hours, or overnight, for best texture.
    • Wrap molds in plastic wrap during initial freezing to prevent freezer burn.
    • Once frozen, store popsicles in an airtight container or freezer bag for up to a month.

    10 Practical Q&As About Pineapple Mint Popsicles

    1. Can I use frozen pineapple?

    Use fresh pineapple for the best flavor. Frozen works in a pinch, but fresh gives a brighter, juicier taste.

    2. Can I substitute mint with other herbs?

    Mint adds a cool, herbal burst. Skip it if you prefer a pure pineapple punch, or swap with basil for a different twist.

    3. How long can I store these popsicles?

    These popsicles are best enjoyed within a month of freezing. Wrap them well to prevent freezer burn.

    4. What if my molds leak?

    Make sure your popsicle molds are sturdy. If they leak, freeze on a tray first, then transfer to a bag.

    5. Should I strain the mixture for a smoother popsicle?

    For a smoother texture, blend the mixture thoroughly until completely smooth before freezing.

    6. How do I adjust the sweetness?

    Adjust sweetness by adding more honey or sugar. Taste the blended mixture before freezing.

    7. How do I get the popsicles out easily?

    Use a sharp knife or warm water to loosen popsicles from molds for easy removal.

    8. Can I add lime or lemon juice?

    Add a splash of lime juice for a tangy brightness that complements the pineapple.

    9. Why are my popsicles too icy?

    If the popsicles are too icy, add a bit more honey or juice to improve texture.

    10. How do I prevent mold leaks?

    Always check for mold cracks or leaks before freezing to avoid spills and freezer messes.

    Once you’ve got your popsicles in the freezer, they’re waiting to chill out until you’re ready for a quick, refreshing escape. Nothing beats the first bite—cold, juicy, with that whisper of mint lingering. They’re perfect for spontaneous summer afternoons or as a cool finish to a backyard meal.

    In the end, these pineapple mint popsicles aren’t just a recipe—they’re a little slice of summer you can hold in your hand. Keep a batch ready and let each lick remind you that sometimes, the simplest ingredients make the best moments.