
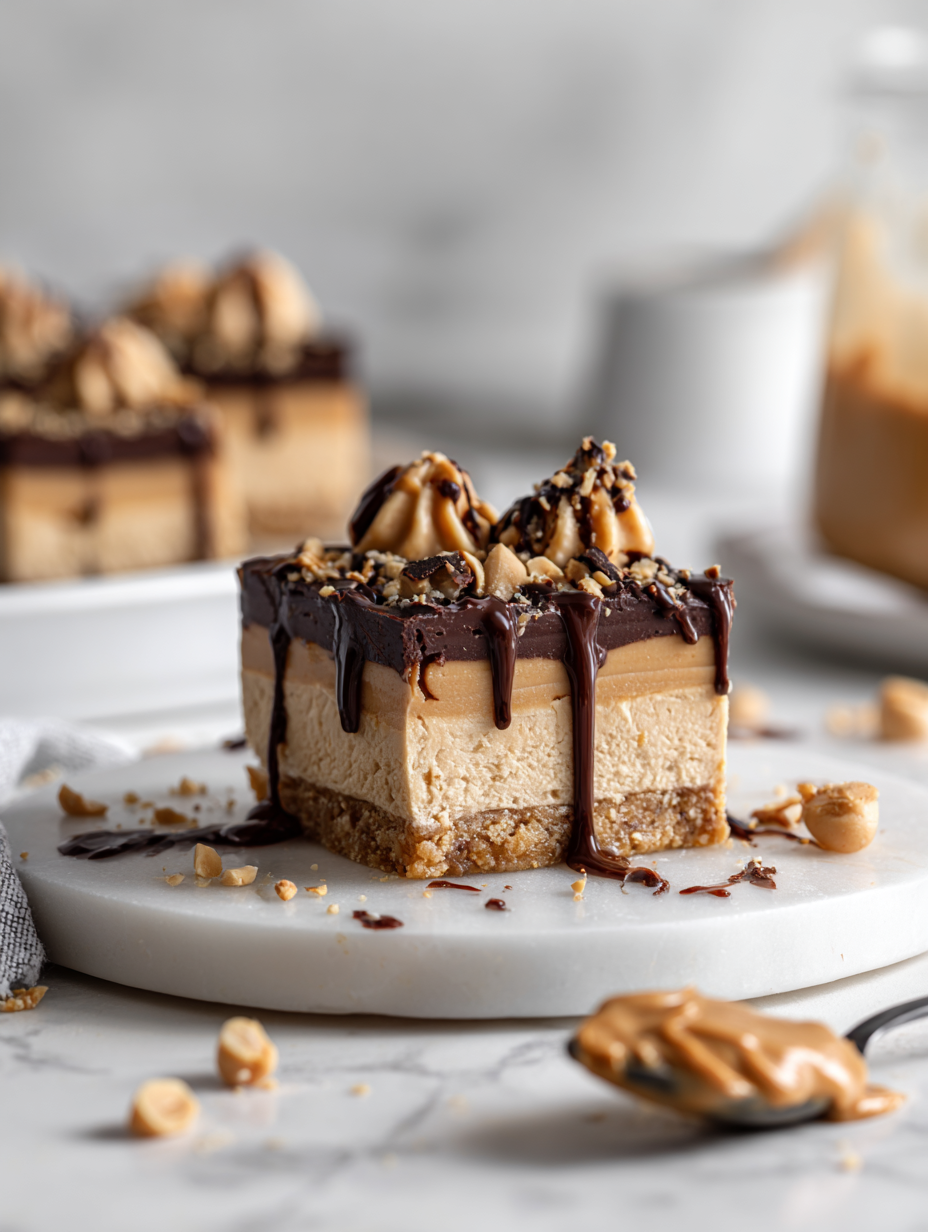
Peanut butter bars hold a special place in my kitchen, not for their polish but for their messy, honest charm. There’s something about the way the peanut butter oozes just a little over the edges, the way the chocolate cracks as you bite in—these treats are pure comfort, unpretentious and a little imperfect, just like childhood afternoons spent sneaking seconds. Making them feels like a small rebellion, a moment of honest indulgence in a world that often demands perfection.
This recipe is a nod to those lazy, sticky days when I’d raid the pantry for something sweet and nutty. No fancy ingredients, no fuss—just peanut butter, chocolate, and a handful of simple staples that come together in a pan. It’s about embracing the chaos, the slight messiness, the uneven edges, and finding joy in the imperfect beauty of homemade treats.
Focusing on the nostalgic comfort of peanut butter bars, this recipe emphasizes the imperfect, messy joy of homemade treats that remind us of childhood afternoons, while adapting traditional ingredients for a more honest, less polished baking experience.
Story Behind This Dish
- This recipe sprouted from a lazy weekend afternoon when I found myself rummaging through the pantry, craving something sweet but honest. I remembered the sticky, messy peanut butter squares from childhood—those no-fuss treats that felt like a small rebellion against perfect desserts. It’s funny how a simple combination of peanut butter and chocolate can bring back such vivid memories of unplanned, carefree moments.
- I started tweaking the classic recipe, aiming for something that felt real—less polished, more forgiving. The kind of treat that’s a little messy around the edges but still satisfying in every bite. It’s become a go-to whenever I want comfort that’s honest, unpretentious, and a little nostalgic.
- heading
- Story Behind This Dish
Key Ingredients Breakdown
- Peanut Butter: I use a chunky, slightly salty peanut butter for texture and flavor; it adds a satisfying chew. If you prefer smoother, it’ll melt into the base more easily, but I love the bits of nuts in every bite.
- Butter: I rely on unsalted butter for richness and balance; it helps the mixture set firm. For a dairy-free version, coconut oil works but gives a subtler flavor and softer texture.
- Powdered Sugar: I prefer a fine, sifted powder for a smooth, melt-in-your-mouth sweetness. If you’re in a pinch, regular sugar can work—just pulse it in a blender first to avoid grittiness.
- Chocolate Chips: I opt for semi-sweet chocolate for a rich, deep flavor; they melt slightly into the warm peanut butter layer. For a different vibe, try dark or milk chocolate—just watch the sweetness level.
- Vanilla Extract: I add a splash to deepen the flavor, making it richer and more rounded. Skip it if you’re feeling minimalist, but it’s a small step that makes a difference.
- Salt: Just a pinch enhances the peanut butter’s natural nuttiness. If your peanut butter is very salty, cut back a little; otherwise, a tiny sprinkle wakes everything up.
- Optional Add-ins: Sometimes I toss in crushed pretzels or chopped nuts for crunch—these little surprises make each bite more interesting. Feel free to customize based on what you have around.
Spotlight on key ingredients
Peanut Butter:
- I prefer a chunky, slightly salty variety that adds texture and a rich, nutty flavor; the bits of nuts give each bite a satisfying chew. Opt for smooth if you want a more uniform base, but I love the rustic feel of chunky.
- Chocolate Chips: I use semi-sweet chocolate for a deep, bittersweet contrast. They melt slightly into the warm peanut butter layer, creating pockets of gooey richness. Dark or milk chocolate can switch up the flavor, but keep an eye on sweetness levels.
Notes for ingredient swaps
- Dairy-Free: Swap butter for coconut oil or vegan margarine. It keeps things rich, but the overall flavor will be slightly more neutral and coconutty.
- Sugar Alternatives: Use maple syrup or honey instead of powdered sugar. Expect a softer, chewier texture and a hint of natural sweetness.
- Chocolate: Replace semi-sweet chips with dark chocolate or milk chocolate chunks. Dark will be more bitter; milk adds creaminess and sweetness.
- Peanut Butter: For a different nutty flavor, try almond or cashew butter. They’ll change the taste profile but still offer that creamy, nutty bite.
- Add-ins: Crushed pretzels or chopped nuts can be swapped or omitted. These add crunch, but skipping them keeps the bars simpler and less messy.
- Vegan Version: Use vegan chocolate and plant-based butter or coconut oil. The texture remains rich, but flavor might be slightly different—more coconut or plant-based nutty notes.
Equipment & Tools
- 9×9 inch pan: To hold and shape the bars
- Parchment paper: For easy removal and cleanup
- Microwave-safe bowl: For melting the peanut butter mixture and chocolate
- Spatula: To spread and smooth layers
- Sharp knife: To cut the finished bars
Step-by-step guide to peanut butter bars
- Gather your equipment: a 9×9 inch pan (for a sturdy base), a heatproof spatula (for spreading and smoothing), and a microwave-safe bowl (for melting chocolate).
- Line the pan with parchment paper, leaving a slight overhang for easy removal later. Set aside.
- In a microwave-safe bowl, combine 1 cup of peanut butter (chunky for texture), 1/2 cup of unsalted butter (melted), and 1/2 cup of powdered sugar. Microwave in 30-second bursts, stirring each time, until smooth and oozy—about 1–2 minutes total.
- Pour the peanut butter mixture into the prepared pan. Use the spatula to spread it evenly—aim for a smooth, slightly uneven surface for that homemade charm. Chill in the fridge for 20–30 minutes, or until firm.
- Meanwhile, melt 1 cup of semi-sweet chocolate chips in the microwave in 20-second intervals, stirring each time, until glossy and smooth. Be careful not to overheat or burn the chocolate—smell for a rich, cocoa scent.
- Pour the melted chocolate over the chilled peanut butter layer. Use the spatula to spread evenly, creating gentle swirls or waves. Return the pan to the fridge for at least 1 hour, or until fully set and firm to the touch.
- Once set, remove from fridge. Let sit at room temperature for 5 minutes to soften slightly, making cutting easier. Use the parchment overhang to lift out the slab, then cut into squares or rectangles with a sharp knife. Expect some uneven edges—that’s part of the charm.
- For the best texture, serve slightly softened—bite into a chewy peanut butter core with a crackling chocolate top. Store leftovers in an airtight container in the fridge for up to a week.
Let the bars rest at room temperature for 5 minutes before slicing. Serve immediately or store in an airtight container in the fridge for up to a week. For cleaner cuts, wipe the knife between slices.
How to Know It’s Done
- Chocolate layer should be shiny and fully set, no sticky spots.
- Peanut butter layer should be firm but not crumbly, with a slight jiggle.
- Edges are clean and edges of the cut squares are slightly cracked or uneven, indicating proper set.
Messy Peanut Butter Bars
Ingredients
Equipment
Method
- Line your 9x9 inch pan with parchment paper, leaving some overhang on the sides for easy removal.
- In a microwave-safe bowl, combine the chunky peanut butter and melted butter. Microwave in 30-second bursts, stirring each time, until the mixture is smooth, creamy, and fragrant—about 1 to 2 minutes.
- Add the sifted powdered sugar to the peanut butter mixture and stir well until fully incorporated. The mixture should become thick and slightly sticky.
- Pour the peanut butter mixture into the prepared pan. Use a spatula to spread it evenly across the bottom, pressing gently to create a smooth, rustic surface with some uneven edges for that homemade charm.
- Place the pan in the fridge and chill for about 20 to 30 minutes, or until the layer is firm to the touch.
- Meanwhile, melt the semi-sweet chocolate chips in a microwave-safe bowl in 20-second intervals, stirring each time, until they are glossy and smooth. Be careful not to overheat, smelling for a rich cocoa aroma.
- Remove the pan from the fridge once the peanut butter layer is firm. Pour the melted chocolate over the top, tilting the pan to spread it evenly with a spatula.
- Return the pan to the fridge and chill for at least an hour, or until the chocolate layer is fully set and shiny.
- Once set, let the bars sit at room temperature for 5 minutes to soften slightly, then use the parchment overhang to lift the entire slab out of the pan.
- Use a sharp knife to cut into squares or rectangles, wiping the blade between slices for clean edges. Serve immediately or store in an airtight container in the fridge for up to a week.
Pro tips for perfect peanut butter bars
- Use room temperature peanut butter for easier melting and spreading. Cold peanut butter can be stubborn and slow to combine.
- Melt chocolate gently in short bursts to avoid burning. Smell for a rich cocoa aroma—no burnt scent allowed.
- When spreading the chocolate, work quickly before it firms up. Keep your spatula warm by dipping it in hot water for smoother application.
- Chill the bars in the fridge until just firm—about 20–30 minutes—to prevent cracking when slicing. Slightly softened edges make cleaner cuts.
- For clean edges, wipe your knife between slices. A quick dip in hot water keeps the cuts sharp and neat.
- If the chocolate cracks or pulls when spreading, gently rewarm it for a few seconds. It should be glossy and smooth, not stiff or grainy.
- To add a textured finish, sprinkle chopped nuts or sea salt on the chocolate layer just before it sets. The contrast enhances both look and crunch.
Common mistakes and how to fix them
- FORGOT to check chocolate temperature → Do a gentle swirl to test for smoothness.
- DUMPED too much salt → Taste first, then add salt gradually for balance.
- OVER-TORCHED chocolate → Remove from heat immediately, add a teaspoon of oil to loosen.
- UNDER-mixed peanut butter → Stir thoroughly to combine oils and solids evenly.
Quick fixes and pantry swaps
- When chocolate seizes, splash in a teaspoon of oil to smooth it out.
- If the mixture is too stiff, gently microwave for 10 seconds, then stir.
- Dumped too much salt? Rinse the excess with a damp cloth before adding more.
- Over-torched? Shield with a handful of fresh chocolate and heat gently again.
- When in doubt, swap peanut butter with almond butter for a nuttier twist.
Prep, store, and reheat tips
- You can prepare the peanut butter layer up to 2 days in advance. Keep it covered in the fridge to prevent it from drying out, and it will still be soft enough to spread easily when ready.
- Store the assembled bars, once fully set, in an airtight container in the fridge for up to a week. The cool environment keeps the chocolate shiny and prevents melting or softening.
- For longer storage, freeze the bars wrapped tightly in plastic wrap and then in foil for up to a month. They can be thawed in the fridge or at room temperature—expect a slightly softer bite after freezing.
- Reheating isn’t really necessary, but if you want to soften a bar for easier biting, let it sit at room temperature for about 10 minutes. The chocolate will become slightly glossy and softer, with a more melt-in-your-mouth feel.
Top questions about peanut butter bars
1. Can I use smooth peanut butter instead of chunky?
Use crunchy peanut butter for more texture and nutty bits in each bite, or smooth if you prefer a creamier base.
2. My peanut butter is too stiff to spread, what do I do?
Yes, a little microwave or gentle heating with a spatula can help soften and mix stubborn peanut butter.
3. How do I know when the bars are ready to cut?
Chill the bars until the chocolate is firm and shiny, about an hour in the fridge. They should crack slightly when cut.
4. How long will the peanut butter bars keep?
Store in an airtight container in the fridge for up to a week; they firm up and the flavors deepen overnight.
5. Can I substitute the chocolate chips?
Use dark or milk chocolate chips based on your sweetness preference. Melt gently, smelling for a rich cocoa aroma.
6. Can I use a different sweetener?
Yes, swap out powdered sugar for honey or maple syrup, which will give a softer, more chewy texture and a subtle flavor change.
7. Any tips for slicing the bars neatly?
Line your pan with parchment for easy removal, and wipe your knife between cuts for cleaner edges.
8. What if my melted chocolate gets grainy?
If chocolate seizes or becomes grainy, add a teaspoon of vegetable oil and gently rewarm to smooth it out.
9. How can I add more crunch to the bars?
Add crushed pretzels or chopped nuts on top before the chocolate sets for a crunchy surprise in each bite.
10. Can I make these ahead of time?
Prepare the peanut butter layer a day ahead and keep it covered. Assemble and chill before serving for best texture.
These peanut butter bars are a simple reminder that some of the best treats come from honest, messy moments in the kitchen. The gooey peanut butter, cracked chocolate, and slightly uneven edges tell their own story—one of comfort and imperfection.
Whenever I make these, I feel a little nostalgic for childhood afternoons and the messy joy of homemade sweets. They’re not polished, but that’s exactly what makes them so satisfying—honest, unpretentious, and just a little bit messy in the best way.

Hi, I’m Noah Bennett, the creator behind Breathing In Flavors. For me, cooking begins with a breath. Before the first bite, before the plating, before the garnish, there is that quiet moment when steam rises and you inhale. That is where flavor truly begins. Breathing In Flavors is my space to slow down, appreciate ingredients, and cook with awareness. I am so glad you’re here.
 The creator behind Breathing In Flavors.
For me, cooking begins with a breath. Before the first bite, before the plating, before the garnish, there is that quiet moment when steam rises and you inhale. That is where flavor truly begins.
Breathing In Flavors is my space to slow down, appreciate ingredients, and cook with awareness. I am so glad you’re here.
The creator behind Breathing In Flavors.
For me, cooking begins with a breath. Before the first bite, before the plating, before the garnish, there is that quiet moment when steam rises and you inhale. That is where flavor truly begins.
Breathing In Flavors is my space to slow down, appreciate ingredients, and cook with awareness. I am so glad you’re here.


