Growing up, I always found myself drawn to those thick, chewy chocolate coconut bars that my mom kept in the cookie jar. There was something about the way the sweet, fudgy chocolate layered over the chewy coconut that made every bite feel like a little moment of childhood comfort. But as I got older, I started experimenting — adding a pinch of sea salt here, swapping honey for corn syrup, trying to make them a bit more grown-up without losing that nostalgic charm.
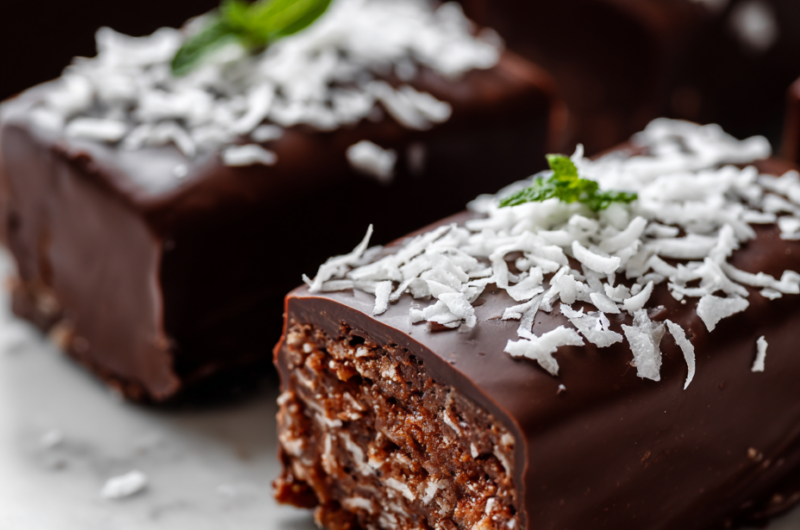
This recipe is my take on that classic treat, but with a slight twist to make it feel a little more refined. The rich chocolate paired with toasted coconut feels indulgent yet familiar, perfect for when you need a quick, satisfying bite. It’s one of those recipes that’s simple enough to throw together on a busy afternoon, but special enough to serve for a cozy weekend afternoon with friends or family.
Focusing on the nostalgic comfort of childhood treats, but elevating them with a sophisticated coconut-chocolate combo that feels indulgent yet familiar.
The story behind this recipe
- This recipe was born out of a cluttered kitchen moment, where I found an old jar of toasted coconut and a block of dark chocolate that needed using up. The combo sparked a memory of those chewy, sweet bars I loved as a kid, but I wanted to give them a little more depth — a hint of richness, a touch of sophistication.
- Making these bars felt like reconnecting with a childhood favorite, but also like giving myself permission to indulge in something a little more refined. The process is straightforward, but every step—like toasting the coconut or melting the chocolate—adds a layer of flavor that makes the whole thing feel special, even if it’s just for a quick snack.
- heading: Short Personal Story
Key Ingredients Breakdown
- Coconut flakes: I like to toast mine until they’re golden and fragrant, which adds a nutty depth. Skip the toasting if you prefer a softer, milder coconut flavor.
- Dark chocolate: I go for at least 70% cocoa for that rich, slightly bitter contrast. If you want it sweeter, a milk chocolate layer works, but it won’t have that deep cocoa punch.
- Sweetener: I usually reach for honey or maple syrup for a mellow sweetness that complements the coconut. If you prefer a less sticky bar, try coconut sugar, which adds a caramel note.
- Butter: I prefer unsalted butter for control over salt levels, but margarine can be a quick substitute—just expect a slightly different richness and mouthfeel.
- Binder: I use sweetened condensed milk because it’s sticky and helps everything set. For a dairy-free version, coconut cream mixed with a touch of syrup can mimic that gooey texture.
- Optional add-ins: A pinch of sea salt or a splash of vanilla can elevate the flavors. I love a sprinkle of flaky sea salt on top just before chilling for that salty-sweet punch.
Spotlight on key ingredients
Coconut flakes:
- I toast mine until golden and fragrant, which adds a nutty depth. Skip the toasting if you prefer a softer, milder coconut flavor.
- Dark chocolate: I go for at least 70% cocoa for that rich, slightly bitter contrast. If you want it sweeter, a milk chocolate layer works, but it won’t have that deep cocoa punch.
- Sweetener: I usually reach for honey or maple syrup for a mellow sweetness that complements the coconut. If you prefer a less sticky bar, try coconut sugar, which adds a caramel note.
Dark chocolate:
- It melts smoothly, creating a glossy, crackly topping. Watch out for overheating, or it’ll seize and become grainy.
- Coconut flakes: During toasting, they turn fragrant and crunchy, giving a satisfying texture contrast. If not toasted, they stay softer and milder.
- Sweetener: When mixed with melted chocolate, it helps create a sticky, cohesive base that sets well. Too much can make the bars overly sweet or sticky.
Notes for ingredient swaps
- Coconut Flakes: I toast mine until golden and fragrant for extra nuttiness. Skip the toasting for softer, milder coconut.
- Dark Chocolate: I use 70% cocoa for richness. Swap with milk chocolate for sweeter, creamier bars, but expect less depth.
- Sweetener: Honey or maple syrup adds mellow sweetness. Coconut sugar offers a caramel note and a slightly drier texture.
- Butter: Unsalted butter gives control over salt. Margarine works in a pinch, but expect a different mouthfeel and flavor.
- Binder: Sweetened condensed milk is sticky and helps set. Coconut cream mixed with syrup can replace it for dairy-free needs.
- Optional Add-ins: Flaky sea salt enhances the salty-sweet contrast. Vanilla extract can deepen flavor, but use sparingly.
Equipment & Tools
- Baking pan (20x20cm/8×8 inch): Holds the mixture and shapes the bars.
- Parchment paper: Prevents sticking and makes removal easy.
- Heatproof bowl: Melting chocolate gently over simmering water.
- Saucepan: Simmering water base for melting chocolate.
- Spatula: Mixing and spreading ingredients evenly.
- Sharp knife: Cutting the chilled bars into squares.
Step-by-step guide to Chocolate Coconut Bars
- Equipment & Tools: Line a 20x20cm (8×8 inch) baking pan with parchment paper, leaving overhang for easy removal. Have a heatproof bowl, saucepan, spatula, and a sharp knife ready.
- Toast the coconut: Spread coconut flakes evenly on a baking sheet. Toast in a preheated 180°C (350°F) oven for 5-7 minutes, until golden and fragrant. Watch closely to prevent burning; stir halfway. Cool slightly.
- Melt the chocolate: Break dark chocolate into small pieces. Melt in a heatproof bowl over a saucepan of simmering water (bain-marie) on low heat, stirring gently. Or microwave in 20-second bursts, stirring each time. Do not overheat; chocolate should be smooth and shiny.
- Prepare the coconut base: In a mixing bowl, combine toasted coconut, melted chocolate, and 2 tbsp of honey or maple syrup. Mix until well combined and sticky. If too dry, add a teaspoon of coconut oil or more syrup.
- Press into pan: Transfer the mixture to the prepared pan. Use a spatula or the back of a spoon to press firmly into an even layer. Chill in the fridge for 15 minutes to set.
- Make the chocolate topping: Melt remaining chocolate in the same way. Pour over the coconut base, spreading evenly with a spatula. Sprinkle with a pinch of sea salt or extra toasted coconut if desired.
- Chill and set: Refrigerate for at least 2 hours, or until firm. The bars should be crackly on top and hold together when pressed.
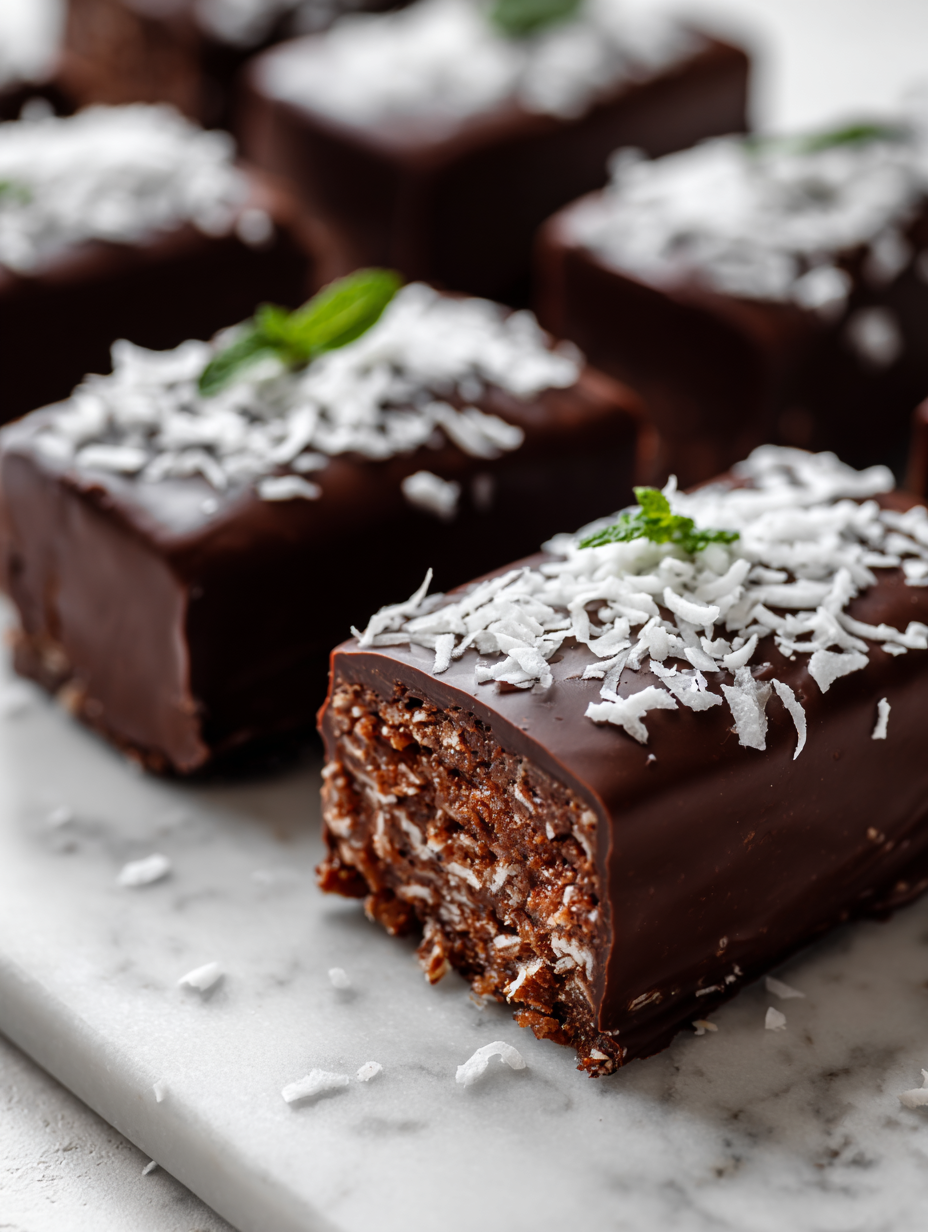
- Cut and serve: Use the overhang to lift the block out of the pan. Cut into squares with a sharp knife. For cleaner edges, wipe the knife with a warm cloth between cuts. Serve immediately or store.
- Resting & Finishing: Let the bars sit at room temperature for 5 minutes before serving if chilled too cold, to soften slightly. Store leftovers in an airtight container in the fridge for up to a week.
Chill the bars until fully firm, about 2 hours. Remove from pan using parchment overhang. Slice into neat squares. Serve immediately or store covered in the fridge.
How to Know It’s Done
- Chocolate topping is glossy and set, no sticky or shiny patches.
- Coconut base is firm but not hard, with a slight crunch when pressed.
- Bars hold shape when cut, with no crumbling or melting on the knife.
Chocolate Coconut Bars
Ingredients
Equipment
Method
- Line your baking pan with parchment paper, letting the edges overhang for easy removal.
- Spread the coconut flakes evenly on a baking sheet and toast in a preheated 180°C (350°F) oven for 5-7 minutes, stirring halfway through, until golden and fragrant.
- While the coconut cools slightly, break the dark chocolate into small pieces and melt it gently in a heatproof bowl over a saucepan of simmering water, stirring until smooth and shiny.
- In a mixing bowl, combine the toasted coconut, melted chocolate, honey or maple syrup, and butter. Mix well until everything is evenly coated and sticky.
- Transfer the mixture into your prepared pan and press down firmly with a spatula or the back of a spoon to form an even layer. Chill in the fridge for about 15 minutes to set slightly.
- Re-melt the remaining chocolate the same way and pour it over the chilled coconut layer, spreading evenly to cover the surface. Sprinkle a pinch of sea salt or additional toasted coconut on top if desired.
- Place the pan back in the fridge and chill for at least 2 hours, or until the chocolate is glossy and fully set.
- Once set, lift the entire block out of the pan using the parchment edges. Use a sharp knife to cut into even squares, wiping the knife between cuts for clean slices.
- Serve immediately or store in an airtight container in the fridge for up to a week. These bars are best enjoyed when firm, with a crackly top and chewy coconut interior.
Pro tips for perfect bars
- Bolded mini-head: Use a rubber spatula → Gently fold ingredients to keep the mixture light and airy.
- Bolded mini-head: Toast coconut carefully → Keep a close eye to prevent burning and develop a fragrant, nutty aroma.
- Bolded mini-head: Melt chocolate gently → Use a double boiler or microwave in short bursts to keep it smooth and shiny.
- Bolded mini-head: Chill in stages → Refrigerate the base before adding the top layer to prevent mixing and ensure crisp layers.
- Bolded mini-head: Wipe knife between cuts → For clean edges, run a warm, damp knife over the slices after each cut.
- Bolded mini-head: Avoid overbaking → Keep an eye on the coconut; it should be golden and fragrant but not burnt.
- Bolded mini-head: Add sea salt last → Sprinkle flaky sea salt just before chilling for an extra flavor kick and crunch.
Common mistakes and how to fix them
- FORGOT to preheat oven → Always preheat to ensure even toasting and baking.
- DUMPED chocolate too hot → Let melted chocolate cool slightly before mixing to prevent seizing.
- OVER-TORCHED coconut → Keep an eye on coconut while toasting; remove once golden to avoid bitterness.
- MIXED ingredients in wrong order → Combine dry ingredients first, then add wet for smooth texture.
Quick fixes and pantry swaps
- When chocolate seizes, splash in a teaspoon of vegetable oil to rescue silky smoothness.
- If coconut burns quickly, patch with a sprinkle of sugar and lower oven heat to 160°C (320°F).
- Dumped the pan too full? Shield with foil and extend chilling time for better set.
- Over-baked coconut? Rescue by stirring into yogurt for a crunchy topping or snack.
- When bars crumble while cutting, chill longer or run the knife under warm water for cleaner slices.
Prep, store, and reheat tips
- Prepare the coconut mixture and melt the chocolate ahead of time; store in separate airtight containers in the fridge for up to 2 days. The aroma of toasted coconut and rich chocolate will intensify overnight.
- Assemble and press the bars into the pan a day before serving. Cover tightly with plastic wrap and refrigerate for up to 24 hours. The bars will firm up and become easier to cut.
- Store the finished bars in an airtight container in the fridge for up to a week. The coconut stays chewy and the chocolate remains glossy and crackly, with flavor deepening over time.
- Reheat gently in a warm (around 30°C/86°F) oven or microwave in short bursts to soften slightly. The bars will regain a lush, fudgy texture, and the coconut will smell toasted and inviting.
Top questions about chocolate coconut bars
1. How do I know when the bars are done?
Look for bars with a firm, crackly chocolate top and a chewy, slightly sticky coconut base. They should hold their shape without crumbling easily.
2. What texture should I expect?
They’re ready when the chocolate is glossy and set, and the coconut layer feels firm but not hard when pressed.
3. Can I use different chocolate types?
Use dark chocolate with at least 70% cocoa for a rich flavor. Milk chocolate will be sweeter and creamier, but less intense.
4. Should I toast the coconut?
Toast the coconut until golden and fragrant for extra flavor. If you skip toasting, it’ll be softer and less nutty in taste.
5. How long should I chill the bars?
Chill the bars for at least 2 hours to ensure they are firm and easy to cut. Letting them sit at room temperature for 5 minutes before slicing helps for cleaner edges.
6. Can I substitute the sweetener?
You can swap honey or maple syrup for agave syrup without much flavor change. Coconut sugar adds a caramel note but may make the mixture slightly drier.
7. How do I get clean slices?
Use a sharp knife wiped with warm water for clean cuts. Running the knife under warm water between slices prevents sticking and crumbling.
8. How should I store these bars?
Store leftovers in an airtight container in the fridge for up to a week. They’ll stay chewy and the chocolate glossy, with intensified flavor.
9. What if the chocolate seizes or cracks?
If the chocolate cracks or isn’t glossy, it might have overheated. Melting it gently and stirring regularly helps keep it smooth.
10. Any tips for melting chocolate smoothly?
When melting chocolate, use a double boiler or microwave in short bursts to avoid burning or seizing the chocolate.
These bars are a little nostalgic, a little indulgent, and honestly, a lot satisfying. The aroma of toasted coconut and melting chocolate fills the kitchen, reminding me why I keep coming back to this simple treat.
Whenever I make them, I feel a tiny bit of that childhood magic, but with a grown-up twist. They’re perfect for sharing, or just keeping around for those moments when a sweet, chewy bite is needed without fuss.

Hi, I’m Noah Bennett, the creator behind Breathing In Flavors. For me, cooking begins with a breath. Before the first bite, before the plating, before the garnish, there is that quiet moment when steam rises and you inhale. That is where flavor truly begins. Breathing In Flavors is my space to slow down, appreciate ingredients, and cook with awareness. I am so glad you’re here.
 The creator behind Breathing In Flavors.
For me, cooking begins with a breath. Before the first bite, before the plating, before the garnish, there is that quiet moment when steam rises and you inhale. That is where flavor truly begins.
Breathing In Flavors is my space to slow down, appreciate ingredients, and cook with awareness. I am so glad you’re here.
The creator behind Breathing In Flavors.
For me, cooking begins with a breath. Before the first bite, before the plating, before the garnish, there is that quiet moment when steam rises and you inhale. That is where flavor truly begins.
Breathing In Flavors is my space to slow down, appreciate ingredients, and cook with awareness. I am so glad you’re here.


