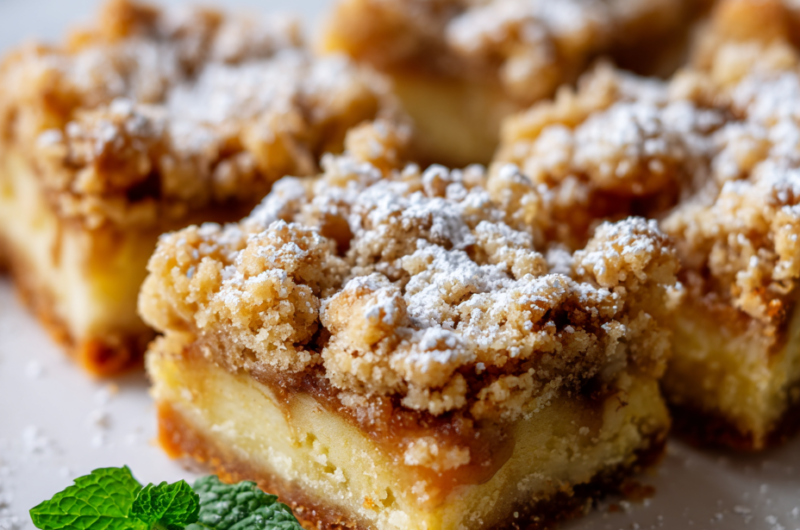
These Apple Crumble Bars are my go-to for those mornings when I need a sweet fix that’s quick to make and even quicker to disappear. The aroma of baked apples mingling with buttery crumble always feels like a warm hug after a long day. They’re my secret weapon for turning simple pantry ingredients into something special without a fuss.
What makes these bars stand out is how they manage to feel like a little piece of autumn in every bite, even if it’s not quite the season. I love making a batch on lazy weekends, knowing they’ll come in handy for breakfast, snacks, or when unexpected guests drop by. It’s honest baking—no fancy tricks, just good, honest comfort in every crumb.
Focusing on how these bars are my secret weapon for quick, comforting bites that taste like autumn in every crumb, perfect for busy mornings or unexpected guests.
The story behind this recipe
- This recipe was born out of a crowded weekend brunch, where I realized I needed something sweet but effortless to serve. The idea of combining my favorite apple crumble flavors into bars came from a messy kitchen experiment that turned into a hit. Now, it’s my go-to for those mornings when I want comfort without the fuss.
- I remember the first time I made these, I was chasing the last bits of caramelized apple aroma rising from the oven. It felt like capturing a little piece of autumn’s warmth, even in the middle of winter. Now, they’re a staple that always reminds me to keep it simple, honest, and a little cozy.
- heading: ‘The story behind this recipe’
Ingredient breakdown
- Apples: I prefer tart Granny Smiths—they give a lovely zing and hold up well in baking. Swap for Fuji if you want a sweeter bite that melts into the crumble.
- Brown Sugar: I like the deep caramel flavor it adds, especially when it crisps up. You can use coconut sugar for a slightly nuttier note, but it’ll change the color and moisture.
- Butter: I always use unsalted, real butter—it makes the crumble so tender and rich. For a dairy-free version, try coconut oil, but the texture might be a tad crumblier.
- Oats: Old-fashioned rolled oats give that hearty texture I love. Steel-cut oats are too tough here; stick to the traditional for that chew.
- Cinnamon: Just a pinch wakes up the apples with a warm, spicy aroma. Nutmeg or allspice can be nice tweaks, but don’t overdo it—these bars are about balance.
- Flour: All-purpose works best for the crumble. Whole wheat adds a nutty flavor but makes the topping denser—use a light hand if you prefer a delicate crunch.
- Lemon Juice: Brightens the apples and cuts through the sweetness. Skip it if you want a more mellow, caramelized flavor—though I recommend keeping it for that zing.
Spotlight on key ingredients
Apples:
- I prefer tart Granny Smiths—they give a lovely zing and hold up well in baking. Swap for Fuji if you want a sweeter bite that melts into the crumble.
- Brown Sugar: I like the deep caramel flavor it adds, especially when it crisps up. You can use coconut sugar for a slightly nuttier note, but it’ll change the color and moisture.
- Butter: I always use unsalted, real butter—it makes the crumble so tender and rich. For a dairy-free version, try coconut oil, but the texture might be a tad crumblier.
Brown Sugar:
- Oats: Old-fashioned rolled oats give that hearty texture I love. Steel-cut oats are too tough here; stick to the traditional for that chew.
- Cinnamon: Just a pinch wakes up the apples with a warm, spicy aroma. Nutmeg or allspice can be nice tweaks, but don’t overdo it—these bars are about balance.
- Flour: All-purpose works best for the crumble. Whole wheat adds a nutty flavor but makes the topping denser—use a light hand if you prefer a delicate crunch.
Notes for ingredient swaps
- Dairy-Free: Swap butter for coconut oil or vegan butter. Expect a slightly crumblier topping, but still delicious.
- Sweetener: Use maple syrup or honey instead of brown sugar for a richer, more complex sweetness.
- Gluten-Free: Replace all-purpose flour with almond flour or gluten-free baking blend. The texture will be slightly more delicate.
- Apple Varieties: Swap Granny Smiths for Honeycrisp or Fuji for a sweeter, juicier bite with less tartness.
- Oats: Oat flakes can be replaced with chopped nuts or seeds for crunch and flavor variation.
- Lemon Juice: Use apple cider vinegar for a subtle tang, but reduce the quantity to avoid overpowering the apples.
- Spices: Add ground ginger or cardamom for a warming spice boost that complements the apple flavor.
Equipment & Tools
- 9-inch square baking pan: To bake the bars evenly
- Parchment paper: For easy removal and cleanup
- Peeler and corer: To prepare the apples
- Mixing bowls: To combine ingredients
- Pastry cutter or fingers: To work in the butter into the dry ingredients
Step-by-step guide to apple crumble bars
- Preheat your oven to 180°C (350°F). Grease a 9-inch square baking pan or line it with parchment paper for easy removal.
- Peel, core, and dice about 3 large apples (about 3 cups). Toss them with 1 tablespoon lemon juice to prevent browning and add brightness.
- In a mixing bowl, combine 1 cup old-fashioned rolled oats, 1/2 cup brown sugar, 1/2 teaspoon ground cinnamon, and a pinch of salt. Stir together.
- Add 1/2 cup cold unsalted butter, cut into small pieces. Use your fingers or a pastry cutter to work the butter into the dry ingredients until crumbly but with some larger clumps.
- Spread the diced apples evenly in the prepared baking pan. Crumble the oat mixture over the apples, pressing lightly to adhere.
- Bake for 35-40 minutes, or until the topping turns golden brown and the apples are bubbly around the edges. The smell of cinnamon and baked apples should fill your kitchen.
- Check for doneness: the crumble should be crisp, and the apples should be tender when pierced with a fork. If the topping browns too quickly, tent with foil and continue baking.
- Remove from oven and allow to cool slightly in the pan for about 15 minutes. This helps the filling set and makes cutting easier.
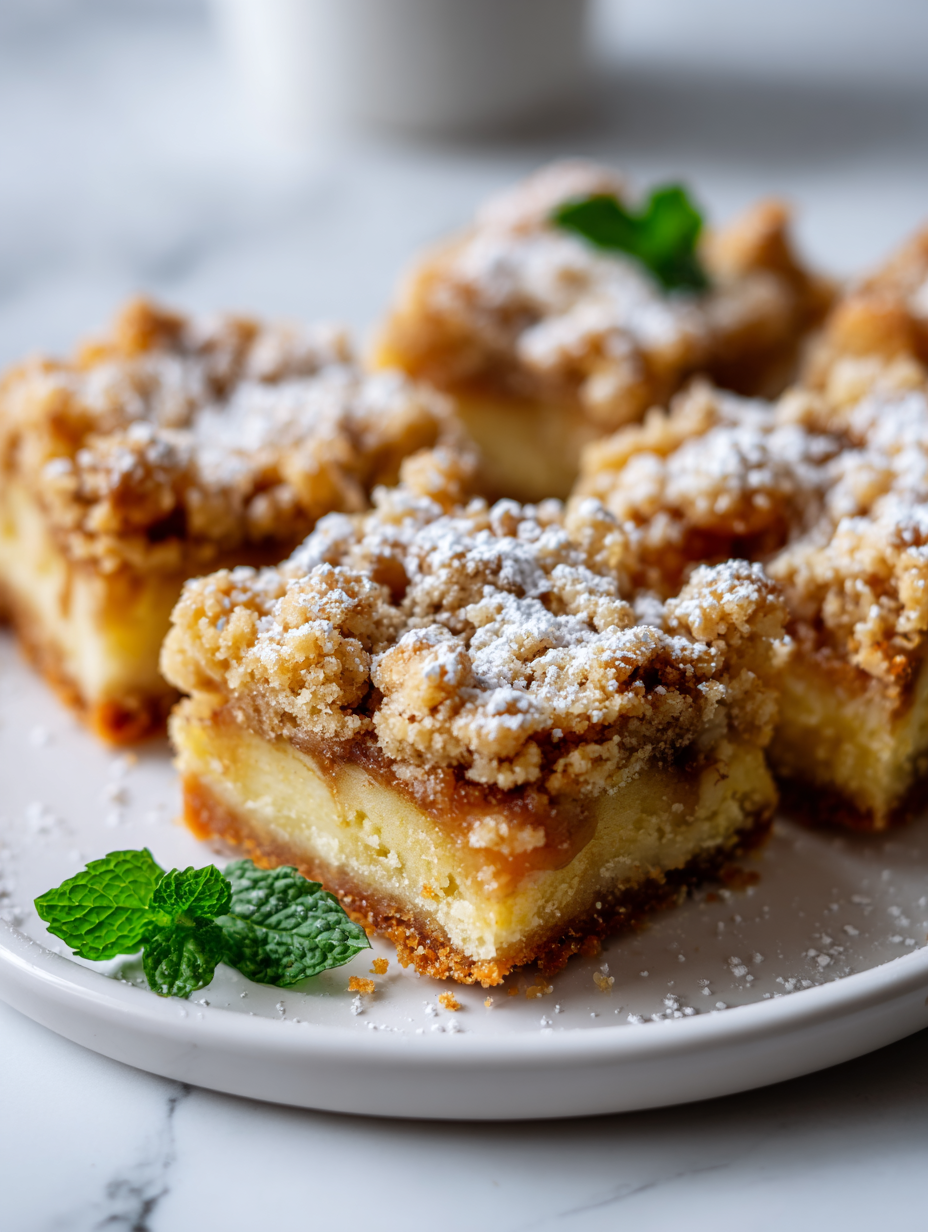
- Cut into squares or bars. Serve warm or at room temperature, maybe with a dollop of whipped cream or a scoop of vanilla ice cream if you’re feeling fancy.
Let the bars rest in the pan for 15 minutes to set before slicing. Serve warm or at room temperature. For cleaner cuts, use a sharp knife, wiping clean between slices.
How to Know It’s Done
- Golden brown topping with crisp texture
- Bubbly apple filling around the edges
- Apples tender when pierced with a fork
Apple Crumble Bars
Ingredients
Equipment
Method
- Peel, core, and dice the apples into small chunks, then toss them with lemon juice in a bowl. This keeps them from browning and adds a bright flavor.
- In a large mixing bowl, combine the oats, brown sugar, cinnamon, and flour. Mix well to evenly distribute the ingredients.
- Add the cold butter pieces to the dry mixture. Use your fingers or a pastry cutter to work the butter into the dry ingredients until the mixture resembles coarse crumbs, with some larger clumps for texture.
- Spread the diced apples evenly in the prepared baking pan, creating a layer that covers the bottom.
- Crumble the oat mixture over the apples, pressing it down lightly to ensure it sticks and forms an even topping.
- Bake in a preheated oven at 180°C (350°F) for 35-40 minutes, until the topping turns golden brown and the apples are bubbling around the edges, filling your kitchen with warm cinnamon and baked apple aroma.
- Remove the bars from the oven and let them cool in the pan for about 15 minutes, allowing the filling to set and making them easier to cut.
- Use a sharp knife to cut into squares or bars, wiping the knife clean between slices for neat edges. Serve warm or at room temperature, perhaps with a dollop of whipped cream or a scoop of vanilla ice cream for extra indulgence.
Pro tips for perfect apple crumble bars
- Keep butter very cold to create a crumbly, flaky topping that crisps up perfectly.
- Use a light hand when pressing the crumble over the apples to prevent it from becoming dense.
- Sprinkle a little extra cinnamon on top before baking for a fragrant, spicy aroma that wafts through your kitchen.
- For a more caramelized topping, broil the bars for 1-2 minutes at the end, watching closely to avoid burning.
- Chill the assembled bars in the fridge for 15 minutes before baking to help the crumble hold together better.
Common mistakes and how to fix them
- FORGOT to check oven temperature → Use an oven thermometer for accuracy.
- DUMPED the filling too early → Let it cool slightly to set before cutting.
- OVER-TORCHED the edges → Tent with foil if edges brown too quickly.
- MISSED mixing butter into crumbs → Work quickly to prevent melting; keep ingredients cold.
Quick fixes and pantry swaps
- When the bars stick, splash cold water on the edges and gently pry them loose.
- If the crumble is too soggy, patch with a sprinkle of extra oats and bake 5 more minutes.
- Over-baked edges shimmer with a dark hue—shield with foil to prevent burning while the center finishes.
- Forgot to chill the butter? Rescue by refrigerating the crumble before baking for crisper texture.
- Pan swap: use a glass dish instead of metal for even heat and a softer, less crispy topping.
Prep, store, and reheat tips
- Prepping the apples and crumble mixture a day ahead saves time; keep refrigerated in an airtight container to maintain freshness and prevent moisture absorption.
- Store baked bars in an airtight container at room temperature for up to 2 days; for longer storage, refrigerate for up to a week, but expect some moisture loss.
- Freezing: Wrap bars tightly in plastic wrap and foil, then freeze for up to 3 months. Thaw at room temperature before serving.
- Reheating: Warm in a low oven (around 150°C/300°F) for 10-15 minutes until the aroma of baked apples and cinnamon returns, and the crust feels crisp again.
Top questions about apple crumble bars
1. Can I use different types of apples?
Use tart apples like Granny Smith for a tangy contrast. Sweet varieties can be used, but they’ll be less tart and more dessert-like.
2. Can I make these bars vegan?
Yes, you can substitute coconut sugar for brown sugar. It adds a caramel note but may alter the moisture and color slightly.
3. How do I know when the bars are done?
Bake until the topping is golden brown and the apples are bubbling around the edges, about 35-40 minutes at 180°C (350°F).
4. How should I store leftovers?
Store in an airtight container at room temperature for up to 2 days, or refrigerate for longer storage. Reheat in the oven for crispness.
5. How do I get a flaky crumble topping?
Use cold butter and handle the crumble mixture quickly to keep it crumbly. Do not overmix; chunks are good.
6. Can I add other spices or flavors?
Add a pinch of cinnamon or nutmeg to the apple filling for extra warmth. For a spicy kick, sprinkle some ginger or allspice.
7. How do I get clean cuts?
Use a sharp knife to cut the bars, wiping clean between slices for neat edges. Let them cool slightly before slicing.
8. Can I freeze these bars?
Yes, freeze unbaked bars tightly wrapped in plastic and foil up to 3 months. Bake directly from frozen, adding a few minutes to the baking time.
9. What if the topping isn’t crispy?
If the topping isn’t crispy enough, broil for 1-2 minutes watching carefully. For softer topping, bake at a slightly lower temp longer.
10. What are signs the bars are fully baked?
When the apple filling is bubbling and the topping is golden brown, the bars are ready. Use your nose and eyes as guides.
These bars aren’t just a treat—they’re a little reminder that simple ingredients can come together to create something cozy and satisfying. Baking them fills the kitchen with the warm smell of baked apples and cinnamon, which somehow makes everything feel a bit more manageable. It’s a comfort I keep coming back to, especially when I need a quick moment of sweetness amidst chaos.
Maybe it’s the nostalgic aroma, or the way they crumble just right on the first bite, but these bars feel like a small, honest victory. Sharing them with friends or family turns a simple moment into something a little more memorable. Sometimes, that’s all a good bake needs—to slow down time, even just for a little while.

Hi, I’m Noah Bennett, the creator behind Breathing In Flavors. For me, cooking begins with a breath. Before the first bite, before the plating, before the garnish, there is that quiet moment when steam rises and you inhale. That is where flavor truly begins. Breathing In Flavors is my space to slow down, appreciate ingredients, and cook with awareness. I am so glad you’re here.
 The creator behind Breathing In Flavors.
For me, cooking begins with a breath. Before the first bite, before the plating, before the garnish, there is that quiet moment when steam rises and you inhale. That is where flavor truly begins.
Breathing In Flavors is my space to slow down, appreciate ingredients, and cook with awareness. I am so glad you’re here.
The creator behind Breathing In Flavors.
For me, cooking begins with a breath. Before the first bite, before the plating, before the garnish, there is that quiet moment when steam rises and you inhale. That is where flavor truly begins.
Breathing In Flavors is my space to slow down, appreciate ingredients, and cook with awareness. I am so glad you’re here.


