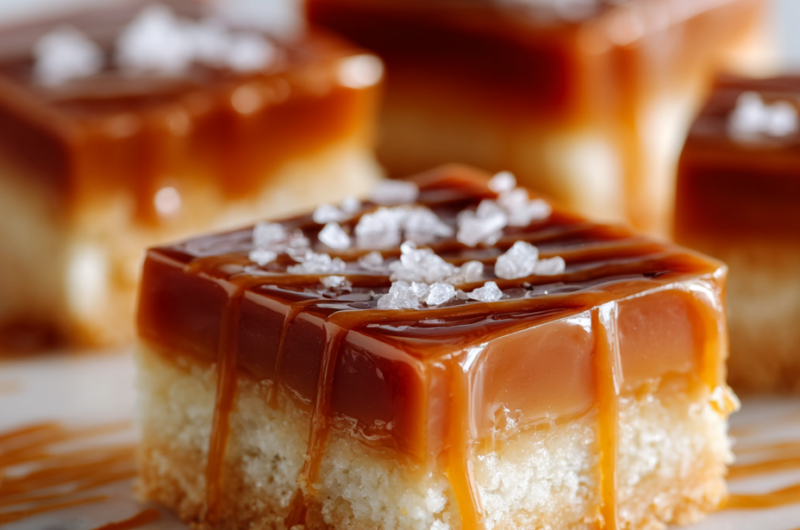
Caramel shortbread is one of those treats that feels like a little secret in every bite. There’s something about that perfect balance—crisp, buttery base, topped with a gooey, rich caramel—that makes it hard to stop at just one piece. I love how it’s simple enough to whip up in a weekend, but special enough to feel like a real indulgence.
What really draws me in is the way the textures play together. The crunch of the shortbread, giving way to that silky caramel layer, creates a satisfying contrast that keeps every bite interesting. It’s a reminder that sometimes, the most humble desserts can be turned into something extraordinary with just a little care.
This recipe is my go-to when I want a nostalgic, comforting treat. It’s a little messy to make, but that’s part of the charm—getting my hands sticky with caramel and feeling the warmth of melted butter. It’s a simple pleasure that always makes the kitchen smell like sweet, toasty sugar, and that’s hard to beat.
Focusing on the forgotten art of balancing richness and crunch in classic caramel shortbread, highlighting the homemade touch that elevates this humble treat into a nostalgic, crowd-pleasing dessert.
The story behind this recipe
This recipe came about after a lazy afternoon rummaging through my grandma’s old recipe box. I found a faded note tucked between hand-written pages, filled with scribbles and smudges, describing her way of making caramel that was just a touch smoky and perfectly sticky. I remember the smell of butter melting and sugar bubbling, a scent that instantly pulled me back to childhood afternoons in her warm kitchen. It’s funny how such simple ingredients can carry so many memories, turning a humble treat into something much more personal.
Key Ingredients and Tips
- Unsalted butter: I prefer the richness it adds, but salted butter can work if you want a hint of savory contrast; just cut back on added salt. The aroma of melting butter is my cue for starting the base.
- Sweetened condensed milk: It makes the caramel irresistibly gooey and deep in flavor. For a slightly lighter version, try coconut milk with a touch of sugar—just expect a different, more tropical sweetness.
- Dark chocolate: I love a splash of dark chocolate melted into the caramel for a bittersweet kick. Or skip it altogether if you want pure caramel bliss—sometimes simple is best.
- Flour: I use plain all-purpose flour for the shortbread, but if you’re gluten-free, almond flour gives a nutty, tender crumb. Watch for a light, golden color that signals it’s baked through.
- Golden syrup: It’s the secret to that shiny, chewy caramel. If unavailable, honey or corn syrup can mimic some of that gloss and stretch, but the flavor will shift slightly—more floral or neutral, respectively.
- Sea salt: Just a pinch sprinkled over the caramel enhances all the sweet and buttery notes. For a more complex flavor, try smoked sea salt—adds a subtle smoky depth that’s unexpectedly delicious.
- Vanilla extract: I always add a splash for warmth and depth. If you’re out, a tiny bit of vanilla bean paste or even almond extract can add a different fragrant layer.
Spotlight on key ingredients
Sweetened condensed milk:
- Its rich, sticky texture melts into a deep caramel, creating that luscious, chewy layer that defines this treat.
- The golden hue: When heated, it turns a warm amber, filling the kitchen with a sweet, toasty aroma that signals caramel perfection.
Unsalted butter:
- Melts smoothly, imparting a rich, buttery base that’s essential for that tender shortbread texture and warm aroma.
- The smell of melting butter: It’s the first sign to start your caramel, filling the room with a cozy, toasty scent that sparks anticipation.
Notes for ingredient swaps
- Dairy-Free: Swap butter for coconut oil or vegan butter. Expect a slightly different richness and a more coconut-forward flavor.
- Sweetened Condensed Milk: Use coconut milk with sugar simmered down until thick for a dairy-free caramel alternative.
- Chocolate: Replace dark chocolate with white chocolate or carob for a different flavor profile, but note the texture may vary slightly.
- Flour: Almond or oat flour can replace all-purpose flour for a nuttier or more tender crust, but might affect crispness.
- Golden Syrup: Honey or agave syrup can mimic the gloss and chewiness, but will add their distinctive floral or neutral notes.
- Sea Salt: Use flavored salts like smoked or Himalayan for an extra layer of depth, or omit if you prefer a purely sweet caramel.
- Vanilla Extract: Almond or maple extract can be interesting substitutes, each adding a unique aromatic twist.
Equipment & Tools
- Baking pan: To shape and bake the shortbread base and caramel layer.
- Mixing bowls: To combine dry ingredients and prepare mixtures.
- Pastry cutter or fingers: To cut in butter until crumbly for the shortbread.
- Saucepan: To cook the caramel layer on the stove.
- Spatula: To spread caramel evenly and smooth the base.
- Sharp knife: To slice the cooled, set caramel shortbread into squares.
- Parchment paper: For easy removal and clean edges.
Step-by-step guide to caramel shortbread
- Preheat your oven to 160°C (320°F). Line a 20cm (8-inch) square baking pan with parchment paper, leaving some overhang for easy removal.
- In a mixing bowl, combine 200g (1 1/2 cups) all-purpose flour, 100g (1/2 cup) sugar, and a pinch of salt. Mix well.
- Add 150g (2/3 cup) unsalted butter, cold and cubed. Rub in with your fingers or use a pastry cutter until the mixture resembles coarse crumbs.
- Press this shortbread mixture firmly into the prepared pan, spreading evenly. Bake for 20-25 minutes until golden around the edges. It should smell buttery and slightly toasted.
- While the base is baking, prepare the caramel layer. In a saucepan over medium heat, melt 100g (1/2 cup) unsalted butter. Add 150g (about 1/2 cup) golden syrup and 1 can (397g) sweetened condensed milk.
- Stir continuously until the mixture thickens and turns a rich, amber color, about 8-10 minutes. You’ll notice it bubbling and smelling caramelized.
- Once the shortbread base is out of the oven, pour the hot caramel over it immediately. Spread evenly with a spatula. Return to the oven for 10 minutes, or until the caramel is bubbling around the edges.
- Remove from oven and let it cool at room temperature for at least 30 minutes. Transfer to the fridge and chill for 2 hours until firm.
- For the finishing touch, melt 50g (1/4 cup) dark chocolate and drizzle over the cooled caramel layer. Let it set for about 15 minutes at room temperature.
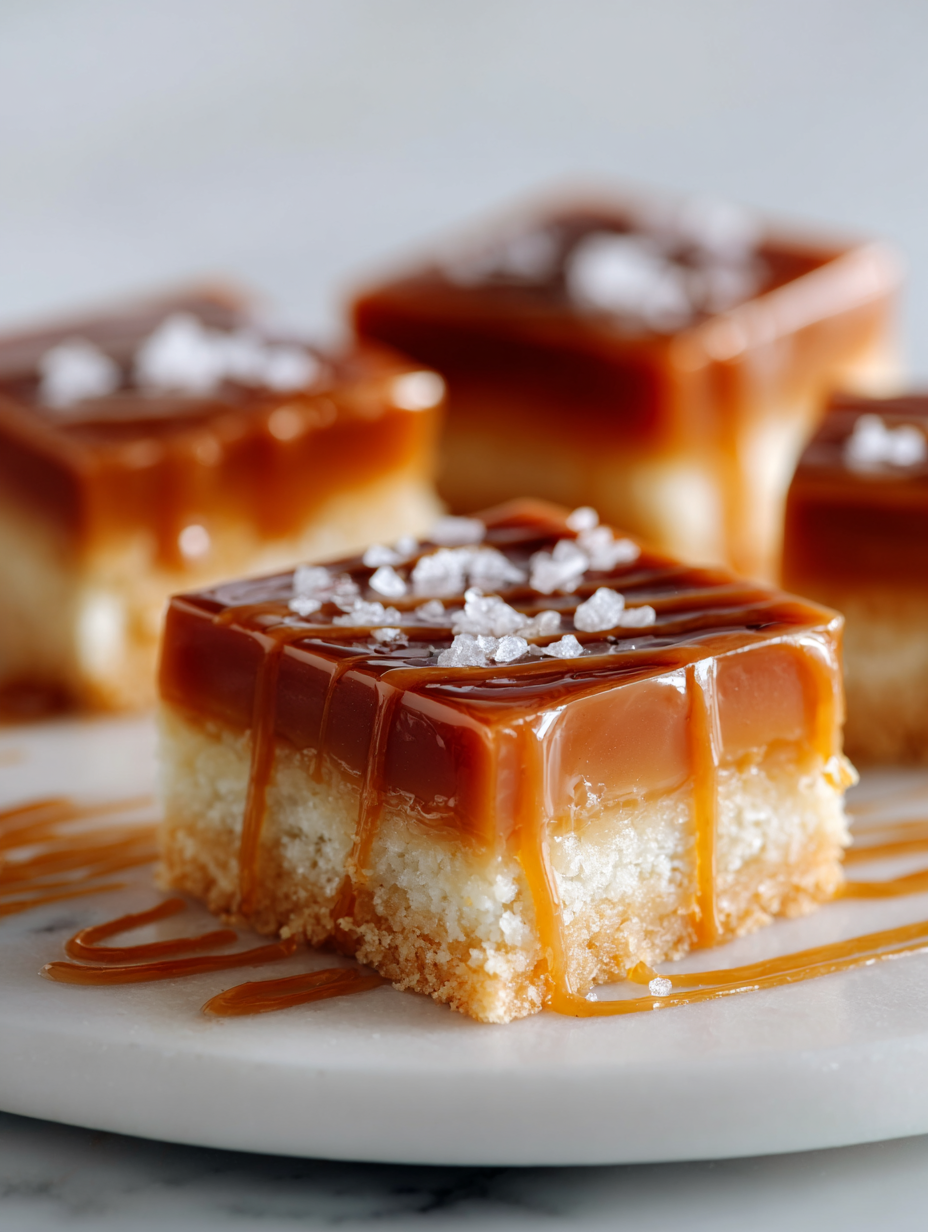
- Slice into squares using a sharp knife. The caramel should be gooey and sticky, encased in crisp shortbread. If it cracks, don’t worry; just patch with more chocolate or caramel.
Let the caramel shortbread cool at room temp, then chill in the fridge for 2 hours until firm. Slice into neat squares, drizzle with melted chocolate if desired, and serve directly from the fridge for the best gooey texture.
How to Know It’s Done
- The shortbread should be golden and firm around the edges before adding caramel.
- Caramel should be thick, shiny, and bubbling gently when poured over the base.
- The finished squares should hold together, with caramel that’s soft but not runny, and a crisp base.
Caramel Shortbread
Ingredients
Equipment
Method
- Preheat your oven to 160°C (320°F). Line a square baking pan with parchment paper, leaving some overhang for easy removal.
- In a mixing bowl, combine the flour, sugar, and a pinch of salt, then stir until evenly mixed.
- Add the cold, cubed butter to the dry mixture. Rub in with your fingers or a pastry cutter until the mixture resembles coarse crumbs, and starts to clump together.
- Press this buttery crumb mixture firmly into the prepared pan, spreading it out evenly with your hands or a spatula. Bake for 20-25 minutes until golden around the edges and fragrant with toasted butter aroma.
- While the base cools slightly, pour the golden syrup into a saucepan over medium heat. Add the sweetened condensed milk and melted butter (if cooled slightly), stirring constantly.
- Cook the mixture, stirring continuously, until it thickens and turns a deep amber color, about 8-10 minutes. It will bubble and smell sweet and caramelized.
- Once the shortbread base is baked and slightly cooled, pour the hot caramel evenly over it. Use a spatula to spread it out smoothly.
- Return the pan to the oven and bake for an additional 10 minutes until the caramel is bubbling around the edges, filling the kitchen with a warm, sweet aroma.
- Remove the pan from the oven and let it cool at room temperature for about 30 minutes. Then, transfer it to the fridge and chill for at least 2 hours until the caramel is firm and set.
- Meanwhile, melt the dark chocolate in a microwave or double boiler until smooth. Drizzle it over the cooled caramel layer in a zigzag pattern for a decorative touch.
- Once the chocolate is set, use a sharp knife to slice the caramel shortbread into squares. Serve chilled or at room temperature, enjoying the crunchy base with the gooey caramel and chocolate topping.
Tips for perfect caramel shortbread
- Bolded mini-head: Use a light hand when pressing the shortbread base to keep it tender and crumbly.
- Bolded mini-head: Keep a close eye on the caramel as it bubbles; it can go from perfect to burnt quickly.
- Bolded mini-head: For an extra glossy caramel, add a tiny pinch of baking soda at the end—watch it foam up!
- Bolded mini-head: Chill your caramel shortbread thoroughly before slicing to prevent it from cracking or melting.
- Bolded mini-head: When drizzling chocolate, do it while the caramel is just set but still slightly warm for better adhesion.
- Bolded mini-head: If the caramel is too thick to pour, gently rewarm it over low heat until smooth and shiny.
- Bolded mini-head: Use a sharp knife dipped in hot water to get clean, precise cuts through the caramel layer.
Common mistakes and how to fix them
- FORGOT to preheat oven → Always preheat for even baking and better texture.
- DUMPED caramel too hot → Let it cool slightly for smooth pouring and avoiding burns.
- OVER-TORCHED caramel → Remove from heat immediately; it should be golden, not burnt.
- FAILED to chill enough → Chill at least 2 hours for clean slicing and firm caramel.
Quick fixes for caramel shortbread
- When caramel is too thick, splash in a tiny bit of hot water to loosen it up.
- If caramel crystallizes, patch with a small amount of hot cream and stir vigorously.
- Splash a few drops of vinegar if caramel becomes overly bitter or burnt-smelling during cooking.
- When shortbread cracks while slicing, shield it with a warm, damp cloth for a cleaner cut.
- DUMPED caramel too cold and firm? Warm it gently over low heat until it shimmers and flows smoothly.
Prep, store, and reheat tips
- Prepare the shortbread base and bake it a day ahead. Once cooled, store in an airtight container at room temperature for up to 2 days, which helps develop a slightly richer flavor as the butter firms up.
- Make the caramel layer a day in advance if desired. Keep it covered and refrigerated; it will thicken further, so warm gently before pouring over the shortbread for a silky texture.
- Chill the assembled caramel shortbread in the fridge for at least 2 hours or overnight. The cold helps the caramel set fully, making slicing cleaner and the texture firmer.
- Reheat slices slightly in a warm oven (around 80°C/175°F for 5 minutes) or microwave just until the caramel softens and becomes gooey again—watch for melty edges and a warm smell.
- Shelf life: Stored properly in an airtight container in the fridge, caramel shortbread keeps well for up to 5 days. The flavors deepen slightly, and the texture remains satisfying—crisp base, soft caramel.
- For longer storage, freeze individual slices wrapped tightly in plastic wrap and foil. Thaw at room temperature; the caramel may be a bit softer but still delicious.
Top questions about caramel shortbread
1. How do I know when the shortbread is baked enough?
Look for a golden, firm base that smells buttery and toasted, about 20-25 minutes baking.
2. What should the caramel look and feel like when ready?
Aim for a thick, shiny caramel that bubbles gently when poured; it should be smooth and pourable but thickened.
3. How long should I chill the caramel shortbread?
Chill the assembled dessert in the fridge for at least 2 hours; it helps the caramel set and makes slicing easier.
4. Can I use different types of chocolate?
Use dark chocolate for a rich, bitter contrast. White chocolate adds sweetness; both melt well over the caramel.
5. How should I store leftover caramel shortbread?
Store in an airtight container at room temperature for 2 days, or refrigerate for up to 5 days; reheat slices slightly before serving if needed.
6. What if my caramel crystallizes or becomes grainy?
If caramel crystallizes, add a splash of hot cream and stir vigorously to smooth it out again.
7. How can I get neat slices without cracking the caramel?
Use a sharp, warm knife for clean cuts; dip the blade in hot water and wipe dry between slices.
8. My caramel is too thick, what do I do?
If the caramel is too thick to pour, gently rewarm it over low heat until it shimmers and flows smoothly.
9. Can I tweak the salt or butter in the recipe?
Use salted butter or add a pinch of sea salt to enhance the caramel’s richness and balance the sweetness.
10. Can I freeze caramel shortbread?
Yes, you can freeze individual slices wrapped tightly; thaw at room temperature for a soft, gooey treat.
Making caramel shortbread feels like a small act of rebellion—breaking away from perfect, polished desserts to embrace sticky fingers and warm kitchens. Every bite is a reminder that some of the best treats are the simplest, with just the right balance of crunch and chew. It’s a sweet, honest indulgence that’s perfect for sharing or keeping all to yourself.
In a world of fleeting trends, this recipe stays steady—comforting, nostalgic, and undeniably satisfying. Whether it’s a lazy weekend project or a quick fix for unexpected guests, it’s a classic that never lets you down. Sometimes, all you need is a good caramel and a little butter to make everything feel right.

Hi, I’m Noah Bennett, the creator behind Breathing In Flavors. For me, cooking begins with a breath. Before the first bite, before the plating, before the garnish, there is that quiet moment when steam rises and you inhale. That is where flavor truly begins. Breathing In Flavors is my space to slow down, appreciate ingredients, and cook with awareness. I am so glad you’re here.
 The creator behind Breathing In Flavors.
For me, cooking begins with a breath. Before the first bite, before the plating, before the garnish, there is that quiet moment when steam rises and you inhale. That is where flavor truly begins.
Breathing In Flavors is my space to slow down, appreciate ingredients, and cook with awareness. I am so glad you’re here.
The creator behind Breathing In Flavors.
For me, cooking begins with a breath. Before the first bite, before the plating, before the garnish, there is that quiet moment when steam rises and you inhale. That is where flavor truly begins.
Breathing In Flavors is my space to slow down, appreciate ingredients, and cook with awareness. I am so glad you’re here.


