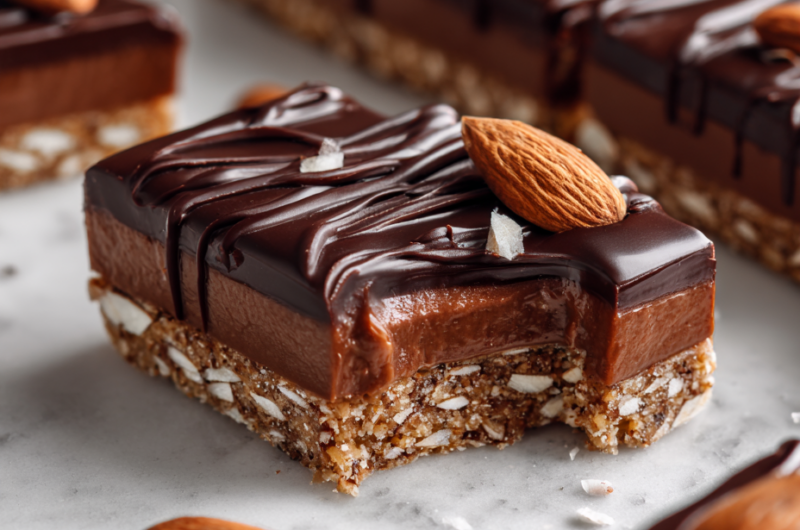
What draws me to these chocolate almond bars is the unexpected crunch that comes from the buttery base, which contrasts so beautifully with the rich, gooey chocolate topping. It’s like a little textural surprise in every bite, almost like a mini adventure for your mouth. I’ve made these so many times that I can almost do it on autopilot, but the way the layers come together still makes me smile.
This recipe is my go-to when I want something satisfying but not overly complicated. The process is straightforward, but the result feels fancy enough to share at a casual get-together or just keep for myself on a lazy weekend. The smell of toasted almonds and melting chocolate filling the kitchen is what makes it all worth it, a comforting promise of good things to come.
Focusing on the surprising texture contrast between a crisp, buttery base and gooey, rich chocolate almond topping that makes every bite a sensory adventure.
The story behind this recipe
- This recipe started as a way to use up leftover toasted almonds and a sudden craving for something crunchy and chocolatey. One afternoon, I threw together a quick base, melted some good dark chocolate, and sprinkled almonds on top—almost by accident, it became a favorite. Now, I keep these bars in the fridge for when I need a little something to brighten a dull afternoon.
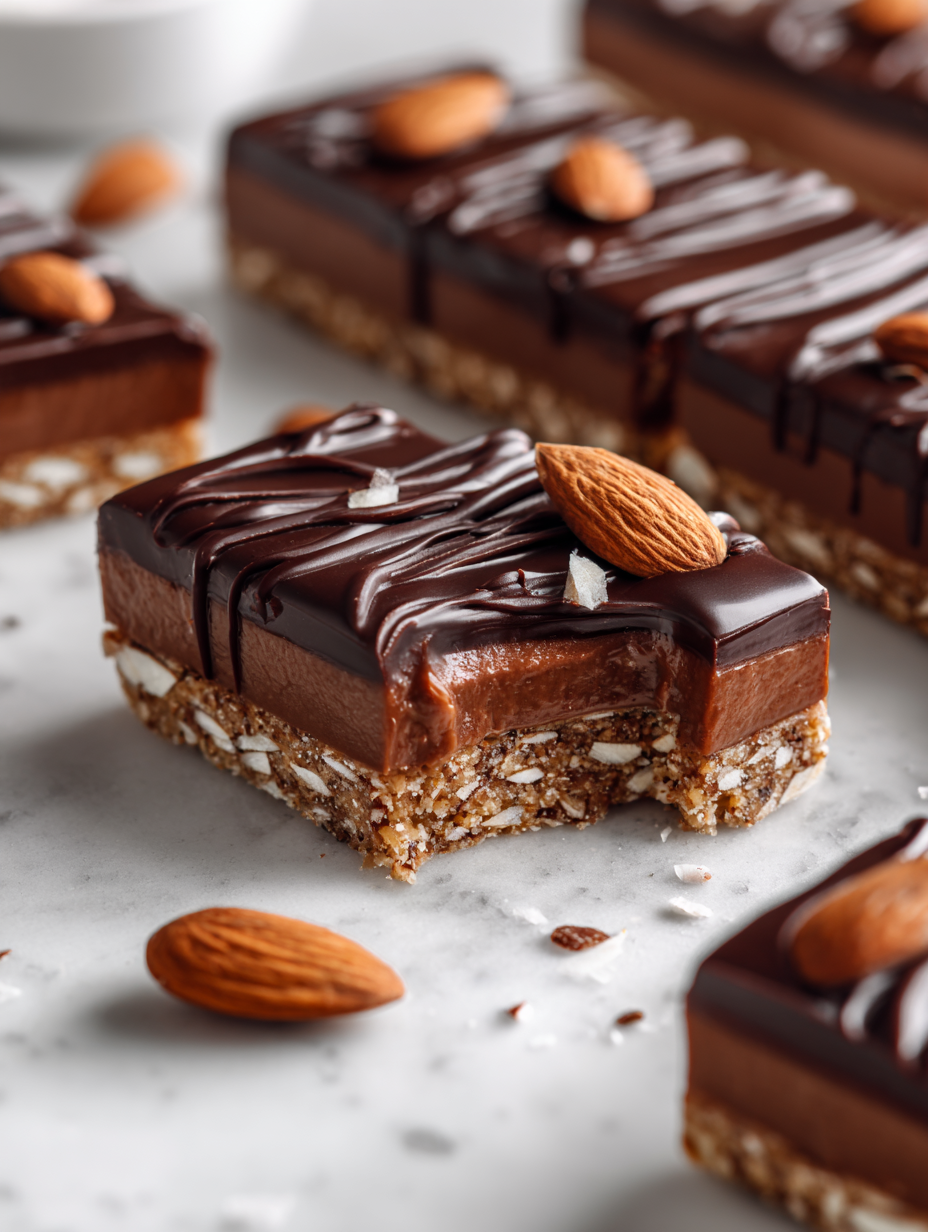
- What keeps me coming back is the way the crispy base plays against the gooey chocolate topping, creating a satisfying contrast that’s both nostalgic and exciting. Each batch feels like a little experiment—sometimes I add a pinch of sea salt on top, other times extra almonds for crunch. It’s one of those recipes that feels like a cozy secret I can’t wait to share with friends.
- heading: ‘The story behind this recipe’
Ingredient breakdown: key components
- Unsalted butter: I use melted butter to create a tender, slightly flaky base that melts in your mouth, but feel free to swap in coconut oil for a dairy-free version that still crisps up nicely.
- Granulated sugar: I prefer a touch more sugar for a subtle sweetness that balances the almonds and chocolate. Cut back if you want a less sweet bar, but don’t skip it entirely.
- All-purpose flour: I rely on regular flour for structure, but almond flour can add extra nuttiness if you want a richer, gluten-free option—just expect a slightly denser crust.
- Toasted almonds: The key is to toast them until they’re fragrant and golden—this boosts their flavor and adds a satisfying crunch. If you’re in a rush, use pre-toasted, but toast fresh almonds for maximum aroma.
- Dark chocolate: I love a semi-sweet or bittersweet bar melted into the topping—look for one with a good snap. For a milkier flavor, swap in milk chocolate, but it’ll be sweeter and creamier.
- Honey or maple syrup: I drizzle a bit into the chocolate for depth and gloss—use maple for a smoky, earthy note or honey for floral sweetness. Adjust to taste for your preferred richness.
- Sea salt flakes: A sprinkle on top elevates the chocolate and almonds, adding a burst of savory contrast. Skip if you prefer sweeter, more subdued bars, but trust me, it’s worth it.
Spotlight on key ingredients
Almonds:
- Toasted almonds: I toast them until they’re golden and fragrant, which amplifies their nutty aroma and adds a satisfying crunch. Skip this step if you’re in a rush, but fresh-toasted makes a real difference.
- Dark chocolate: I prefer a semi-sweet or bittersweet bar with a good snap. As it melts, it develops a glossy sheen and rich aroma that’s almost intoxicating. Use good quality chocolate for that melt-in-your-mouth feel.
Chocolate:
- Butter: I melt it gently to keep the base tender and flaky, with a subtle richness. Using unsalted butter lets the almonds and chocolate shine, but you can swap in coconut oil for a dairy-free twist that crisps up nicely.
- As it melts, it becomes velvety and fragrant, filling the kitchen with a deep cocoa smell. When cooled, it sets into a shiny, firm layer that snaps cleanly.
Notes for ingredient swaps
- Dairy-Free: Coconut oil replaces butter for a slightly sweeter, tropical flavor and crispier crust.
- Sweetener: Maple syrup can be used instead of honey for a smoky, earthy sweetness, though it may alter the texture slightly.
- Flour: Almond flour adds nuttiness and gluten-free appeal, but expect a denser, richer crust with a more crumbly texture.
- Chocolate: Carob chips make a good non-cocoa alternative, with a milder flavor and slightly different melt-in texture.
- Nuts: Pecans or hazelnuts can stand in for almonds, offering different aromatic notes and crunch levels.
- Salt: Flaked sea salt on top is classic, but smoked salt adds an intriguing depth, especially with dark chocolate.
- Sweet Add-ins: Dried cherries or cranberries can be stirred into the chocolate layer for a tart contrast.
Equipment & Tools
- 9×9 inch baking pan: Holds the crust and chocolate topping, easy to lift out.
- Parchment paper: Prevents sticking and makes removal easier.
- Saucepan: Melts butter and chocolate evenly.
- Spatula: Spreads chocolate and presses crust evenly.
- Knife: Cuts the bars cleanly without crushing.
- Baking sheet: To toast almonds evenly.
Step-by-step guide to Chocolate Almond Bars
- Equipment ready: line a 9×9 inch (23×23 cm) baking pan with parchment paper, ensuring edges hang over for easy removal.
- Preheat your oven to 175°C (350°F). Toast the almonds on a baking sheet for 8-10 minutes until fragrant, then let cool and chop roughly.
- Melt the butter in a small saucepan over medium heat. Once melted, remove from heat and stir in sugar and a pinch of salt until combined.
- In a mixing bowl, whisk together the flour and a pinch of salt. Pour in the melted butter mixture and stir until just combined into a crumbly dough.
- Press this dough evenly into the prepared pan, smoothing out the top with the back of a spatula. Bake for 15-18 minutes, until golden at the edges. Let cool slightly.
- While the base cools, melt the dark chocolate with a teaspoon of butter or oil in a heatproof bowl over simmering water (or microwave at 30-second intervals). Stir until smooth.
- Spread the melted chocolate over the cooled crust, using a spatula for an even layer. Sprinkle the toasted almonds generously on top while the chocolate is still warm.
- Allow the bars to set at room temperature for about 30 minutes, then refrigerate for at least 2 hours until firm and glossy.
- Once set, lift the bars out of the pan using the parchment overhang. Cut into squares or rectangles with a sharp knife. Serve chilled or at room temperature.
Let the bars cool completely, then chill in the fridge for at least 2 hours. Use the parchment overhang to lift, then cut into squares. Serve chilled or at room temperature for best texture.
How to Know It’s Done
- Crust is golden and firm, not pale or soggy.
- Chocolate layer is glossy, smooth, and set without streaks.
- Almonds are toasted and fragrant, not burnt or underdone.
Chocolate Almond Bars
Ingredients
Equipment
Method
- Line your baking pan with parchment paper, letting the edges overhang for easy removal.
- Toast the almonds in the oven at 175°C (350°F) for 8-10 minutes until fragrant and golden. Let them cool, then roughly chop.
- In a saucepan, melt the butter over medium heat until melted and fragrant, then remove from heat.
- Stir in the sugar and a pinch of salt into the melted butter until well combined; the mixture should be smooth and slightly glossy.
- In a mixing bowl, whisk together the flour and a pinch of salt, then pour in the butter mixture, stirring until it forms a crumbly dough.
- Press this dough evenly into the prepared pan, smoothing the surface with the back of a spatula for an even layer.
- Bake the crust for 15-18 minutes until golden at the edges. Remove from oven and let cool slightly.
- While the crust cools, melt the dark chocolate with a teaspoon of butter or oil in a heatproof bowl over simmering water or in short bursts in the microwave, stirring until smooth and glossy.
- Pour and spread the melted chocolate evenly over the cooled crust using a spatula.
- Sprinkle the toasted almonds generously over the warm chocolate layer, pressing them slightly into the surface for adhesion.
- Sprinkle a pinch of sea salt flakes on top, then let the bars set at room temperature for about 30 minutes, or refrigerate for 2 hours until firm and glossy.
- Use the parchment edges to lift the bars out of the pan, then cut into squares with a sharp knife. Serve chilled or at room temperature and enjoy!
Pro tips for perfect bars
- Bolded mini-head: Use room temperature butter to ensure a smooth, even base that crisps up perfectly.
- Bolded mini-head: Toast almonds until fragrant and golden—this intensifies their nutty aroma and adds crunch.
- Bolded mini-head: Melt chocolate slowly over low heat or in short bursts in the microwave—avoid scorching for glossy finish.
- Bolded mini-head: Press the crust mixture firmly into the pan for an even layer—use the bottom of a glass to smooth it out.
- Bolded mini-head: Chill the finished bars thoroughly—at least 2 hours—to allow the chocolate to set fully and cut cleanly.
- Bolded mini-head: Sprinkle flaky sea salt on the chocolate just before it sets—this contrast heightens flavor and adds shimmer.
- Bolded mini-head: Keep an eye on the oven during toasting—almonds can go from perfect to burnt quickly—set a timer.
Common mistakes and how to fix them
- FORGOT to check oven temperature → Use an oven thermometer for accuracy.
- DUMPED sugar directly into hot butter → Mix sugar into cooled butter to prevent clumping.
- OVER-TORCHED chocolate → Remove from heat immediately if it starts to burn or turn grainy.
- MISSED to cool the base before adding chocolate → Allow crust to cool slightly to prevent melting the chocolate.
Quick fixes and pantry swaps
- When the chocolate seizes, splash a few drops of warm cream to smooth it out.
- If the almonds burn during toasting, quickly transfer to a paper towel and cover to stop cooking.
- DUMPED too much salt on top? Quickly brush off excess with a clean, dry brush for a balanced flavor.
- Overbaked crust? Patch with a small piece of fresh dough and press down to even it out.
- Shield the bars with foil if they start to crack or over-torched, preventing further browning.
Prep, store, and reheat tips
- Pre-chop and toast almonds a day ahead; store in an airtight container to keep them crunchy and fragrant.
- The crust can be assembled and baked up to 2 days in advance; cool completely before wrapping tightly and refrigerating.
- Chocolate topping can be melted and prepared 1 day ahead; keep in a covered container at room temperature, gently rewarm if needed.
- Bars will keep well in an airtight container at room temperature for up to 3 days, or in the fridge for up to a week, with flavors mellowing slightly over time.
- Reheat slices briefly in a low oven (around 150°C/300°F) for 5-8 minutes until warm and the chocolate softens slightly, releasing a rich cocoa aroma.
Top questions about Chocolate Almond Bars
1. What kind of chocolate should I use?
Look for a chocolate bar with a good snap and deep cocoa aroma. It melts smoothly and sets glossy.
2. Can I substitute other nuts?
Use fresh, toasted almonds for the best crunch and nutty flavor. They should smell fragrant and be golden.
3. Is there a dairy-free option?
Yes, you can swap butter for coconut oil, but expect a slightly different texture and a hint of coconut flavor.
4. How long should I chill the bars?
Refrigerate the bars for at least 2 hours until the chocolate is firm and shiny before slicing.
5. What if my chocolate doesn’t melt smoothly?
If the chocolate seizes or becomes grainy, add a splash of warm cream and stir until smooth.
6. How do I avoid a soggy base?
To prevent a soggy crust, bake until golden and let it cool completely before adding the chocolate topping.
7. Can I skip the salt?
Use flaky sea salt on top just before the chocolate sets to enhance flavor contrast and add shimmer.
8. How long do these bars last?
You can store the bars in an airtight container at room temperature for 2-3 days or in the fridge for a week.
9. What if the crust is overbaked?
To fix over-baked crust, gently patch with fresh dough and press down to even it out.
10. How do I reheat without ruining the texture?
When reheating, warm slices in a low oven for 5-8 minutes until the chocolate softens and releases a rich aroma.
These chocolate almond bars feel like a cozy secret—flaky crust, rich chocolate, and toasted almonds in every bite. They’re perfect for sharing, but honestly, I keep some in the fridge for when I need a quick pick-me-up. Nothing beats the smell of melting chocolate and toasted nuts filling the kitchen.
In a busy week, these bars remind me that good things come from simple ingredients and a little patience. They’re not fancy, but they carry a lot of warmth and nostalgia, especially when served with a cup of coffee or tea. Just a little treat that makes the day a bit sweeter.

Hi, I’m Noah Bennett, the creator behind Breathing In Flavors. For me, cooking begins with a breath. Before the first bite, before the plating, before the garnish, there is that quiet moment when steam rises and you inhale. That is where flavor truly begins. Breathing In Flavors is my space to slow down, appreciate ingredients, and cook with awareness. I am so glad you’re here.
 The creator behind Breathing In Flavors.
For me, cooking begins with a breath. Before the first bite, before the plating, before the garnish, there is that quiet moment when steam rises and you inhale. That is where flavor truly begins.
Breathing In Flavors is my space to slow down, appreciate ingredients, and cook with awareness. I am so glad you’re here.
The creator behind Breathing In Flavors.
For me, cooking begins with a breath. Before the first bite, before the plating, before the garnish, there is that quiet moment when steam rises and you inhale. That is where flavor truly begins.
Breathing In Flavors is my space to slow down, appreciate ingredients, and cook with awareness. I am so glad you’re here.


