Corn muffins often get a reputation as a basic side, but I see them as a blank slate for bold, unexpected flavors. Adding roasted poblano or a squeeze of lime can turn a simple muffin into a vibrant snack or breakfast. It’s about playing with what’s in your fridge and making each batch uniquely yours.
I love the way corn muffins hold a bit of rustic charm, but also invite experimentation. Sometimes I toss in a handful of shredded cheese or chopped herbs—whatever feels right that day. It’s a forgiving recipe that rewards a bit of creativity and a willingness to try new twists.
Focusing on how corn muffins can be a canvas for unexpected flavors—like adding roasted poblano or a hint of lime—turning a simple comfort food into a vibrant, customizable snack.
Unexpected flavor twists in corn muffins
- Making these muffins feels like a small act of rebellion, turning simple ingredients into something unexpectedly delightful.
- I remember the first time I added a dash of smoked paprika—it transformed the flavor and made me realize how flexible this recipe truly is.
- Baking these muffins always brings back memories of lazy weekend mornings, the smell filling the house with a cozy, comforting aroma.
- There’s a quiet pride in pulling a batch from the oven, knowing I tweaked the ingredients just right for that perfect crumb.
The story behind this recipe
- This recipe came about one rainy afternoon when I found a bag of old dried cornmeal in the back of my pantry. I remembered how my grandma used to make cornbread for Sunday dinners, but I wanted to create something quicker and more snackable. These muffins are a nod to those cozy childhood memories, but packed with my own twists.
- I started experimenting with adding a little honey for depth and a splash of buttermilk to keep them moist. The first batch was a bit dense, but the smell of toasted corn and butter wafting through the kitchen kept me going. Over time, I tweaked the ratios and found that a quick mix and high heat give the best rise and crust.
- Baking these feels like a small act of reclaiming simple ingredients—cornmeal, eggs, a touch of fat—and turning them into something warm and satisfying. They remind me that comfort food doesn’t have to be complicated, just honest and well-loved.
Corn Muffins History & Trivia
- Corn muffins have roots in Native American cuisine, where dried corn was ground into meal for early settlers.
- The tradition of baking cornbread in the South evolved into the classic muffin form as a portable, quick snack.
- Adding ingredients like cheese or jalapeños to corn muffins became popular in the early 20th century, blending regional flavors.
- Cornmeal’s popularity surged during the Great Depression as a cheap, filling staple for many families.
- The term ‘muffin’ in the U.S. was borrowed from British baking, but corn muffins are distinctly American comfort food.
Key Ingredients Breakdown
- Cornmeal: I prefer a coarser grind for texture, but you can use fine if you like a softer crumb. The coarse grind gives a nutty crunch with each bite.
- Baking Powder: This is your leavening hero—make sure it’s fresh. It helps the muffins puff up and develop that light, tender crumb I love.
- Buttermilk: Adds a tang and keeps the muffins moist. If you don’t have any, a splash of whole milk with a tiny squeeze of lemon works almost as well.
- Eggs: They give structure and richness. I find that using large eggs makes the muffins sturdy but not heavy—less is more here.
- Sweetener: A touch of honey or sugar balances the savory corn. I often add just enough to hint at sweetness without overpowering the corn flavor.
- Fat: Melted butter is my go-to for flavor and moistness. If you want a lighter muffin, substitute with a neutral oil, but don’t skip the butter in the mix.
- Optional Add-ins: Cheese, chili, herbs—whatever you love. Just fold them in gently to keep the muffins airy and avoid sinking to the bottom.
Spotlight on key ingredients
Cornmeal:
- I prefer a coarser grind for texture, but you can use fine if you like a softer crumb. The coarse grind gives a nutty crunch with each bite.
- Baking Powder: This is your leavening hero—make sure it’s fresh. It helps the muffins puff up and develop that light, tender crumb I love.
Buttermilk:
- Adds a tang and keeps the muffins moist. If you don’t have any, a splash of whole milk with a tiny squeeze of lemon works almost as well.
- Eggs: They give structure and richness. I find that using large eggs makes the muffins sturdy but not heavy—less is more here.
Notes for ingredient swaps
- Dairy-Free: Swap buttermilk for almond or coconut milk mixed with a teaspoon of lemon juice. Keeps moisture but loses tang.
- Gluten-Free: Use a blend of rice and tapioca flours instead of all-purpose flour. Expect a slightly denser crumb.
- Vegan: Replace eggs with flaxseed meal (1 tablespoon flaxseed + 3 tablespoons water per egg). Adds nuttiness and binding.
- Sweetener: Honey or maple syrup can replace sugar for a richer, more complex sweetness, but may affect moisture.
- Fat: Olive oil or neutral oil can substitute melted butter. Muffins will be a little lighter and less flavorful.
- Cornmeal: Use finely ground cornmeal for a softer texture or opt for a coarser grind for more crunch and rustic feel.
- Add-ins: Fresh herbs, shredded cheese, or chopped chilies—customize to your taste, just fold gently to keep air in the batter.
Equipment & Tools
- Oven: To bake the muffins at a consistent temperature.
- Muffin tin or paper liners: To shape and hold the muffins during baking.
- Mixing bowls: To combine dry and wet ingredients separately.
- Whisk or fork: To beat eggs and mix ingredients thoroughly.
- Spatula: To fold ingredients gently without deflating the batter.
- Toothpick or skewer: To test the doneness of the muffins.
- Wire rack: To cool the muffins evenly after baking.
Step-by-step guide to corn muffins
- Preheat your oven to 220°C (425°F). Lightly grease a 12-cup muffin tin or line with paper liners. Set aside.
- In a large mixing bowl, whisk together 1 cup of cornmeal, 1 cup of all-purpose flour, 1 tablespoon of baking powder, and 1/2 teaspoon of salt. This creates your dry base.
- In a separate bowl, beat 2 large eggs until slightly frothy, then stir in 1/2 cup of melted butter and 1/2 cup of buttermilk. Whisk until combined; the mixture should be smooth and slightly bubbly.
- Pour the wet ingredients into the dry ingredients. Gently fold together with a spatula until just combined. Do not overmix; lumps are okay, but no streaks of flour.
- If adding extras like shredded cheese, chopped chili, or herbs, fold them in now. Distribute the batter evenly among the muffin cups, filling each about 2/3 full.
- Bake in the preheated oven for 15–18 minutes. The tops should turn golden, and a toothpick inserted in the center comes out clean. The muffins will rise and develop a crispy crust.
- Once baked, remove from the oven and let the muffins rest in the tin for 5 minutes. Transfer to a wire rack to cool slightly, about 5–10 minutes, for easier handling.
- Serve warm or at room temperature. For best flavor, enjoy within the first day, but they keep well for up to 2 days in an airtight container. Reheat in a 180°C (350°F) oven for 5 minutes until warm and fragrant.
Let the muffins rest in the tin for 5 minutes, then transfer to a wire rack. Serve warm or at room temperature, preferably within a day for the best texture and flavor.
How to Know It’s Done
- Muffins are golden brown and slightly crispy on top.
- A toothpick inserted in the center comes out clean.
- Muffins feel firm but spring back when gently pressed.
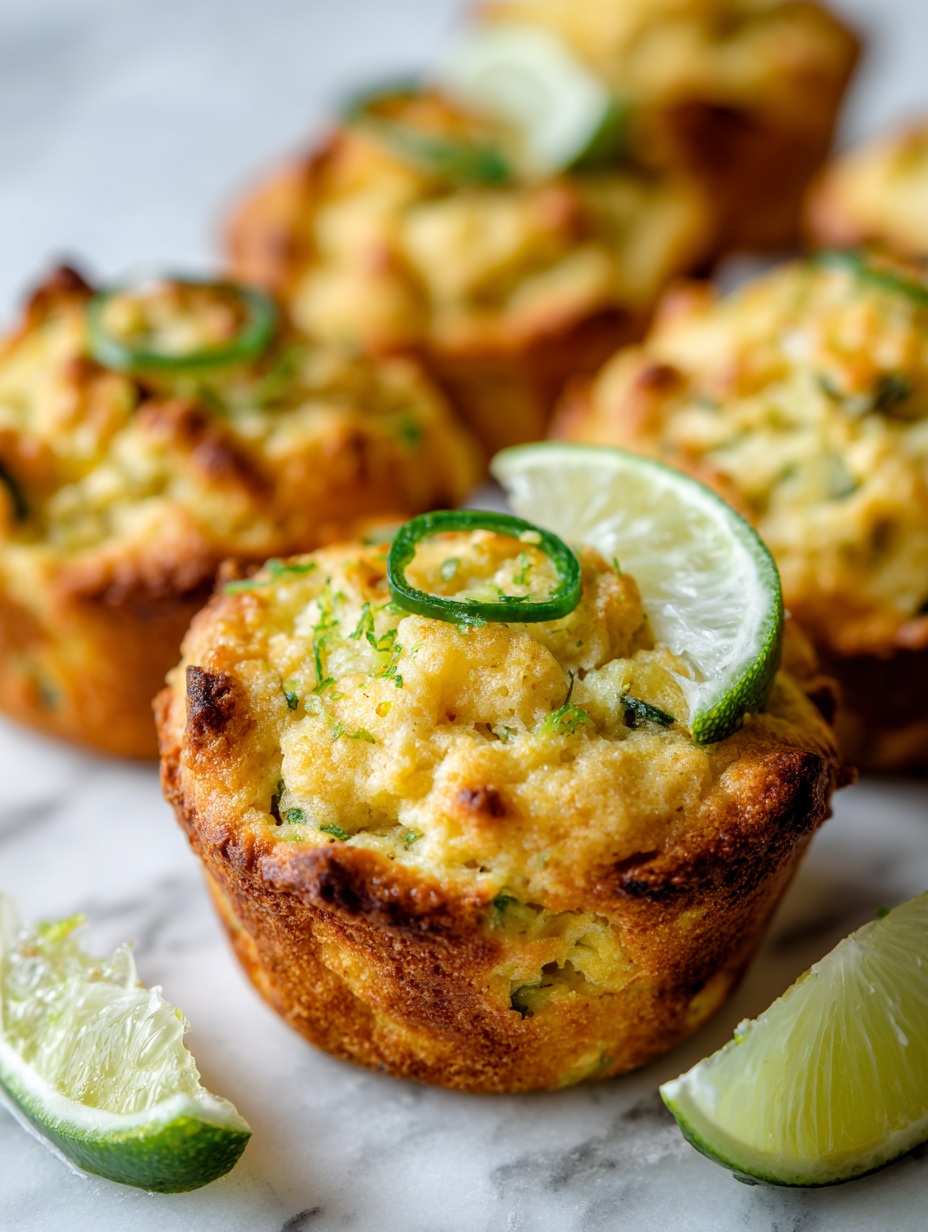
Savory Corn Muffins with Poblano and Lime
Ingredients
Equipment
Method
- Preheat your oven to 220°C (425°F) and line a muffin tin with paper liners or grease it lightly.
- In a large mixing bowl, whisk together the cornmeal, flour, baking powder, and salt until well combined. The mixture should look slightly sandy and uniform.
- In a separate bowl, beat the eggs until frothy and slightly bubbly, then stir in the melted butter, buttermilk, and lime juice. Whisk until the mixture is smooth and fragrant.
- Pour the wet mixture into the dry ingredients, then gently fold everything together with a spatula until just combined. Avoid overmixing; the batter should be slightly lumpy.
- Fold in the chopped roasted poblano peppers evenly throughout the batter, distributing their smoky flavor and vibrant color.
- Spoon the batter into the prepared muffin tin, filling each cup about two-thirds full for room to rise and develop a golden crust.
- Bake in the preheated oven for 15–18 minutes, or until the tops are golden brown and a toothpick inserted in the center comes out clean.
- Once done, remove the muffins from the oven and let them rest in the tin for about 5 minutes, allowing the crumb to set slightly.
- Transfer the muffins to a wire rack and let them cool for another 5–10 minutes. They should be fragrant, with a crispy edge and a tender crumb inside.
- Serve the muffins warm or at room temperature, perhaps with a squeeze of fresh lime or a pat of butter for extra flavor.
Notes
Pro Tips for Perfect Corn Muffins
- Use fresh baking powder for maximum lift and fluffiness.
- Gently fold in add-ins like cheese or herbs to keep muffins airy.
- Preheat your oven thoroughly to ensure even baking and good rise.
- For a crispy crust, bake at high heat right from the start.
- Check doneness with a toothpick; it should come out clean and dry.
- Rest muffins for 5 minutes before removing from the tin to set the crumb.
- Use a coarse grind of cornmeal for extra crunch and rustic texture.
Common Corn Muffin Mistakes & Fixes
- FORGOT to check oven temperature → calibrate your oven regularly.
- DUMPED dry ingredients too quickly → fold gently to avoid tough muffins.
- OVER-TORCHED the crust → lower oven heat slightly or cover with foil.
- UNDER-mixed batter → mix until just combined, avoid overworking to prevent density.
Quick Fixes & Pantry Hacks
- When muffins crackle and smell toasty, they’re ready—avoid overbaking to keep moistness.
- Splash a little water on the crust if it’s too dry and bake briefly to rehydrate.
- Patch a sunken muffin by brushing with butter and re-baking for crispness.
- DUMPED the batter? Mix gently and quickly to prevent dense muffins, don’t overmix.
- Use a pantry swap: canned corn instead of fresh adds sweetness and texture.
Prep, store, and reheat tips
- Prep the dry ingredients—measure and mix the cornmeal, flour, baking powder, and salt a day ahead. Keeps everything ready to go, and the dry mix benefits from resting, which can deepen the flavors.
- You can prepare the wet ingredients (whisked eggs, melted butter, buttermilk) a few hours in advance and store them covered in the fridge. Just give them a quick stir before combining.
- Store baked muffins in an airtight container at room temperature for up to 24 hours. The crust stays crisp, and they remain moist inside. For longer storage, freeze for up to 2 months—wrap tightly to prevent freezer burn.
- Reheat muffins in a 180°C (350°F) oven for about 5 minutes. The smell of toasted corn and butter will re-emerge, and the crust will crisp up nicely. Microwaving for 20-30 seconds works in a pinch but can soften the crust.
Top questions about corn muffins
1. How do I know when the muffins are done?
Look for muffins that are golden brown and slightly crispy on top. They should feel firm but spring back when gently pressed. A toothpick inserted in the center should come out clean. If they feel dense or look pale, give them a few more minutes in the oven.
2. How fresh should my baking powder be?
Use fresh baking powder for the best lift. Check by dropping a small spoonful into warm water—if it bubbles actively, it’s good to go. Old baking powder won’t give you that light, airy crumb.
3. Can I use regular milk instead of buttermilk?
Yes, you can swap buttermilk with regular milk mixed with a teaspoon of lemon juice or vinegar. It won’t be as tangy but will still keep the muffins moist and tender.
4. Can I make these gluten-free?
Absolutely. Use a gluten-free flour blend instead of regular flour. Expect a slightly denser texture, but the flavor remains warm and satisfying.
5. Can I customize the add-ins?
Add shredded cheese, chopped jalapeños, or herbs to give your muffins a flavor boost. Fold them in gently to avoid sinking, and expect a burst of savory with each bite.
6. How should I store leftovers?
Store baked muffins in an airtight container at room temperature for up to a day for the best crust. For longer storage, freeze them wrapped tightly for up to 2 months. Reheat in a 180°C (350°F) oven until warm and crispy, about 5 minutes.
7. What if my muffins are dense or over-browned?
If your muffins turn out too dense, don’t overmix the batter—lumps are okay. If they brown too quickly, tent lightly with foil to prevent burning while the center finishes baking.
8. Any tips for better muffins?
Preheat your oven fully before baking. Use a coarse grind of cornmeal for a crunchier texture, and gently fold in herbs or cheese last to keep them airy.
9. How do I add mix-ins without sinking?
When adding extras like cheese or chilies, fold them in carefully to keep the batter airy. Bake at high heat from the start for a crispy crust and fluffy interior.
10. What if my muffins crack or burn?
If your muffins crack excessively or smell burnt, lower the oven temperature slightly or cover with foil. For a quick fix, brush with butter and re-bake for a few minutes to re-crisp the crust.
These corn muffins may seem simple, but they carry a quiet versatility that makes them special. Whether you serve them alongside a hearty stew or enjoy them as a quick snack, they bring a comforting, rustic presence to any table.
In a season when cozy, homemade baking feels especially grounding, these muffins remind me of home and the joy of improvisation. They’re imperfect, just like life, but always satisfying in their warm, buttery way.

Hi, I’m Noah Bennett, the creator behind Breathing In Flavors. For me, cooking begins with a breath. Before the first bite, before the plating, before the garnish, there is that quiet moment when steam rises and you inhale. That is where flavor truly begins. Breathing In Flavors is my space to slow down, appreciate ingredients, and cook with awareness. I am so glad you’re here.
 The creator behind Breathing In Flavors.
For me, cooking begins with a breath. Before the first bite, before the plating, before the garnish, there is that quiet moment when steam rises and you inhale. That is where flavor truly begins.
Breathing In Flavors is my space to slow down, appreciate ingredients, and cook with awareness. I am so glad you’re here.
The creator behind Breathing In Flavors.
For me, cooking begins with a breath. Before the first bite, before the plating, before the garnish, there is that quiet moment when steam rises and you inhale. That is where flavor truly begins.
Breathing In Flavors is my space to slow down, appreciate ingredients, and cook with awareness. I am so glad you’re here.


