There’s something about the crunch of toasted pecans combined with the sticky, sweet maple layer that feels like a cozy fall memory. I love how this recipe brings that nostalgic crunch into a bar form—easy to share, even easier to eat straight from the pan. It’s the kind of treat that makes the house smell like a Sunday afternoon in October, warm and inviting.
Baking these bars is like capturing a moment—getting that perfect caramelized pecan topping that’s both rich and just a little smoky, balanced by the deep sweetness of real maple syrup. It’s honest baking, no fancy stuff, just good ingredients and a bit of patience. Perfect for when you want something familiar but with a little extra flair.
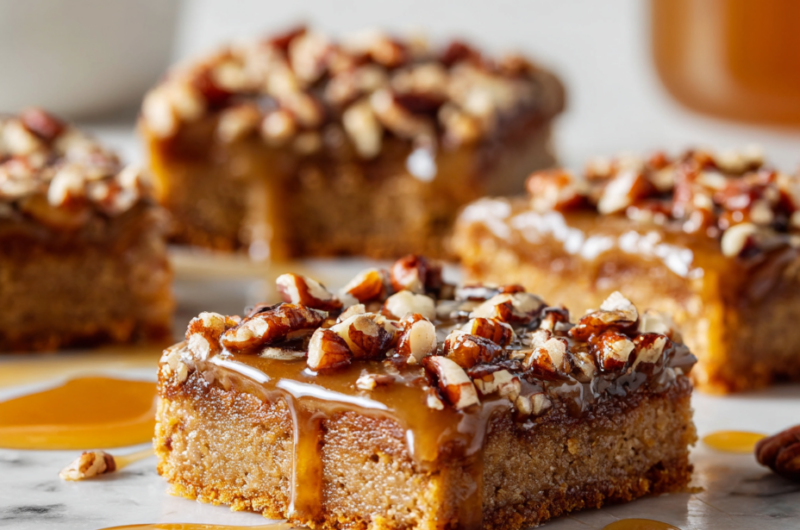
Focusing on the nostalgic crunch of toasted pecans paired with the rich, gooey maple syrup layer—this recipe is about capturing that perfect balance of texture and deep, cozy sweetness that evokes a fall afternoon in the kitchen.
The story behind this recipe
- This recipe grew out of a busy weekend when I was craving something sweet but with a bit of crunch, something that reminded me of my grandma’s baking without actually needing her kitchen. I started experimenting with toasted pecans and real maple syrup, aiming for that perfect caramelization and crunch. The smell of toasted nuts mingling with rich syrup filled the house and took me right back to fall afternoons on her porch. That warmth, that crunch—this bar is my way of capturing that moment and sharing it.
- A few years back, I accidentally over-toasted a batch of pecans and realized the smoky, toasted flavor added depth I loved. Ever since, I’ve kept that mistake in mind, dialing down the heat just enough to get that perfect nutty aroma without burning. It’s a simple lesson: sometimes the small mishaps create the best flavor. Now, these bars are a staple when I want to indulge in a bit of nostalgia—crunchy, sweet, and just a little smoky.
- heading
- story_type
Ingredient breakdown
- Maple syrup: I love the rich, deep aroma when it simmers—swap for honey if you want a lighter, floral sweetness, but the maple’s warmth is what really makes these bars special.
- Pecans: Toasted pecans bring that irresistible crunch and smoky flavor—try almonds for a milder nutty note, but don’t skip the toasting step to boost flavor.
- Butter: I use unsalted butter for control over salt—if you want dairy-free, coconut oil can work but will add a subtle coconut aroma which is quite nice.
- Brown sugar: Adds a chewy richness—light brown sugar keeps it softer, while dark offers a more molasses-forward punch—adjust based on your sweetness preference.
- Flour: I prefer all-purpose for structure—gluten-free blends can work but might change the texture slightly—add a pinch of xanthan gum if you go gluten-free.
- Salt: Just a pinch heightens all the flavors—if you’re using salted butter, cut back on the added salt to avoid over-salting.
- Vanilla extract: A splash enhances the caramel and nutty tones—skip if you want a more straightforward nutty bar, but I think it brightens everything.
Spotlight on key ingredients
Maple syrup:
- I love the rich, deep aroma when it simmers—swap for honey if you want a lighter, floral sweetness, but the maple’s warmth is what really makes these bars special.
- Pecans: Toasted pecans bring that irresistible crunch and smoky flavor—try almonds for a milder nutty note, but don’t skip the toasting step to boost flavor.
- Butter: I use unsalted butter for control over salt—if you want dairy-free, coconut oil can work but will add a subtle coconut aroma which is quite nice.
Pecans:
- Their natural oils release during toasting, creating a fragrant, smoky aroma that’s hard to beat—don’t skip this step for flavor.
- They tend to burn quickly if over-toasted, so keep a close eye and stir frequently—aim for a golden-brown color and a nutty, toasted smell.
- When chopped, they should be coarsely broken—too fine and you lose that satisfying crunch in every bite.
Notes for ingredient swaps
- Sweetener: Maple syrup provides rich, deep flavor; honey can be used as a lighter, floral alternative, but the caramel notes will be subtler.
- Nuts: Pecans bring a buttery crunch and smoky aroma; almonds can substitute for a milder, slightly sweeter crunch, but skip the toasting if you want a softer bite.
- Butter: I prefer unsalted for control; coconut oil works for dairy-free, though it adds a faint coconut scent and slightly different texture.
- Brown Sugar: Light brown sugar keeps it soft and chewy; dark brown sugar adds molasses richness—adjust based on your preferred depth of sweetness.
- Flour: All-purpose flour creates structure; gluten-free blends are fine but may need extra binding, like a pinch of xanthan gum.
- Salt: Just a pinch enhances flavor; if using salted butter, reduce or omit the added salt to avoid over-salting.
- Vanilla: I love the bright, aromatic note it adds; vanilla extract can be replaced with vanilla bean paste for a more intense flavor.
Equipment & Tools
- 9-inch square baking pan: To hold and shape the crust and filling.
- Parchment paper: For easy removal and clean edges.
- Mixing bowls: To combine dry ingredients and mix toppings.
- Pastry cutter or fingers: To cut in the butter for the crust.
- Skillet: To toast pecans evenly.
- Saucepan: To make the maple syrup filling.
- Knife dipped in hot water: To cut clean, smooth squares after chilling.
Step-by-step guide to Maple Pecan Bars
- Preheat your oven to 175°C (350°F). Grease a 9-inch square baking pan and line it with parchment paper for easy removal.
- In a mixing bowl, combine 1 cup (125g) of all-purpose flour, 1/2 teaspoon of salt, and 1/4 cup (50g) of packed brown sugar. Use a fork to mix well.
- Add 1/2 cup (115g) of cold unsalted butter, cut into small pieces. Use your fingers or a pastry cutter to rub the butter into the dry ingredients until the mixture resembles coarse crumbs. Press this evenly into the bottom of your prepared pan. Bake for 15 minutes until lightly golden.
- While the base bakes, toast 1 cup (120g) of pecans in a dry skillet over medium heat for about 5 minutes, stirring frequently until fragrant and slightly darker. Set aside to cool.
- In a saucepan over medium heat, combine 1/2 cup (120ml) of pure maple syrup, 1/4 cup (50g) of packed brown sugar, and 2 tablespoons of unsalted butter. Bring to a gentle boil, then reduce heat to low and simmer for 5 minutes, stirring occasionally. Remove from heat and stir in 1 teaspoon of vanilla extract.
- Chop the toasted pecans coarsely. Mix them into the maple syrup mixture, ensuring they’re well coated. Pour this mixture over the baked crust, spreading evenly.
- Bake for an additional 20-25 minutes at 175°C (350°F). The topping should be bubbling and the pecans slightly caramelized. The edges might turn a little darker—this is perfect.
- Remove from oven and let cool in the pan on a wire rack for at least 2 hours. This resting time allows the filling to set and become chewy, not gooey.
- Once cooled, cut into squares. For clean cuts, use a sharp knife dipped in hot water and wiped dry after each cut.
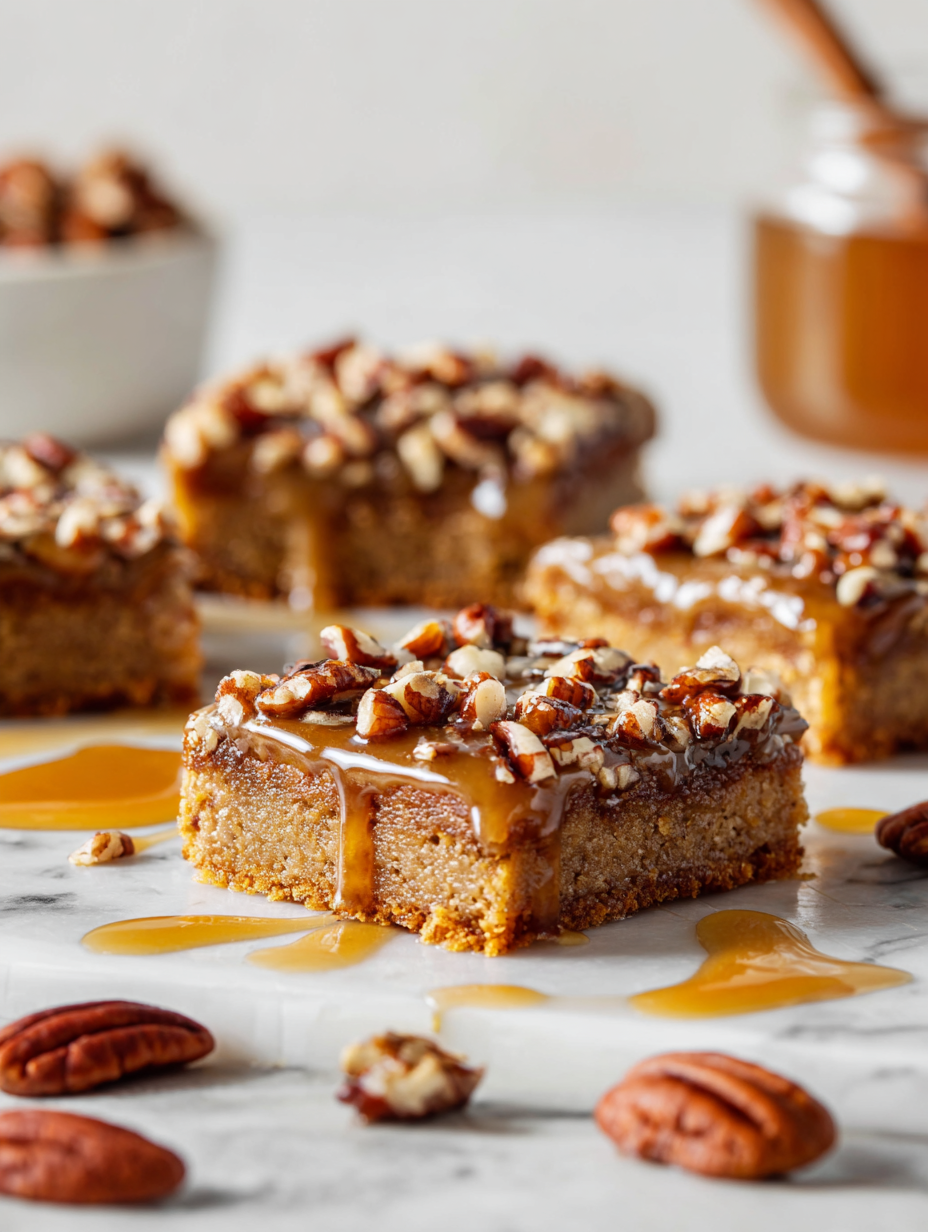
- Serve at room temperature or slightly warmed. The bars should have a firm base, a gooey maple-pecan layer, and a crunchy topping. Enjoy the aroma and textures!
Let the bars cool completely in the pan on a wire rack for at least 2 hours. Then, lift out with parchment and cut into squares with a hot, sharp knife. Serve at room temperature or slightly warmed for maximum gooeyness and crunch.
How to Know It’s Done
- The crust is golden and firm before adding filling.
- The maple-pecan topping is bubbling and slightly caramelized.
- Bars are set and hold shape when cooled, not sticky.
Maple Pecan Bars
Ingredients
Equipment
Method
- Preheat your oven to 175°C (350°F). Line your 9-inch square pan with parchment paper, leaving some overhang for easy removal.
- In a mixing bowl, combine the flour, salt, and brown sugar. Mix them together until evenly distributed.
- Add the cold, small pieces of butter into the dry ingredients. Use your fingers or a pastry cutter to work the butter into the flour until the mixture resembles coarse crumbs.
- Press this crumbly mixture firmly into the bottom of your prepared pan to form an even crust. Bake for about 15 minutes until golden around the edges.
- While the crust bakes, toast the pecans in a dry skillet over medium heat for about 5 minutes, stirring frequently until fragrant and darker in color. Let cool, then coarsely chop them.
- In a saucepan over medium heat, combine the maple syrup, brown sugar, and butter. Bring to a gentle boil and simmer for 5 minutes, stirring occasionally. Remove from heat and stir in vanilla extract.
- Coarsely chop the toasted pecans and stir them into the warm syrup mixture, coating them evenly.
- Pour the pecan-maple filling over the baked crust, spreading it out evenly with a spatula.
- Bake the assembled bars for another 20-25 minutes, until the filling is bubbling and the pecans are caramelized around the edges.
- Remove the pan from the oven and allow the bars to cool completely in the pan on a wire rack, about 2 hours. This helps the filling set and makes cutting easier.
- Use a sharp knife dipped in hot water to cut the cooled bars into squares, wiping the knife dry between cuts for clean slices.
- Serve these bars at room temperature or slightly warmed, enjoying the crunchy, gooey, and caramelized layers with a cozy aroma filling the room.
Tips and tricks for perfect bars
- Bolded mini-head: Use a light hand when pressing the crust — too much pressure can make it dense.
- Bolded mini-head: Toast pecans until fragrant and slightly darker — this unlocks their smoky, nutty flavor.
- Bolded mini-head: Keep an eye on the caramel layer — it should bubble gently and turn golden, not dark or burnt.
- Bolded mini-head: Dipping your knife in hot water before cutting helps get clean, smooth squares.
- Bolded mini-head: When mixing the pecans into the syrup, coat them thoroughly to ensure even crunch in every bite.
- Bolded mini-head: For an extra glossy finish, brush the cooled bars with a little warm maple syrup before serving.
- Bolded mini-head: If the filling is too thick, warm it slightly to loosen, but don’t let it bubble too aggressively.
Common mistakes and how to fix them
- FORGOT to preheat the oven → Preheat early for even baking.
- DUMPED the pecans too early → Toast pecans until fragrant, not burned.
- OVER-TORCHED the caramel layer → Watch closely, remove when golden and bubbling.
- MISSED the resting time → Cool completely to set the layers properly.
Quick fixes and pantry swaps
- When the caramel is too thick, splash in a touch of warm water and stir until loosened.
- If the pecans burn during toasting, patch with fresh nuts and lower the heat for the next batch.
- Splash a few drops of lemon juice if the syrup crystallizes or becomes too thick during simmering.
- DUMPED the syrup mixture too early? Shield with a lid and gently reheat to soften before pouring.
- When the bars stick to the pan, rescue with a hot, wet cloth underneath the pan edges for easy release.
Prep, store, and reheat tips
- Prepare the crust and bake it a day ahead; once cooled, store in an airtight container at room temperature for up to 24 hours, keeping it crisp and fresh.
- Assemble and bake the maple-pecan topping just before serving for maximum gooeyness and crunch, but you can assemble the topping up to 2 days in advance and refrigerate covered.
- Store cooled bars in an airtight container in the fridge for up to 4 days; to keep them from drying out, wrap in plastic wrap before sealing.
- Reheat bars gently in a 150°C (300°F) oven for 10 minutes until warm and fragrant—watch for bubbling and a slight shimmer on the pecans.
Top questions about Maple Pecan Bars
1. Can I use honey instead of maple syrup?
Yes, you can substitute honey or agave syrup, but expect a slightly different flavor and less deep maple aroma.
2. Can I swap pecans for other nuts?
Absolutely, walnuts or almonds work well. Toast them first to bring out their flavor and add crunch.
3. How can I make these bars dairy-free?
Use dairy-free butter or coconut oil for a vegan version. The texture will be similar, but flavor may be milder without butter.
4. Can I freeze these bars?
Yes, you can freeze the uncut bars wrapped tightly for up to a month. Thaw at room temperature before serving.
5. How do I know when the bars are done?
Bake until the topping is bubbling and golden around the edges. The filling should look glossy and set when slightly jiggled.
6. How do I get clean slices?
Use a sharp knife dipped in hot water for clean cuts. Wipe the blade dry between cuts to prevent sticking.
7. Why toast the pecans?
Ensure the pecans are toasted until fragrant and darker in color. This boosts their smoky, nutty flavor.
8. What if the caramel is too thick?
If the caramel layer is too thick or sticky, gently reheat it with a splash of warm water and stir to loosen.
9. How can I prevent tearing when cutting?
Use a hot, sharp knife dipped in water to get smooth, even cuts and avoid tearing the bars.
10. How should I store these bars?
Store the cooled bars in an airtight container at room temperature for up to a day or in the fridge for 4 days.
Making these Maple Pecan Bars is like capturing the essence of a cozy fall afternoon—rich, crunchy, and just a little smoky. Each bite brings back memories of warm kitchens and simple pleasures, especially when the house is filled with that irresistible nutty aroma.
They’re perfect for sharing, whether at a casual get-together or a quiet moment alone. Once cooled, they hold their shape beautifully, making it easy to enjoy a piece of that caramelized, toasted goodness anytime you need a little comfort.

Hi, I’m Noah Bennett, the creator behind Breathing In Flavors. For me, cooking begins with a breath. Before the first bite, before the plating, before the garnish, there is that quiet moment when steam rises and you inhale. That is where flavor truly begins. Breathing In Flavors is my space to slow down, appreciate ingredients, and cook with awareness. I am so glad you’re here.
 The creator behind Breathing In Flavors.
For me, cooking begins with a breath. Before the first bite, before the plating, before the garnish, there is that quiet moment when steam rises and you inhale. That is where flavor truly begins.
Breathing In Flavors is my space to slow down, appreciate ingredients, and cook with awareness. I am so glad you’re here.
The creator behind Breathing In Flavors.
For me, cooking begins with a breath. Before the first bite, before the plating, before the garnish, there is that quiet moment when steam rises and you inhale. That is where flavor truly begins.
Breathing In Flavors is my space to slow down, appreciate ingredients, and cook with awareness. I am so glad you’re here.


