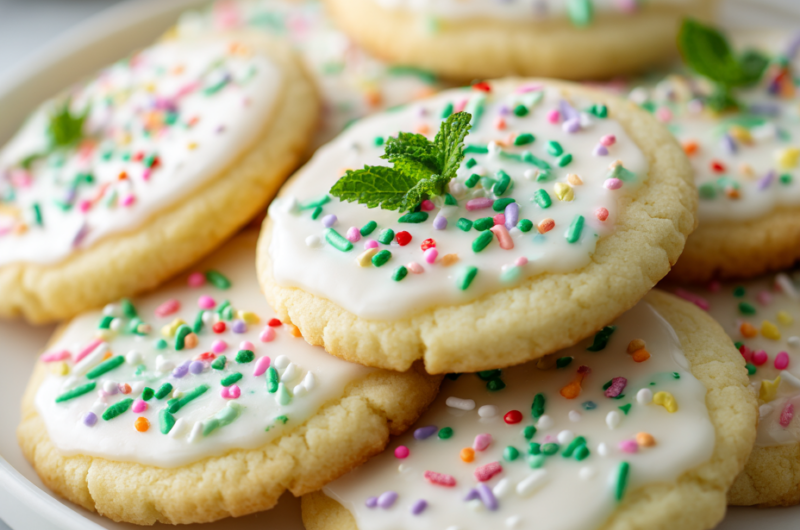
When I think of sugar cookies, I don’t just see a simple treat—I see a story told through texture. The crisp edges giving way to a chewy, almost tender center, that’s where the magic happens. Achieving that perfect bite feels like a quiet victory, especially when the cookies are decorated with just the right amount of sparkle or a dash of color.
This recipe is my go-to because it’s honest about the mess and the joy. The dough might be a little sticky, and the edges might crack if you aren’t gentle, but that’s part of the charm. Every batch is a reminder that sometimes, the best cookies are the ones made with patience, a little bit of chaos, and a lot of love.
Focusing on how the texture of a sugar cookie can tell a story—crisp edges, chewy centers, and the secret to achieving that perfect bite.
The story behind this recipe
- Making these sugar cookies takes me back to my grandmother’s kitchen, where the scent of vanilla and butter filled the air. She had a way of turning simple ingredients into moments of joy, especially during holidays when the house would be filled with laughter and chatter. I remember the mess—the flour dusted across the countertops, the dough that was just a little too sticky, and the satisfaction of pulling perfect cookies from the oven.
- This recipe is my homage to those days, a reminder that even imperfect cookies carry a kind of magic. It’s about the small victories—finding that delicate balance of crisp edges and chewy centers, and the quiet pride in decorating each one. No matter how many batches I bake, it’s those nostalgic touches that keep me coming back to this recipe year after year.
- heading:
Ingredient breakdown: key components
- Unsalted butter: I use softened butter for a tender crumb and rich flavor—cold butter leads to tougher cookies, so give it time to soften at room temp.
- Granulated sugar: The key to that classic sweetness and slight crunch; for a softer cookie, try reducing sugar slightly or adding a splash of honey for moisture.
- All-purpose flour: I prefer weighing my flour to avoid overpacking; too much makes cookies dense, but sifted flour keeps the texture light and airy.
- Vanilla extract: It’s the aroma that makes these special—opt for pure vanilla for depth, but a splash of almond extract can add a lovely, nutty undertone.
- Egg: I always beat the egg lightly before adding—helps with even mixing and a more cohesive dough. For a dairy-free version, try applesauce (though the texture shifts).
- Baking powder: Just a teaspoon gives a gentle rise; skipping it will make flatter cookies, but too much can cause them to puff up too much and crack.
- Sea salt: A pinch enhances sweetness and depth—don’t skip it, but be cautious with the amount, especially if your butter or vanilla are salted.
Spotlight on key ingredients
Unsalted butter:
- I use softened butter for a tender crumb and rich flavor—cold butter leads to tougher cookies, so give it time to soften at room temp.
- Granulated sugar: The key to that classic sweetness and slight crunch; for a softer cookie, try reducing sugar slightly or adding a splash of honey for moisture.
- All-purpose flour: I prefer weighing my flour to avoid overpacking; too much makes cookies dense, but sifted flour keeps the texture light and airy.
Vanilla extract & Egg:
- Vanilla extract: It’s the aroma that makes these special—opt for pure vanilla for depth, but a splash of almond extract can add a lovely, nutty undertone.
- Egg: I always beat the egg lightly before adding—helps with even mixing and a more cohesive dough. For a dairy-free version, try applesauce (though the texture shifts).
Notes for ingredient swaps
- Dairy-Free: Use coconut oil or margarine instead of butter for a dairy-free version, though expect a slightly different richness and a coconut aroma.
- Sugar Alternatives: Swap granulated sugar with coconut sugar or maple sugar for a deeper caramel note, but expect a darker color and slightly different sweetness.
- Flour Variations: Use gluten-free flour blends if needed; they may make the dough a bit more delicate and require careful handling.
- Flavor Boosts: Add a pinch of cinnamon or lemon zest to the dough for extra aroma—these tweaks add warmth and brightness.
- Egg-Free: Substitute with flaxseed meal mixed with water or applesauce; the texture may be slightly softer and less chewy.
- Sweetener Adjustments: Honey or agave syrup can replace sugar, adding moisture and a subtle floral flavor—reduce liquid slightly to compensate.
- Salt: Use Himalayan or sea salt for a more mineral-rich flavor; be cautious with quantity as it can overpower the sweetness.
Equipment & Tools
- Mixing bowls: To combine ingredients smoothly and evenly.
- Rolling pin: To evenly flatten the dough for cutting.
- Cookie cutters: To shape the cookies uniformly.
- Baking sheet: To bake the cookies evenly.
- Parchment paper: To prevent sticking and facilitate easy cleanup.
- Wire rack: To cool cookies without sogginess.
Step-by-step guide to sugar cookies
- Gather your equipment: a rolling pin, cookie cutters, baking sheet, parchment paper, mixing bowls, and a spatula. Preheat your oven to 180°C (350°F).
- In a large bowl, cream together 1 cup (226g) softened unsalted butter and 3/4 cup (150g) granulated sugar until light and fluffy, about 2-3 minutes. Use a hand mixer or stand mixer on medium speed.
- Add 1 large egg and 1 teaspoon vanilla extract to the butter-sugar mixture. Mix until well combined, about 30 seconds. Scrape down the sides of the bowl as needed.
- In a separate bowl, whisk together 2 1/4 cups (280g) all-purpose flour, 1/2 teaspoon baking powder, and a pinch of salt. Gradually add dry ingredients to wet, mixing on low speed until just combined. The dough will be slightly sticky.
- Divide the dough into two equal parts. Flatten each into a disk, wrap in plastic wrap, and chill in the fridge for at least 1 hour. This firms up the dough for easier rolling.
- Lightly flour a clean surface and rolling pin. Roll out one disk to about 1/4 inch (6mm) thickness. Use cookie cutters to cut out shapes. Transfer cookies to a parchment-lined baking sheet, spacing about 1 inch apart.
- Bake the cookies in the preheated oven for 8-10 minutes. The edges should turn a very light golden. Keep an eye on them to prevent over-browning.
- Remove from oven and let cookies cool on the baking sheet for 5 minutes. Then transfer to a wire rack to cool completely. If cookies puffed up or cracked, gently reshape or patch with extra dough scraps.
- Once cooled, decorate as desired. Store in an airtight container at room temperature for up to a week, or freeze for longer storage.
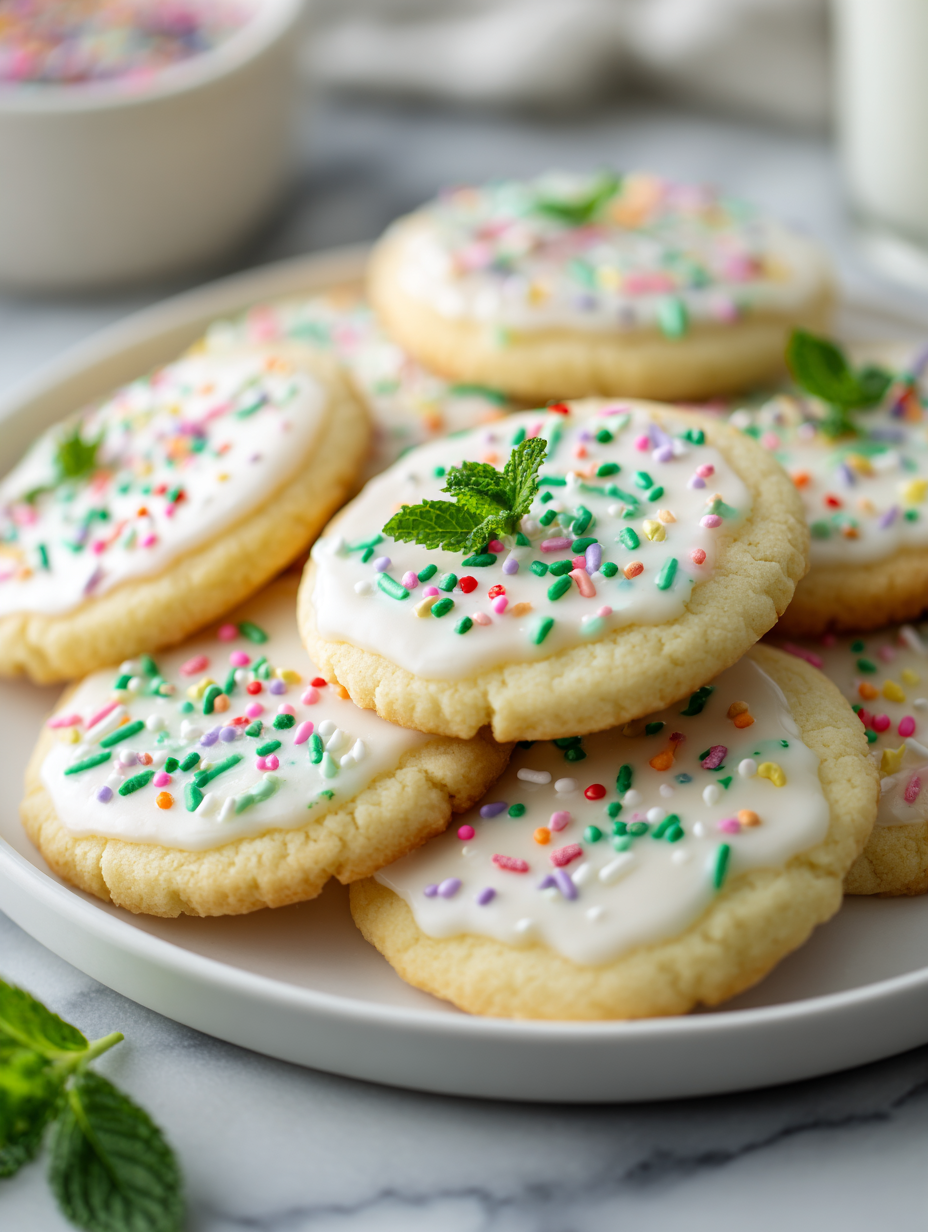
- For best texture, serve cookies at room temp. The crisp edges combined with chewy centers make each bite satisfying.
Let the cookies cool completely on a wire rack before decorating. Once cooled, add icing or sprinkles if desired. Serve at room temperature for optimal texture and flavor.
How to Know It’s Done
- Edges are lightly golden without over-browning.
- Cookies are firm but not hard when cooled.
- Dough is smooth and holds together without cracking.
Classic Sugar Cookies
Ingredients
Equipment
Method
- In a large mixing bowl, beat the softened butter and sugar together with a hand or stand mixer on medium speed until the mixture is pale, fluffy, and smells fragrant—about 2-3 minutes.
- Add the lightly beaten egg and vanilla extract to the creamed mixture. Mix on low speed until the ingredients are well incorporated, about 30 seconds. The mixture should be smooth and slightly glossy.
- In a separate bowl, whisk together the flour, baking powder, and sea salt. Gradually add this dry mixture to the wet ingredients, mixing on low speed until just combined. The dough will be soft and slightly sticky.
- Divide the dough into two equal parts, shape each into a flat disc, wrap tightly in plastic wrap, and refrigerate for at least 1 hour to relax the gluten and firm up the dough.
- Preheat your oven to 180°C (350°F). Lightly flour a clean surface and rolling pin. Remove one disc of dough from the fridge and roll it out evenly to about 1/4 inch (6mm) thickness. If the dough sticks, dust lightly with flour.
- Use cookie cutters to cut out your desired shapes from the rolled dough. Carefully transfer the cut cookies onto a parchment-lined baking sheet, spacing them about 1 inch apart to allow for slight spreading.
- Bake the cookies in the preheated oven for 8-10 minutes, or until the edges are just starting to turn a very light golden color. Keep a close eye to prevent over-browning.
- Remove the cookies from the oven and let them cool on the baking sheet for about 5 minutes. Then transfer them to a wire rack to cool completely, which helps set their texture and prevents sogginess.
- Once cooled, decorate the cookies with icing, sprinkles, or other fun touches. Serve at room temperature to enjoy the perfect balance of crisp edges and chewy centers.
Notes
Tips & Tricks for Perfect Cookies
- Bolded mini-head: Chill the dough thoroughly before rolling—this helps prevent sticking and keeps shapes sharp.
- Bolded mini-head: Use a light hand with flour when rolling—too much can dry out the dough and make cookies crumbly.
- Bolded mini-head: Keep an eye on oven temperature—240°C (460°F) is ideal for quick, even baking without over-browning.
- Bolded mini-head: For crisp edges, bake cookies until edges are just golden—no darker, or they’ll be too hard.
- Bolded mini-head: Gently lift cookies with a palette knife after baking—this prevents breaking fragile edges.
- Bolded mini-head: Decorate cookies only after they’ve cooled—adding icing too early can cause melting and uneven finish.
- Bolded mini-head: To prevent cracks, don’t overwork the dough—mix until just combined for a tender, even crumb.
Common mistakes and how to fix them
- FORGOT to chill dough → Rest in fridge for easier rolling and cleaner edges.
- DUMPED too much flour → Use a scale, and lightly dust surface; over-flouring dries dough.
- OVER-TORCHED cookies → Remove early; edges turn golden before the centers overbake.
- MISSED rolling thickness → Aim for 1/4 inch; thicker cookies stay chewy, thinner get crisp.
Quick fixes and pantry swaps
- When dough is too sticky, splash a little more flour and chill for 10 minutes.
- If cookies spread too much, patch with extra dough and refrigerate before baking again.
- Splash cold water on the baking sheet if cookies over-brown quickly.
- Patch cracks with a tiny dab of dough and smooth with your finger.
- When in doubt, swap vanilla for a splash of lemon juice for brightness.
Prep, store, and reheat tips
- Prepare and chill the dough up to 24 hours ahead; it firms up nicely, making rolling easier and shapes sharper.
- Cookies can be baked up to 3 days in advance; store in an airtight container at room temperature for optimal freshness and crunch.
- Freeze unbaked cookie shapes on a tray, then transfer to a bag; they can keep for up to 1 month. Thaw briefly before baking.
- Reheat cookies in a 150°C (300°F) oven for 3-5 minutes until just warmed; they’ll regain a slight crisp and aroma without drying out.
- Cookies stored longer may lose some of their fresh, buttery aroma but will still be delicious when warmed slightly before serving.
Top questions about sugar cookies
1. How do I know when sugar cookies are done?
Look for a dough that’s slightly tacky but not sticky, and a gentle vanilla aroma. The edges should turn a light golden when baked.
2. How can I prevent cookies from spreading too much?
Cookies are ready when edges are just golden and firm, but centers still look soft. They’ll firm up as they cool.
3. Can I skip chilling the dough?
Chill the dough for at least an hour to firm it up. Cold dough holds shape better and spreads less during baking.
4. What’s the best butter temperature for this recipe?
Use room temperature butter for a smooth dough. Cold butter makes the cookies dense and harder to work with.
5. When should I decorate the cookies?
Decorate only after the cookies have cooled completely. Warm cookies can cause icing to melt and slide off.
6. How should I store sugar cookies?
Store in an airtight container at room temp for up to a week. For longer, freeze them in a sealed bag for up to a month.
7. How can I tell if I overbaked the cookies?
Overbaking makes cookies tough and dry, so keep a close eye at 8 minutes. They should be barely golden at the edges.
8. Any tips for rolling out the dough?
Use a light hand with flour when rolling. Too much makes the dough dry and crumbly, less makes it sticky.
9. Can I add flavors to sugar cookies?
Adding a splash of lemon zest or spices can brighten the flavor without overpowering the classic sweetness.
10. What if my dough is too sticky to work with?
If the dough is too sticky, sprinkle lightly with flour and refrigerate for 10-15 minutes before rolling again.
Baking these sugar cookies isn’t just about the final shape or the perfect sweetness—it’s about the quiet moments of kneading, rolling, and decorating that bring a sense of calm and familiarity. Each batch carries a bit of nostalgia, reminding me of childhood kitchens and holiday mornings filled with laughter and mess.
Even when they crack or spread a little more than intended, there’s a kind of beauty in the imperfection. These cookies are a simple reminder that good things don’t need to be perfect, just made with honest hands and a little patience.

Hi, I’m Noah Bennett, the creator behind Breathing In Flavors. For me, cooking begins with a breath. Before the first bite, before the plating, before the garnish, there is that quiet moment when steam rises and you inhale. That is where flavor truly begins. Breathing In Flavors is my space to slow down, appreciate ingredients, and cook with awareness. I am so glad you’re here.
 The creator behind Breathing In Flavors.
For me, cooking begins with a breath. Before the first bite, before the plating, before the garnish, there is that quiet moment when steam rises and you inhale. That is where flavor truly begins.
Breathing In Flavors is my space to slow down, appreciate ingredients, and cook with awareness. I am so glad you’re here.
The creator behind Breathing In Flavors.
For me, cooking begins with a breath. Before the first bite, before the plating, before the garnish, there is that quiet moment when steam rises and you inhale. That is where flavor truly begins.
Breathing In Flavors is my space to slow down, appreciate ingredients, and cook with awareness. I am so glad you’re here.


